...making Linux just a little more fun!
By C.E.C. Artime, J.A. Baro
|
...making Linux just a little more fun! |
By C.E.C. Artime, J.A. Baro |
A traditionally geeky user base has made the free software panorama plenty of scientifical tools. A key feature of scientific work is public defense of reseach methods and results in scientific meetings, and this is usually accomplished by means of oral presentations or posters. Both require the authors to develop some visual support: slide shows for oral presentations, with plenty of tools available (OpenOffice, LATEX,...), and a poster proper for the poster sessions. These take the form of an A0-sized paper sheet, and a visual exposition of the materials involved is crucial.
A general tool for manipulating images, as the GIMP, can be very useful when most of the poster is to be filled with photos and analogic images. Notwithstanding, scientific graphics are best handled with a vectorial graphics tool. This article will present a brief review of tools for incorporating graphics in scientific posters.
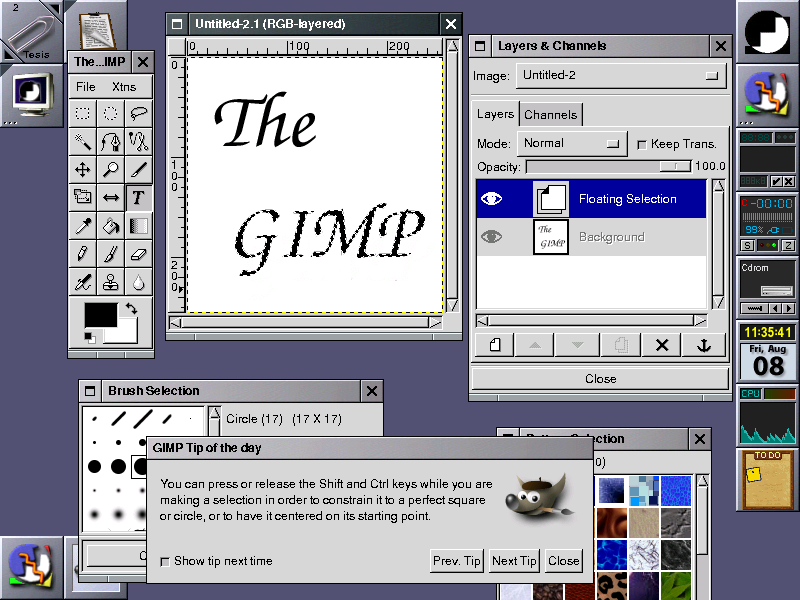
The GIMP is a bitmap- or raster-oriented tool, and as such, aimed at dealing with individual pixels. This approach is suitable for photos and artistic material. Technical drawings take a rather different approach: they are better described by their geometric elements, rather than by their constitutive pixels. This "vectorial" approach has the additional advantage that it produces resolution-independent graphics, thus allowing arbitrary zooming and enlargement.
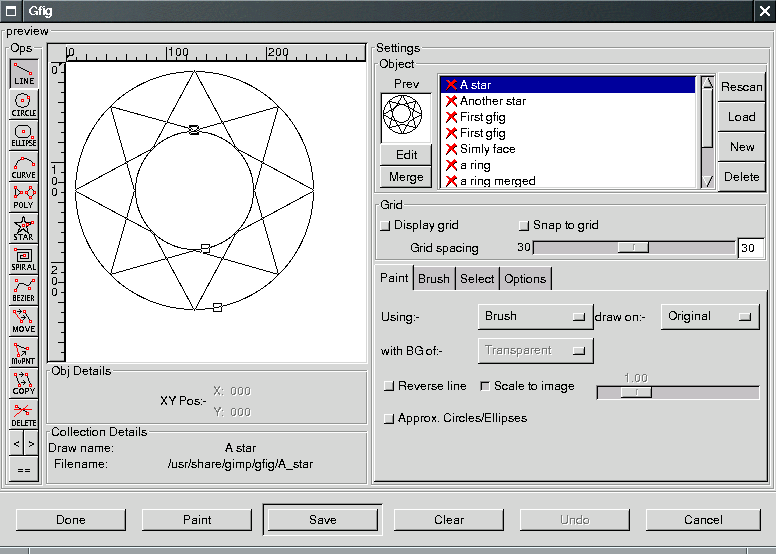
Several free vectorial programs are currently available: Sodipodi, Karbon14, Sketch... Some integrate nicely with the Gnome and KDE desktop environments. Even the GIMP, since version 1.2, includes a plug-in enabling quite elaborate vectorial design, Gfig; it lies under the menu (Filters->Render). However, the classic among X Window applications is Xfig.

Xfig is a thoroughly proven program that makes use of the X Athena widget toolkit. Thus, it is a very mature product and, consequently, its stability is beyond doubt. This is a highly appreciated feature as work on posters frequently goes on until the very dead line.
A further consequence of being a mature project is that Xfig has been enriched by contributions of a wide community of users. This has produced a comprehensive set of galleries for various fields (electronics, UML, music, maps, etc.).
It is a reliable program as it stores its information in a readily accessible text format, from which information retrieval is quite straightforward. This kind of format does not follow the modern trend, that is, it is not a SGML-based system. Rather, it consists of the minimal amount of information for describing the graphic, stored as ASCII characters. A thorough description is available, e.g., at The FIG file format or, in a Debian system, in the file /usr/share/doc/xfig/FORMAT3.2.gz. Its regularity makes it suitable to be processed with the classical Unix/GNU text filters: sed, awk and such. So chances are that you prefer ASCII to the XML format. On the other hand, important applications as Gnuplot and GNU plotutils can produce FIG files; a comprehensive list is available in the file FIGAPPS, within the Xfig distribution.
Another nice feature of Xfig lies with its ability to export using LATEX friendly formats. This is true for both text and graphics. A “special flag” is assigned to each piece of text, signaling whether it is to be exported 'raw' or 'as TEX'. Graphics are coded according to the LATEX package options chosen by the user. More on this later, so keep reading or look up the LATEX.AND.XFIG and PDFLATEX.AND.XFIG files in the Xfig distribution
In order to be fair, it is time now to expose some not-so-desirable Xfig features. It did not age badly, it is rather that Xfig drags several drawbacks inherited from old techniques.
Users of modern programs will certainly get dissapointed by its single level of undo. So it pays to be a little cautious when designing.
As mentioned above, Xfig makes use of Athena widgets, and suffers from their limilations. For example, it is not easy to handle accented characters in dialog windows (as when using the Edit tool), a very frustrating feature for most European users. Note that it allows the use of the Meta key as a Compose key, thus permitting accented characters when using the Text tool on the canvas.
On the other hand, Xfig handles a lot of export formats. In fact, some of them are especially useful for LATEX users. However, its support for modern graphic formats, like XML-based SGV (Scalable Vector Graphics), is still experimental.
LATEX is a set of macros built on the top of the TEX typesetting system. It is widely used to publish scientific papers, reports and books. Despite many users are unaware, slides are easily composed too. However, designing a full poster with LATEX alone is a daunting task, as many objects must be arranged in a 2D space with possibly complex interconnections among them. So the composition can be visually arranged with Xfig, and lately refined with a TEX editor.
To facilitate the integration of the visual work with the edition of TEX source code, Xfig users are empowered with a broad range of options. First, they have the choice of exporting a file as either a LATEX chunk or as a complete LATEX file. Second, a given graphical element is possibly translated to several TEX expressions, depending of which macros are available or are preferred by the user; this point is discussed in the next paragraph.
The Xfig web site also hosts transfig, which includes a program to export from Fig format to several “devices”, fig2dev. This functionality is available from the GUI as well, under the Export option of the File menu. As we intend to finally automatize the full task as much as possible, emphasis is put on the stand-alone program.
Transformation of Fig documents into TEX elements can be accomplished in several ways. Each way differs in the number of graphical elements it can deal with (for example: rotated text, filled rectangles), at the cost of requiring more sophisticated LATEX packages: epic, eepic, eepicemu, pictex. The best results are obtained with combined PostScript (or PDF) and TeX: this assures that all elements seen in the Xfig screen will be present in the printable output. Two warnings: specially flagged text will be shown as raw TEX in Xfig, but nicely typeset in the final document; and some previewers, as Xdvi (distributed with teTEX), are not able to represent some kinds of elements, as rotated text, so better use dvips and a PostScript viewer.
Processing a TEX file produces by default DVI format files, standing for DeVice Independent. This format is ready to be transformed into the set of displaying instructions. The most widespread format for final documents is PostScript, featuring a complete programming language understood by almost every high-quality printer.
The program dvips converts a DVI file into a PostScript, and is distributed with the main TEX packages, like tetex. It allows several interesting options, giving access to the powerful features of PostScript. One of them is the ability of setting the paper size, be it in a measure unit, as cm, or by a standard name, as A1. This feature is accessed by the -t and -T options.
The output of dvips is fine if one has access to an A0-size capable printer. This is often not the case. An acceptable alternative would be printing 16 A4 pages, or 8 A3 pages. The poster package tiles a one-page PostScript into small pieces, that can be pasted together to form the whole image. Guide lines indicating where to apply the guillotine cutter are printed as well. Poster is available at the KDE web site, and as a Debian package.
Should we give away small copies of our poster, psresize is the tool of choice to build them. It is included in the psutils Debian package.
The entire process must be repeated if any change is made in the Xfig drawing. We suggest that you consider seriously the little extra work of gluing all the steps mentioned through a shell script. Here we present one developed for the most widespread shell, GNU bash. Calling the following script from within the directory containing the Fig file, the whole proccess is performed. Note that it appends a LATEX preamble and postamble, required by several LATEX features used by the author, and several other as required by Xfig exports.
(We just realised the inclusion of a simple script meant to perform the conversion from the Fig format to an EPS, TeXfig2eps, in the Xfig distribution. As our discussion shows, it may not be enough in many cases.)
#!/bin/bash
################################################
# Processes the FIG source file for the poster #
################################################

######################################################
#                                                    #
# Usage:                                             #
#         1. Design a poster with Xfig.              #
#         2. Save it as a normal FIG file, with      #
#            the name, e.g., `myfile.fig'.     	     #
#         3. Substitute `BASE=myfile' for the line   #
#            `BASE=poster' in this script.	     #
#         4. Run this script within the directory    #
#            where `myfile.fig' lies.	             #
#         5. The output files will be:		     #
#            `myfile-a0.ps' - one poster-sized page  #
#            `myfile-a4-1.ps' - a4-sized mini-poster #
#            `myfile-a4-16.ps' - sixteen tile pages  #
#						     #
######################################################

# basename

BASE=poster

# convert the FIG into LaTeX + PostScript

echo '
\documentclass{article}
\usepackage{amsmath}          % symbols and equations
\usepackage{amsfonts}         % needed for blackboard characters
\usepackage[spanish]{babel}   % titles in our language
\usepackage[latin9]{inputenc} % accented characters
\usepackage[a0paper,margin=0cm,nohead,nofoot]{geometry} % margins
\usepackage{graphicx}         % including figures
\usepackage{color}            % import from Xfig
\usepackage{epic}             % complements the following
\usepackage{eepic}            % Xfig filling
\usepackage{rotating}         % text in figures
\usepackage{type1cm}          % arbitrarily sized fonts
\begin{document}
' > $BASE.tex

fig2dev -L pstex $BASE.fig > $BASE.pstex

echo -n '
\begin{picture}(0,0)
\includegraphics{'$BASE'.pstex}
\end{picture}
' >> $BASE.tex

fig2dev -L pstex_t $BASE.fig >> $BASE.tex

echo '\end{document}' >> $BASE.tex

# typeset the source LaTeX

latex $BASE

# transform into a PostScript of size almost DIN A0

dvips -o $BASE-a0.ps -T 84cm,118cm $BASE

# build the small A4 version of the poster

psresize -Pa0 -pa4 $BASE-a0.ps $BASE-a4-1.ps

# build the 16 A4 pages composing the poster

dvips -o $BASE.eps -T 84cm,118cm -E $BASE
poster -mA4 -pA0 $BASE.eps > $BASE-a4-16.ps
Some of the commands used in the script need further explanation.
The following paragraphs try to clarify these issues.
The \usepackage{color} is suggested in /usr/share/doc/xfig/README.Debian in Debian systems. Latest versions of Xfig's pstex use the \RGB command for setting text's color.
Other packages were included as needed, often with a trial and error procedure. The example does not make use of all them, but it can be illustrative as a comprehensive list of packages that we have ever needed for our own posters.
Please note that psresize operates on .ps files, and poster on .eps files. Thus dvips is executed twice, without and with the -E option.
$ xfig -paper a0 -portraitthe canvas adopts the size and orientation of the poster we need. We design a sample poster shown here in a screenshot capture and here in Fig format. We save it with the name poster.fig. The basename poster is assigned to the BASE variable in the first lines of the script. After running the script within the same directory where poster.fig lies, the following output files are of interest:
The standard tetex distribution uses by default bitmapped fonts, which requires discrete magsteps. This leads to warnings like
LaTeX Font Warning: Font shape `OT1/cmr/m/n' in size <30> not available
(Font)              size <24.88> substituted on input line 5.

LaTeX Font Warning: Size substitutions with differences
(Font)              up to 5.12pt have occurred.
As stated in the tetex documentation, \usepackage{type1cm} allows the use of Computer Modern fonts at arbitrary type sizes. It must overwrite font definitions, so it may require to be included after other packages.
Note that transfig uses a fixed set of font sizes, handled through the macro
#define TEXFONTSIZE(S)        (texfontsizes[((S) <= MAXFONTSIZE) ? round(S)\
                                                         : (MAXFONTSIZE-1))])
that indirectly limits the maximum size of fonts to be of 41
points. For the example being shown, we had to edit
transfig's sources (file texfonts.h) in order to
change that macro to
#define TEXFONTSIZE(S) (S)The Debian way:
$ su
Password:
# apt-get remove transfig
Reading Package Lists... Done
Building Dependency Tree... Done
The following packages will be REMOVED:
  transfig
0 packages upgraded, 0 newly installed, 1 to remove and 3  not upgraded.
Need to get 0B of archives. After unpacking 799kB will be freed.
Do you want to continue? [Y/n]
(Reading database ... 67797 files and directories currently installed.)
Removing transfig ...
# exit
$ apt-get source transfig
Reading Package Lists... Done
Building Dependency Tree... Done
Need to get 340kB of source archives.
Get:1 ftp://ftp.es.debian.org testing/main transfig 1:3.2.4-rel-4 (dsc) [652B]
Get:2 ftp://ftp.es.debian.org testing/main transfig 1:3.2.4-rel-4 (tar) [326kB]
Get:3 ftp://ftp.es.debian.org testing/main transfig 1:3.2.4-rel-4 (diff) [13.0kB]
Fetched 340kB in 1m51s (3062B/s)
dpkg-source: extracting transfig in transfig-3.2.4-rel
$ vi transfig-3.2.4-rel/fig2dev/dev/texfonts.h
$ cd transfig-3.2.4-rel/
$ dpkg-buildpackage -rfakeroot -uc -us
...
[lots of output]
...
$ cd ..
$ su
Password:
# dpkg -i transfig_3.2.4-rel-4_i386.deb
Selecting previously deselected package transfig.
(Reading database ... 67734 files and directories currently installed.)
Unpacking transfig (from transfig_3.2.4-rel-4_i386.deb) ...
Setting up transfig (3.2.4-rel-4) ...
# exit
If you find this method cumbersome, you can have a look at this directory where a style file meant to produce big fonts for big pages (posters) can be found.
![[BIO]](../gx/2002/note.png) C.E.C. Artime is a GNU fan and a free software advocator since 2000.
C.E.C. Artime is a GNU fan and a free software advocator since 2000.
J.A. Baro is a Linux user and a Perl hacker since 1996.