

Sponsored by:

Our sponsors make financial contributions toward the costs of publishing Linux Gazette. If you would like to become a sponsor of LG, e-mail us at sponsor@ssc.com.
TWDT 1 (text)
TWDT 2 (HTML)
are files containing the entire issue: one in text format, one in HTML.
They are provided
strictly as a way to save the contents as one file for later printing in
the format of your choice;
there is no guarantee of working links in the HTML version.
Got any great ideas for improvements! Send your comments, criticisms, suggestions and ideas.
This page written and maintained by the Editor of Linux Gazette, gazette@ssc.com
Write the Gazette at gazette@ssc.com
|
Contents: |
 Date: Wed May 28 11:16:14 1997
Subject: Help wanted: 2.1.40 will not boot
From: Duncan Simpson, D.P.Simpson@ecs.soton.ac.uk
2.1.40 dies after displaying the message Checking whether the WP bit is honored even in supervisor mode...
A few prints hacked in later reveals that in enters the page fault handler, detects the bootup test and gets to the end of the C (do_fault in traps.c). However it never gets back to continue booting---exactly where it gets lost is obscure.
Anyone have any ideas/fixes?
Duncan
Date: Fri, 16 May 1997 16:17:47 -0400
Subject: CD-ROMs
From: James S Humphrye, humpjs@aur.alcatel.com
I just found the LG today, and I have read most of the back issues... Great job so far! Lots of really useful info in here!
Now to my "problem". I installed Slackware 3.0, which went just fine. I had XFree86 and all the goodies working perfectly (no, really, it all worked just great!) Then I upgraded my machine to a P150, and installed a Trident 9660) PCI video card. Then the X server wasn't happy any more. So...I upgraded the kernel sources to 2.0.29, got all the required upgrades for GCC, etc. I built a new kernel, and it was up and running...sort of.
Despite having compiled in support for both IDE and SCSI CDROMs, I can only get the IDE one to work. I have edited the rc.* scripts, launched kerneld, run depmod -s, and all the other things the docs recommend.
I have rebuilt the kernel to zdisk about 25 times, trying different combinations of built-in and module support, all to no avail. When the system boots, the scsi host adapter is not detected (it is an AHA1521, located on a SB16/SCSI-2 sound card, and it worked fine under 1.2.13 & 1.3.18 kernels) When the aha152x module tries to load, it says it does not recognize scd0 as a block device. If I try to mount the SCSI unit, it says "init_module: device or resource busy". Any advice would be welcome. What I want is to at least be able to use the SCSI CDROM under Linux, or better yet, both it and the IDE CDROM...
There are also a bunch of messages generated by depmod about unresolved symbols that I don't understand, as well as a bunch of lines generated by modprobe that say "cannot locate block-major-XX" (XX is a major number, and the ones I see are for devices not installed or supported by the kernel) The second group of messages may be unimportant, but I don't know..
Thanks in advance, Steve
Date: Mon, 26 May 1997 12:18:40 -0700
Subject: Need Help From Linux Gazette
From: Scott L. Colantonio, scott@burbank.k12.ca.us
Hi... We have Linux boxes located at the remote schools and the district office. All remote school clients (Mac, WinNT, Linux) attempting to access the district office Linux boxes experience a 75 second delay on each transaction. On the other hand, we do not experience any delay when district office clients (Mac, WinNT, Linux) attempt to access the remote school Linux boxes. The delay began when we moved all the remote school clients to a separate network (and different ISP) than the district office servers.
To provide a map, consider this:
remote school <-> city hall city hall <-> Internet Internet <-> district office
We experience a 75 second delay: remote school client -> city hall -> Internet -> District office Linux box
We do not experience any delay: remote school client -> city hall -> Internet
We do not experience any delay: city hall -> Internet -> District office Linux box
We do not experience any delay: District office client -> Internet -> city hall -> remote school Linux box ...
The remote schools use a Linux box at City Hall for the DNS.
In effect, the problem is isolated to the remote school clients connecting to the district office Linux boxes, just one hop away from city hall.
As a result, the mail server is now a 75 second delay away from all educators in our district. Our Cisco reps do not think, after extensive tests, that this is a router configuration problem.
I setup a Microsoft Personal web server at the district office to test if the delay was universal to our route. Unfortunately, there was no delay when remote school clients attempted to access the MS web server.
Is this a known Linux network problem? Why is this a one-way problem?
Any help would be greatly appreciated.
Scott L. Colantonio
Date: Thu, 1 May 1997 16:16:58 -0700
Subject: inetd
From: Toby Reed, toby@eskimo.com
I have a question for the inetd buffs out there...perhaps something like xinetd or a newer version has the capability to do the job, but what I want is this:
normal behavior:
connect to inetd
look in /etc/inetd.conf
run program

enhanced behavior:
connect to inetd
find out what hostname used to connect to inetd
look in /etc/inetd.conf.hostname if it exists, if not, use /etc/inetd.conf
run program listed in /etc/inetd.conf
So if dork1.bob.com has the same IP address as dork2.bob.com, inetd would still be able to distinguish between them. In other words, similar to the VirtualHost directive in Apache that allows you to make virtual hosts that have the same IP address, except that with inetd.
Or, depending on the hostname used to access inetd, inetd could forward the request to another address.
This would be extremely useful in many limited-budget cases where a multitude of IPs are not available. For example, in combination with IP masquerading, would allow a lan host to be accessed transparently both ways on all ports, so long as it was accessed by a hostname, not an IP address. No port masquerading or proxies would be required unless the service needed was very very special. Even non-inetd httpd servers would work with this kind of redirection because the forwarded connection would still be handled by httpd on the machine with the masqueraded machine.
Anyone know if this already exists or want to add to it so I can suggest it to the inetd group?
-Toby
Date: Thu, 8 May 1997 08:05:03 -0700 (PDT)
Subject: S3 Virge Video Board
From: Tim Gray & Family, timgray@lambdanet.com
I have a Linux box using a S3 Virge video board with 4 meg Ram. The problem is that X refuses to start with no other color depth than 8bpp. As X is annoying at 8bpp (Color flashing on every window and several programs complain about no free colors) Is there a way to FORCE X to start in 16 bpp? using the command .... startx -bpp 16 does not work and erasing the 8bpp entry in the XF86Config file causes X to self destruct. Even changing the Depth from 8 to 16 causes errors.. Anyone have experience with this X server?
Date: Fri, 9 May 1997 09:20:05
Subject: Linux and NT
From: Greg McNichol, mcnichol@mcs.net
I am new to LINUX (and NT 4.0 for that matter) and would like any and all information I can get my hands on regarding the dual-boot issue. Any help is appreciated.
--Greg
Date: Wed, 14 May 1997 00:02:04
Subject: Help with CD-ROM
From: Ralph, ralphs@kyrandia.com
I'm relatively new to Linux...not a coder or anything like that...just like messing with new things....anyways I have been running Linux for about a year now and love the H*** out of it. About two weeks ago I was testing some HD's I picked up used with this nifty plug and play bios I got and when I went to restore the system back to normal and now my CD-Rom does not work in Linux...I booted back into 95 and it still worked so I tried forcing the darn thing nothing, nada , zero. I booted with the install disks and still no CD-Rom...its on the 2nd eide set for cable select I tried removing the 2nd hard drive and moving it there still nothing....can anyone give me some more suggestions to try?
Date: Thu, 15 May 1997 12:40:27 -0700
Subject: Programming in C++
From: Chris Walker, crwalker@cc.weber.edu
Hi, I'm Chris Walker. I'm an undergrad computer science major at Weber State University. During my object oriented programming class Linux was brought up. The question was asked "if c++ is so good for programs that are spread over different files or machines, why are Linux and Unix programmed in c not c++?" I was hoping that you may have an answer. Has anyone converted Linux source to c++, would there be any advantages/disadvantages?
Thanks, Chris Walker
Date: Thu, 15 May 1997 11:27:17 -0700 (PDT)
Subject: Programming Serial Ports
From: Celestino Rey Lopez, claude@idecnet.com
First of all congratulations for your good job in the Linux Gazette. I'm interested in programming the serial ports in order to get data from other computers or devices. In other Unixes it is possible, via ioctl, to ask the driver to inform a process with a signal every time a character is ready in the port. For example, in HP-UX, the process receive a SIGIO signal. In Linux SIGIO means input/output error. Do you know where can I get information about this matter? Is there any books talking about that?
Thanks in advance and thanks for providing the Linux community with lot of tricks, ideas and information about this amazing operating system.
Date:Fri, 16 May 1997 10:53:18
Subject: Response to VGA-16 Server in LG Issue 17
From: Andrew Vanderstock, Andrew.van.der.Stock@member.sage-au.org.au
I'll look into it, even though VGA_16 has a very short life. Yes, he is correct, there isn't much in the way of testing dual headedness with a herc card and VGA16, as both are getting quite long in the tooth. VGA_16 disappears in a few months to reappear as the argument -bpp 4 on most display adapters. One bug fixer managed to re-enable Herc support in the new source tree a while back, so there may be life there yet.
Also, there was one 2c issue that was a little out of whack in regards to linear addressing. The Cirrus chipsets are not fabulous, but many people have them built into their computers (laptops, HP PC's etc).
All I can suggest is that he try startx -- -bpp 16 and see if that works. If it doesn't have a look at the release notes for his chipset. If all else fails, report any XFree bugs to the bug report cgi on www.xfree86.org
I'll ask the powers that be if I can write an article for you on XFree86 3.3, the next version of the current source tree, as it is due soon. How many words are your articles generally?
Andrew Vanderstock
Date: Sat, 24 May 1997 01:32:29 -0700
Subject: Secure Anonymous FTP setup mini-howto spotted, then lost
From: Alan Bailward, ajb@direct.ca
I saw once on a friend of mines linux box, running Slackware 3.1, in /usr/docs/faq/HOWTO/mini, a mini-howto on how to setup a secure anonymous FTP server. It detailed how to setup all the directories, permissions, and so on, so you could upload, have permissions to write but not delete on your /incoming, etc etc etc. It looked like a great doc, but for the life of me I can't find it! I've looked on the slackware 3.2 cdrom, the 3.1 cdrom, searched all through the net, but to no avail. As I am trying to setup an anonymous ftp site now, this would be invaluable... I'd feel much better reading it than 'chmod 777'ing all over the place :)
If anyone has seen this document, or knows where it is, please let me know. Or even if there is another source of this type of information, I would sure appreciate it sent to me at ajb@direct.ca
Thanks a lot, and keep on Linuxing!
alan
Date: Mon, 26 May 1997 13:21:20 +0800
Subject: Tuning XFree86
From: Soh Kam Yung, kysoh@ctlsg.creaf.com
I've been reading Linux Gazette since day one and it has been great. Keep up the good work.
I've been seeing comments and letters in the Gazette from people who are having trouble with their XFree86. Well, here's a tip for those not satisfied with the way their screen looks (offset to one side, too high/wide, etc.).
While looking through the XFree86 web site for tips on how to tweak my XF86 configuration, I noticed a reference to a program called xvidtune. Not many people may have heard about it, but it is a program used to tune your video modes. Among its features include:
Just run xvidtune and have fun with it! But be careful: as with XFree86 in general, it does not guarantee that the program will not burn your monitor by generating invalid settings. Fortunately, it has a quick escape (press 'r' to restore your previous screen settings).
Regards, -- Soh Kam Yung
Date: Fri, May 30 1997 12:34:23
Subject: Certification and training courses for Linux
From: Harry Silver, hsilver@pyx.net
I am currently on a mailing list for consultants for Red Hat Linux. One of my suggestions to that list is contained below. I truly hope as part of a broader international initiative, Linux International will pick up the ball on this one so as to ensure that Linux generically will survive. I truly hope that someone from your organization will follow up both with myself and with the Red Hat consulting mailing list as to a more generic Linux support effort in this area. All that would be required is gathering up the manuals from the older Unixware CNE course and 'porting' them to Linux and creating an HTMLized version. This along with online testing could easily generate a reasonable revenue stream for the generic Linux group involved.
Respectfully,
MY SUGGESTION: About two years ago, Novell still had Unixware before sending it over to the care of SCO. At the time Unix was under the stewardship of Novell, a Unixware CNE course was developed. Since, Ray Noorda of Caldera and former CEO of Novell is also an avid supporter of Linux as well as the good folks at Red Hat and other distributions, rather than RE-INVENT the wheel so to speak, wouldn't it make more sense to pattern certification AFTER the Unixware CNE courses by 'porting' the course to Linux GENERICALLY ?
Harley Silver
Date: Fri, 24 May 1996 11:39:25 +0200
Subject: Duplicating a Linux Installed HD
From: Dietmar Kling, kling@tao.de
Hello. I did duplicate my Hard disk before you release this articles for it. A friend of mine new to linux tried to do it, too using your instructions. But we discovered, when he copied my root partition, that he couldn't compile anything on his computer afterwards. A bug in libc.so.5.2.18 prevented his old 8 MB Machine from runnig make or gcc. it always aborted with an error. After updating libc.so5.2.18 and running ldconfig the problem was solved.
We had a SuSe 4.0 installation.
Dietmar
Date: Sat, 10 May 1997 16:09:29 +0200 (MET DST)
Subject: Re: X Color Depth
From: Roland Smith, rsmit06@ibm.net
In response to Michael J. Hammel's 2cent tip in issue #17: I disagree that a 16bit display displays less colors than a 8 bit display.
Both kinds of displays use a colormap. A color value is nothing more than an index into a color map, which is an array of red,green,blue triplets, each 8 bits. The amount of colors that can be shown simultaneously depends on the graphics hardware.
An 8bit display has an eight bit color value, so it can maximally have 256 different color values. The color map links these to 256 different colors which can be displayed simultaneously. Each of these 256 colors can be one of the 2^24 different colors possible with the 3*8 bits in each colormap entry (or color cell, as it is called).
A 16bit display has a sixteen bit color value, which can have 2^16=65536 different values. The colormap links these to 65535 different, simultaneously visible, colors (out of 2^24 possible colors). (actually it's a bit more difficult than this, but thats beyond the point).
So both a 8 and 16 bit display can show 2^24=16.7*10^6 colors. The difference lies in the number of colors they can show *at once*.
Regards, Roland
Date: Fri, May 30 1997 13:24:35
Subject: Using FTP as a shell-command with ftplib
From: Walter Harms, Walter.Harms@Informatik.Uni-Oldenburg.DE ...
Any drawbacks? Of course, for any ftp session you need a user/paswdr. I copy into public area using anonymous/email@ others >will need to surly a password at login, what is not very useful for regular jobs or you have to use some kind of public login but still I think it's easier and >better to use than the r-cmds.
-- walter
Date: Mon, 12 May 1997 17:05:09 -0700
Subject: RE: Using ftp Commands in Shellscript
From: James Boorn, jboorn@optum.com
I recommend you depend on .netrc for ftp usernames and passwords for automated ftp.
James Boorn
Date: Thu, 29 May 1997 09:09:35 -0500
Subject: X limitation to 8 Bit Color (Response to Gary Masters)
From: Omegaman, omegam@COMMUNIQUE.NET
I read your question in Linux Gazette regarding an X limitation to 8 bit color when the system has more that 14 megs of RAM. Where did you find that information? I ask because my system has 24 megs of RAM, and I run 16 bit color all the time. One difference between our systems is that I am using a Diamond Stealth 64 video card.
Gary,
Just caught this letter in Linux Gazette. This limitation is specific to Cirrus Logic cards, particularly those on the ISA bus and some on VLB (ie. old systems -- like mine. Since you're using a Diamond Stealth 64, you don't have this limitation.
Full details are in the readme.cirrus file contained in the XFree86 Documentation. Some cirrus owners may be able to overcome this limitation. See http://xfree86.org
Date: Fri, May 30 1997 8:31:25
Subject: Response to Gary Masters
From: Ivan Griffin, Ivan
Griffin@ul.ie
From: Gary Masters gmasters@devcg.denver.co.us
I read your question in Linux Gazette regarding an X limitation to 8 bit color when the system has more than 14 megs of RAM. Where did you find that information? I ask because my system has 24 megs of RAM, and I run 16 bit color all the time. One difference between our systems is that I am using a Diamond Stealth 64 video card.
XFree86 needs to be able to map video memory in at the end of physical memory linearly. However, ISA machines cannot support greater than 16MB in this fashion - so if you have 16 or greater MB or RAM, you cannot run XFree86 in higher than 8 bit color.
Ivan
![[ TABLE OF
CONTENTS ]](../gx/indexnew.gif)
![[ FRONT
PAGE ]](../gx/homenew.gif)

 More 2¢ Tips!
 Monitoring a ftp Download.
Date: Tue, 27 May 1997 09:57:20 -0400
From: Bob Grabau bob_grabau@fmso.navy.
mil
Here is a tip for monitoring a ftp download. in another virtual console enter the following script:
while :
do
clear
ls -l <filename that you are downloading>
sleep 1
done
This virtual console can be behind (if you are using X) any other window and just showing a line of text. This will let you know if your download is done or stalled. This will let you do other things, like reading the Linux Gazette.
When you type this in, you wll get a > prompt after the first line and continue until you enter the last line.
-- Bob Grabau
Logging In To X Tip
Date: Mon, 26 May 1997 10:17:12 -0500 (CDT)
From: Tom Barron barron@usit.net
Xlogin.mini-howto
Several people regularly use my Linux system at home (an assembled-from- components box containing a 133 Mhz Pentium, 2Gb of disk, 32Mb of memory, running the Slackware distribution) -- my step-son Stephen, who's learning to program and likes using X, my younger step-son Michael, who likes the X screen-savers and games like Doom, my wife Karen, who prefers the generic terminalness of the un-X'd console, and myself -- I like to use X for doing software development work since it lets me see several processes on the screen at once. I also like to keep an X screen saver running when no-one is using the machine.
I didn't want to run xdm (an X-based login manager), since Karen doesn't want to have to deal with X. She wants to be at the console when she logins in and not have to worry about where to click the mouse and such. But I wanted to have a simple way of getting into X when I login without having to start it up manually.
Here's what I came up with:
if [ "$DISPLAY" = "" ]; then

   cal > ~/.month
   xinit .Xsession > /dev/null 2>&1
   clear
   if [ ! -f .noexit ]; then
      exit
   fi

else

   export TTY=`tty`
   export TTY=`expr "$TTY" : "/dev/tty\(.*\)"`
   export PS1="<$LOGNAME @ \h[$TTY]:\w> \n$ "
   export PATH=${PATH}:~/bin:.
   export EDITOR=emacs
   export WWW_HOME=file://localhost/home/tb/Lynx/lynx_bookmarks.html
   export DISPLAY

   alias cls="clear"
   alias dodo="$EDITOR ~/prj/dodo"
   alias e="$EDITOR"
   alias exit=". ~/bin/off"
   alias l="ls -l"
   alias lx="ls -x"
   alias minicom="minicom -m"
   alias pg=less
   alias pine="export DISPLAY=;'pine'"
   alias prj=". ~/bin/prj"
   alias profile="$EDITOR ~/.profile; . ~/.profile"

fi
When I first login, on the console, $DISPLAY is not yet set, so the
first branch of the if statement takes effect and we start up X.
When X terminates, we'll clear the screen and, unless the file
.noexit exists, logout. Running cal and storing the output in
.month is in preparation for displaying a calender in a window
under X.
:
xsetroot -solid black
fvwm &
oclock -geometry 75x75-0+0 &
xload -geometry 100x75+580+0 &
emacs -geometry -0-0 &
xterm -geometry 22x8+790+0 -e less ~/.month &
color_xterm -font 7x14 -ls -geometry +5-0 &
exec color_xterm -font 7x14 -ls -geometry +5+30 \
   -T "Type 'exit' in this window to leave X"
So when my color_xterms run, with -ls as an argument (which says to run a login shell), they run .profile again. Only this time $DISPLAY is set, so they process the else half of the if, getting the environment variables and aliases I normally expect.
xlock Tip
Date: Mon, 26 May 1997 10:14:12 -0500 (CDT)
From: Tom Barron barron@usit.net
Xscreensaver.mini-howto
Several people regularly use my Linux system at home (an assembled-from- components box containing a 133 Mhz Pentium, 2Gb of disk, 32Mb of memory, running the Slackware distribution) -- my step-son Stephen, who's learning to program and likes using X, my younger step-son Michael, who likes the X screen-savers and games like Doom, my wife Karen, who prefers the generic terminalness of the un-X'd console, and myself -- I like to use X for doing software development work since it lets me see several processes on the screen at once. I also like to keep an X screen saver running when no-one is using the machine.
I didn't want to run xdm (an X-based login manager), since Karen doesn't want to have to deal with X. She wants to be at the console when she logins in and not have to worry about where to click the mouse and such. But I wanted to have a simple way of starting up the X-based screensaver xlock when I (or anyone) logged out to the console login.
Here's what I did (as root):
if [ "$DISPLAY" = "" ]; then

   xinit .Xsession > /dev/null 2>&1
   clear
   exit

fi
:
exec xlock -nolock -mode random
In my next article, I show how I arranged to jump into X from the console login prompt just by logging in (i.e., without having to start X manually).
Hex Dump
Date: Sat, 24 May 1997 00:29:20 -0400
From: Joseph Hartmann joeh@arakis.sugar-river.net
Hex Dump by Joseph L. Hartmann, Jr.
This code is copyright under the GNU GPL by Joseph L. Hartmann, Jr.
I have not been happy with Hex Dump. I am an old ex-DOS user, and am familiar with the HEX ... ASCII side-by-side presentation.
Since I am studying awk and sed, I thought it would be an interesting excercise to write this type of dump.
Here is a sample of what you may expect when you type the
(script) command "jhex If you like it, read on....
To the right of the repeated address, "F i l e n a m e"
is the 8 ascii equivalents to the hex codes you see
on the left.
I elected to dump 8 bytes in one row of screen output.
The following software is required: hexdump, bash, less and gawk.
gawk is the GNU/Linux version of awk.
There are four files that I have installed in my /joe/scripts
directory, a directory that is in my PATH environment.
The four files are:
combine -- an executable script: you must "chmod +x combine"
jhex -- an executable script: you must "chmod +x jhex"
hexdump.dashx.format -- a data file holding the formatting
information for the hex bytes.
hexdump.perusal.format -- a data file holding the formatting
information for the ascii bytes.
Here is the file jhex:
I found the "sed & awk" book by Dale Dougherty helpful.
I hope you find jhex useful. To make it useful for yourself, you
will have to replace the "/joe/scripts" with the path of your
choice. It must be a path that is in your PATH, so that the
scripts can be executed from anyplace in the directory tree.
A trivial note: do not remove the blank line from the
hexdump.dasx.format and hexdump.perusal.format
files: it will not work if you do!
A second trivial note: when a file contains many characters all of
same kind, the line-by-line display will
be aborted and the display will look similar
to the example below:
Instead of displaying *all* the 20's, you just get the
I don't like this myself, but I have reached the end of my
competence (and/or patience), and therefore, that's the way it
is!
Date: Fri, 23 May 1997 07:30:38 -0400 I have been using Linux for about a year, as each day passes and my
knowledge increases, my Win95 patitions decrease. This prompted me to
by a notebook, which of course is loaded with Windows. Currently these
two machines are NOT networked :-( But that doesn't mean I can't print
a document created in Word for Windows, Internet Explorer, etc., without
plugging my printer cable into the other machine.
My solution is rather simple. If you haven't already, add a new
printer in the Windows control panel, using the driver for the printer
that is connected to your Linux box. Select "FILE" as the port you wish
to print to and give it a name, eg: Print File (HP Destjet 540). Now
print your document to a floppy disk file, take it to the Linux machine,
and issue a command simular to: cat filename > /dev/lp1. Your document
will be printed with all the formatting that was done in Windows.
Enjoy,
Date: Wed, 21 May 1997 21:42:34 Ever wonder how you can grep certain files in a directory
tree for a particular string. Here's example how
This command will generate a list of all the .c files in
the current working directory or any of its subdirectories
then use this list of files for the grep command. The
grep will then search those files for the string "foo" and
output the filename and the line containing "foo".
The only caveat here is that UNIX is configured to limit
max chars in a command line and the "find" command may
generate a list of files to huge for shell to digest when
it tries to run the grep portion as a command line. Typically
this limit is 1024 chars per command line.
-earl
Date: Wed, 30 Apr 1997 22:41:28
A couple suggestions to people with video cards based on the ViRGE Chipset...
Note: this trick has not been authorized, reconignized, or in any way
endorsed, recommended, or even considered by the guy(s) who wrote svgalib in
the first place. (that last version of svgalib is over a year old, so I
don't expect there to be any new versions real soon) It works for me, so I
just wanted to share it with the Linux community that just might find it useful.
Peter Amstutz
Suppose you have an X running, and want to start another one (perhaps
for a different user).
startx alone will complain.
Writing
Then start it rather with
Of course, if no Xserver is running yet, you can get a non-default depth
by just starting with
Date: Sat, 3 May 1997 12:58:11 +0200 (MDT)
Hi there,
Here is a small tip concerning the 'automatic' file transfer;
Linux Gazette Issue 17, May 1997. Everything is known stuff in Unix
and Linux. To 'automate' file transfer for me means to minimize the
load on the remote server as well as my own telephone costs - you
have to pay for the time you think if or not to get a special file,
for changing the directories and for the time to put the names into
the PC. The procedure is called with the address as parameter and
generates a protocol.
Ftp now looks if a .netrc file exists; in this file I use macros
written in advance and numbered consecutively:
Now I first get the contents of several directories via dir . C131...
and, to have some book-keeping, logically use the same numbers for the
macros and the directories. The protocol shows, if I am really in the
directory I wished to. Until the next session begins, the file C131...
is used to edit the last .netrc file, therefore the names will always
be typed correctly. If you are downloading under DOS from your account
the shorter names are defined in the .netrc file. Everything is done
beforehand with vi under Linux.
Dr.Werner Gerstmann
Date: Mon, 05 May 1997 16:19:05 -0600
But I just can't seem to find any documentation explaining
how to set up local newsgroups. smtpd and nntpd are running,
but the manpages won't tell anything about how to set up ng's
smtpd and nntpd are just transport agents. They could just as easily
transport any sort of message files as they do mail or NetNews files.
What you're looking for is the software which manages these files on
your local system (if you want newsgroups available only locally then
you need to have this software on your system). I used to use CNEWS for
this. I believe there are some other packages, much newer than CNEWS,
that might make it easier. Since I haven't used CNEWS in awhile I'm
afraid I can't offer any more info than this.
Michael J. Hammel
Date: Tue, 06 May 1997 09:25:01 -0400 (EDT)
Saw some X Window tips, so I thought I'd send this one along..
I tend to use lots of color rich applications in X. After
cranking up XEmacs, Gimp, etc., I find that I quickly run
out of palette on my 8-bit display. Most programs don't behave
sensibly when I run out of colors - for example, CGoban comes up
black and white and realaudio refuses to run at all (not enough
colors to play sound, I suppose.
I've found I can solve these problems by passing a "-cc 4" option
to the X server. This tells it to pretend I have a bigger
pallete and to pass back closest matches to colors when necessary.
I've never run out of colors since then.
There are caveats: programs that check for a full colormap
and install their own (color flashing) will automatically do so.
This includes netscape and XForms programs (which I was running
with private color maps anyway). My copy of LyriX
makes the background black. Also, I tried Mosaic on a Sun and
had some odd color effects.
oly
Date: Tue, 06 May 1997 09:40:10 -0400 (EDT)
I forgot to add that the -cc 4 can be used like this:
sorry about that
oly
Date: Mon, 05 May 1997 20:44:13 -0400
A couple suggestions to people with video cards based on the S3/ViRGE
Chipset... (which is many video cards that ship with new computers that
claim to have 3D accelerated graphics. Don't believe it. The 3D graphics
capability of all ViRGE-based chips sucks. They make better cheap 2D
accelerators)
Save it! You're home free! Recompile, re-install libraries, and now, what
we've all been waiting for, test some svga modes! 640x480x256!
640x480x16bpp! 800x600x24bpp! YES!!!
But wait! One thing to watch out for. First, make sure you reinstall it in
the right place! Slackware puts libvga.a in /usr/lib/, so make sure that is
that file that you replace. Another thing: programs compiled with svgalib
statically linked in will have to be rebuilt with the new library, otherwise
they will just go along in their brain dead fashion blithely unaware that your
card is not being used to nearly it's full potential.
Note: this hack has not been authorized, reconignized, or in any way
endorsed, recommended, or even considered by the guy(s) who wrote svgalib.
The last version of svgalib is over a year old, so I don't expect there to
be any new versions real soon. It works for me, so I just wanted to share
it with the Linux community that just might find it useful. This has only
been tested on my machine, using a Diamond Stealth 3D 2000, so if you have a
different ViRGE-based card and you have problems you're on your own.
No, there are no Linux drivers that use ViRGE "accelerated 3D"
features. It sucks, I know (then again, the 3D performance of ViRGE chips
is so bad you're probably not missing much)
Peter Amstutz
Date: 5 May 1997
I wanted to print out a c source with line numbers. Here is one
way to do it:
Assuming you are using bash, install the following function in
your .bashrc file.
"nl" is a textutils utility that numbers the lines of a file.
"-ba" makes sure *all* the lines (even the empty lines) get numbered.
/tmp.tmp is my true "garbage" temporary file, hence I write over it,
and send it to the line printer.
For example to print out a file "kbd.c", with line numbers:
There are probably 20 different methods of accomplishing the same
thing, but when you don't even have *one* of them in your bag of
tricks, it can be a time-consuming detour.
Note: I initially tried to name the function "nl", but this led to
an infinite loop. Hence I named it jnl (for Joe's number lines).
Best Regards,
Date: Thu, 08 May 1997 13:30:04 -0700
Hi, I read your 2c tip in Linux gazette regarding ftplib.
I am not sure why you recommend downloading ftpget, while
another package, actually, a single program, which is available
on many systems does various ftp services pretty well.
I mean ncftp ("nikFTP"). It can do command line, it can work
in the mode of usual ftp (with the "old" or "smarter" interface")
and it also does full-screen mode showing ETA during the transfer.
It has filename and hostname completion and a bunch of other niceties,
like remembering passwords if you ask it to.
Try man ncftp on your system (be in Linux or Solaris) ...
also, ncftp is available from every major Linux archive
(including ftp.redhat.com where you can find latest RPMs)
Hope this helps, Igor
Date: Thu, 08 May 1997 13:52:02 -0700
I have a dial-up with dynamic IP and it has always been an
incontinence for me and my friends to learn my current IP address
(I had an ftp script which put the address every 10 minutes into
~/.plan file on my acct at UCLA, then one could get the address
by fingering the account).
However, recently I discovered a really cool project
http://www.ml.org which
Once their nameserver reloads its tables (once every 5-10mins!)
your computer can be accessed by the name you selected
when registered.
For example, my Linux box has IP name math4.dyn.ml.org
Caveat: if you are not online, the name can point to
a random computer. In my case, those boxes are
most often wooden (i.e. running Windoze ;-) so
you would get "connection refused".
In general, you need some kind of authentication
scheme (e.g. if you telnet to my computer, it would
say "Office on Rodeo Drive")
Isn't that cool ?
Cheers,
Igor
Date: Sat, 10 May 1997 11:55:28 -0400
I used Redhat 4.0's netcfg tool to install my PPP connection, but found
that I could only use the
Internet as root. I set the proper permissions on my scripts and the
pppd (as stated in the
PPP Howto and the Redhat PPP Tips documents), but I still could not use
any Internet app from
a user's account. I then noticed that a user account _could_ access an
IP number, but could not
do a DNS lookup. It turns out that I merely had to chmod ugo+r
/etc/resolv.conf
Date: Wed, 28 May 1997 13:24:45
Sometimes it might be useful to allow trusted friends to connect to your
personal Linux box over the Internet.
An easy way to do this is to put links to your IP address on a full-time
web server, then give the URL to whomever.
Why would you want to do that? Well, I do it so my sister can telnet to
Magnon, my laptop, for a chat whenever I'm connected.
However it might prove difficult if, like me, your ISP assigns your
IP address dynamically. So I wrote a short script to take care
of this... The script generates an html file containing my local
IP address then uploads the file via ftp to a dedicated web server
on which I have rented some web space. It runs every time a ppp
connection is established, so the web page always contains my current
IP, as well as the date/time I last connected.
This is pretty easy to set up, and the result is way cool. Just give my
sis (or anyone else I trust) the URL... then she can check
to see if I'm online whenever she wants, using Netscape from her vax
account at RIT. If I am connected, she can click to telnet
in for a chat.
Here's how it works....
To get ftp to work, I had to create a file named .netrc in my home
directory with a line that
contains the ftp login information for the remote server. My .netrc has
one line that looks like this:
For more information on the .netrc file and its format, try "man ftp".
Chmod it 700 (chmod 700 .netrc) to prevent other users from reading the
file.
This isn't a big deal on my laptop, which is used primarily by yours
truly. But it's a good idea anyway.
Here's my script. There might be a better way to do all of this,
however my script works pretty well.
Still, I'm always interested in ways to improve my work, so if you have
any suggestions or comments,
feel free to send me an email.
Date: Tue, 27 May 1997 11:16:32
Shockingly enough, there seems to be a DOS product out there that will
happily make "image files" of entire hard disks and copy these image files
onto blank hard disks in a sector-by-sector fashion. Boot sectors and
partition tables should be transferred exactly. See:
http://www.ingot.com
for more details. Seagate (I think...) has also made a program that does
the duplication in one step - transfers all of one hard disk to another
identical disk. I'm not sure which of these products works with
non-identical disks.
Hope this helps.
Michael Jablecki
From: Paul
Oh, here's a little tidbit of info to pass on, this has been bugging me
for a while. Often times when people send in tips 'n' tricks, it requires
one to untar and unzip an archive. It usually suggested that this be done
in one of several cumbersome ways:
gzcat foo.tar.gz | tar zxvf -
or 1. gunzip foo.tar.gz
2. tar xvf foo.tar
or some other multi-step method. There is a much easier, time-saving,
space saving method. The version of tar shipped with most distributions
of Linux is from the FSF GNU project. These people recognized that most
tar archives are usually gzipped and provided a 'decompress' flag to tar.
This is equivalent to the above methods:
tar zxvf foo.tar.gz
This decompress the tar.gz file on the fly and then untars it into the
current directory, but it also leaves the original .tar.gz alone.
However, one step I consider essential that is usually never mentioned, is
to look at what's in the tar archive prior to extracting it. You have no
idea whether the archiver was kind enough to tar up the parent directory
of the files, or it they just tarred up a few files. The netscape tar.gz
is a classic example. When that's untarred, it dumps the contents into
your current directory. Using:
gtar ztvf foo.tar.gz
allows you to look at the contents of the archive prior to opening it up
and potetially writing over files with the same name. At the very least,
you will know what's going on and be able to make provisions for it before
you mess something up.
For those who are adventurous, (X)Emacs is capable of not only opening up
and reading a tar.gz file, but actually editing and re-saving the contents
of these as well. Think of the time/space savings in that!
Seeya,
Paul
Linus Torvalds, the "Kernel-Kid" and creator of Linux, Jon
"Maddog" Hall, Linux/Alpha team leader and inspiring Linux
advocate, David Miller, the mind behind Linux/SPARC, and Phil
Hughes, publisher of Linux Journal, and many more will speak
at the upcoming Atlanta Linux Showcase.
For more information on the Atlanta Linux Showcase and to
reserve your seat today, please visit our web site at
http://www.ale.org.showcase
SSC is currently putting together a Linux Speaker's Bureau.
http://www.ssc.com/linux/lsb.html
The LSB is designed to become a collage of speakers specializing in Linux.
Speakers who specialize in talks ranging from novice to advanced - technical
or business are all welcome. The LSB will become an important tool for
organizers of trade show talks, computer fairs and general meetings, so if
you are interested in speaking at industry events, make sure to visit the
LSB WWW page and register yourself as a speaker.
We welcome your comments and suggestions.
The Linux System Administrator's Guide (SAG) is a book on system
administration targeted at novices. Lars Wiraenius has been writing it for
some years, and it shows. He has made an official
HTML version, available at the SAG home page at: Take a Look!
The Olivetti and Oracle Research Laboratory has made available the first
public release of omniORB (version 2.2.0). We also refer to this version
as omniORB2.
omniORB2 is copyright Olivetti & Oracle Research Laboratory. It is free
software. The programs in omniORB2 are distributed under the GNU General
Public Licence as published by the Free Software Foundation. The libraries
in omniORB2 are distributed under the GNU Library General Public
Licence.
For more information take a look at http://www.orl.co.il/omniORB.
Source code and binary distributions are available from
http://www.orl.co.uk/omniORB/omniORB.html
The Wurd Project, a SGML Word Processor for the UNIX environment (and
hopefully afterwards, Win32 and Mac) is currently looking for developers
that are willing to participate in the project.
Check out the site at:
http://sunsite.unc.edu/paulc/wp Mailing list archives are available, as well as the current source,
documentation, programming tools and various other items can also be found
at the above address.
Check it out...
Here's the online copy of Metro's article on Linus...
Announcing BlackMail 0.24. This is a bug-fix release over the previous
release, which was made public on April 29th.
BlackMail is a mailer proxy that wraps around your existing mailer
(preferrably smail) and provides protection against spammers, mail
forwarding, and the like.
For those of you looking for a proxy, you may want to
look into this. This is a tested product, and works very well. I am
interested in getting this code incorporated into SMAIL, so if you are
interested in doing this task, please feel free.
You can download blackmail from ftp://ftp.bitgate.com.
You can also view the web page at
http://www.bitgate.com.
Red Hat Software is proud to announce the arrival of Red Hat's TriTeal CDE
for Linux. Red Hat Software, makers of the award-winning, technologically
advanced Red Hat Linux operating system, and TriTeal Corporation, the industry
leader in CDE technology, teamed up to bring you this robust, easy to use CDE
for your Linux PC.
CDE includes
Red Hat's TriTeal CDE for Linux provides users with a graphical
environment to access both local and remote systems.
It gives you icons, pull-down menus, and folders.
Red Hat's TriTeal CDE for Linux is available in two versions. The Client
Edition gives you everything you need to operate a complete licensed copy
of the CDE desktop, incluidng the Motif 1.2.5 shared libraries. The
Developer's Edition allows you to perform all functions of the Client
Edition, and also includes a complete integrated copy of OSF Motif version
1.2.5, providing a complete development environment with static and
dynamically linked libraries, Motif Window Manager, and sample Motif
Sources.
CDE is an RPM-based product, and will install easily on Red Hat and other
RPM-based Linux systems. We recommend using Red Hat Linux 4.2 to take full
advantage of CDE features. For those who do not have Red Hat 4.2, CDE
includes several Linux packages that can be automatically installed to
improve its stability.
Order online at: http://www.redhat.com
Or call 1-888-REDHAT1 or (919) 572-6500.
Announcing the release 2.0.1 of TCFS
(Transparent Cryptographic File System) for Linux.
TCFS is a cryptographic filesystem developed here at Universita' di
Salerno (Italy). It operates like NFS but allow users to use a new
flag X to make the files secure (encrypted). Security engine is based on
DES, RC5 and IDEA.
The new release works in Linux kernel space, and may be linked as
kernel module. It is developed to work on Linux 2.0.x kernels.
A mailing-list is available at tcfs-list@mikonos.dia.unisa.it.
Documentation is available at http://mikonos.dia.unisa.it/tcfs.
Here you can find instructions for installing TCFS and docs on
how it works.
Mirror site is available at http://www.globenet.it
and
http://www.inopera.it/~ermmau.tcfs
Qddb 1.43p1 (patch 1) is now available
Qddb is fast, powerful and flexible database software that runs
on UNIX platforms, including Linux. Some of its features include:
Qddb-1.43p1 is the first patch release to 1.43. This patch
fixes a few minor problems and a searching bug when
using cached secondary searching.
To download the patch file:
ftp://ftp.hsdi.com/pub/qddb/sources/qddb-1.43p1.patch For more information on Qddb, visit the official Qddb home page:
http://www.hsdi.com/qddb
AUSTIN, TX- Crack dot Com, developers of the cult-hit Abuse and the
anticipated 3D action/strategy title Golgotha, recently learned
that Kevin Bowen, aka Fragmaster on irc and Planet Quake, has put up
the first unofficial Golgotha web site.
The new web site can be found at http://www.planetquake.com/grags/golgotha,
and there is a link to the new site at http://crack.com/games/golgotha.
Mr. Bowen's web site features new screenshots and music previously available
only on irc.
Golgotha is Crack dot Com's first $1M game and features a careful
marriage of 3D and 2D gameplay in an action/strategy format featuring
new rendering technology, frantic gameplay, and a strong storyline.
For more information on Golgotha, visit Crack dot Com's web site at
http://crack.com/games/golgotha.
Crack dot Com is a small game development company located in Austin,
Texas. The corporation was founded in 1996 by Dave Taylor, co-author
of Doom and Quake, and Jonathan Clark, author of Abuse.
ImageMagick-3.8.5-elf.tgz is now out.
This version brings together a number of minor changes made to
accomodate PerlMagick and lots of minor bugs fixes including
multi-page TIFF decoding and writing PNG.
ImageMagick (TM), version 3.8.5, is a package for display and
interactive manipulation of images for the X Window System.
ImageMagick performs, also as command line programs, among others
these functions:
ImageMagick supports also the Drag-and-Drop protocol form the OffiX
package and many of the more popular image formats including JPEG,
MPEG, PNG, TIFF, Photo CD, etc.
Check out:
ftp://ftp.wizards.dupont.com/pub/ImageMagick/linux
Linux Systems Labs, The Linux Publishing Company is pleased to announce
Slackware 3.2 on CD-ROM
This CD contains Slackware 3.2 with 39 security fixes and patches since
the Official Slackware 3.2 release. The CD mirrors the slackware ftp site
as of April 26, 1997. Its a great way to get started with Linux or update
the most popular Linux distribution.
This version contains the 2.0.29 Linux kernel, plus recent versions of
these (and other) software packages:
LSL price: $1.95
Ordering Info: http://www.lsl.com
A new release of mtools, a collection of
utilities to access MS-DOS disks from Unix without mounting them.
Mtools can currently be found at the following places:
http://linux.wauug.org/pub/knaff/mtools Mtools-3.6 includes the features such as Msip -e which now only ejects Zip
disks when they are not mounted, Mzip manpage, detection of bad passwords
and more.
Most GNU software is packed using the GNU `gzip' compression program.
Source code is available on most sites distributing GNU software.
For more information write to gnu@prep.ai.mit.edu
CM3 version 4.1.1 is now available for Unix and Windows platforms:
SunOS, Solaris, Windows NT/Intel, Windows 95, HP/UX, SGI IRIX,
Linux/ELF on Intel, and Digital Unix on Alpha/AXP. For additional
information, or to download an evaluation copy, contact Critical Mass,
Inc. via the Internet at info@cmass.com or on the World Wide Web at newsBot: mailBot: siteSee:
linkCheck: All products require Linux, SunOS or Solaris. And all are sold as
"age ware": a free trial license allows full testing. When the
license expires, the products "age", forget some of their skills,
but they still retain about 80% of their functionality.
A GUI text editor named "Red" is available for Linux.
The editor has a full graphical interface, supports mouse and key
commands, and is easy to use.
These are some of Red's features that might be interesting:
It can be downloaded free in binary form or with full source code. The web site also includes a full Manual - have a look if you are
interested.
Announcing Emacspeak-97++ (The Internet PlusPack). Based
on InterActive Accessibility technology, Emacspeak-97++
provides a powerful Internet ready audio desktop that
integrates Internet technologies including Web surfing and
messaging into all aspects of the electronic desktop.
Major Enhancements in this release include:
Emacspeak-97++ can be downloaded from:
From: David E. Stern, lptsua@i/wasjomgtpm/edu
The end goal: to install FileRunner, I simply MUST have it! :-)
My intermediate goal is to install Tcl/Tk 7.6/4.2, because FileRunner
needs these to install, and I only have 7.5/4.1 . However, when I try to
upgrade tcl/tlk, other apps rely on older tcl/tk libraries, atleast that's
what the messages allude to:
I have enough experience to know that apps may break if I upgrade the
libraries they depend on. I've tried updating some of those other apps,
but I run into further and circular dependencies--like a cat chasing it's
tail.
In your opinion, what is the preferred method of handling this scenario?
I must have FileRunner, but not at the expense of other apps.
It sounds like you're relying too heavily on RPM's.
If you can't afford to risk breaking your current stuff,
and you "must" have the upgrade you'll have to do some
stuff beyond what the RPM system seems to do.
One method would be to grab the sources (SRPM or tarball)
and manually compile the new TCL and tk into /usr/local
(possibly with some changes to their library default
paths, etc). Now you'll probably need to grab the
FileRunner sources and compile that to force it to use the
/usr/local/wish or /usr/local/tclsh (which, in turn, will
use the /usr/local/lib/tk if you've compiled it all right).
Another approach is to set up a separate environment
(separate disk, a large subtree of an existing disk
-- into which you chroot, or a separate system entirely)
and test the upgrade path where it won't inconvenience you
by failing. A similar approach is to do a backup, test your
upgrade plan -- (if the upgrade fails, restore the backup).
This is a big problem in all computing environments (and
far worse in DOS, Windows, and NT systems than in most
multi-user operating systems. At least with Unix you have
the option of installing a "playpen" (accessing it with the
chroot call -- or by completely rebooting on another partition
if you like).
Complex interdepencies are unavoidable unless you require that
every application be statically linked and completely self-sufficient
(without even allowing their configuration files to be separate.
So this will remain an aspect of system administration where
experience and creativity are called for (and a good backup
may be the only thing between you and major inconvenience).
--
Jim
From: Bill Johnson, b_johnson@cel.co.chatham.ga.us
I have two networking problems which may be related. I'm using a
dial-up (by chat) ppp connection.
1) pppd will not execute for anyone without root privilege, even
though it's permissions are set rw for group and other.
I presume you mean that it's *x* (execute) bit is set.
It's *rw* bits should be disabled -- the *w* bit ESPECIALLY.
If you really want pppd to be started by users (non-root)
you should write a small C "wrapper" program that executes
pppd after doing a proper set of suid (seteuid) calls and
sanity checks. You might be O.K. with the latest suidperl
(though there have been buffer overflows with some versions
of that.
Note that the file must be marked SUID with the chmod command
in order for it to be permitted to use the seteuid call
(unless ROOT is running it, of course).
Regardless of the method you use to accomplish your SUID of
pppd (even if you just set the pppd binary itself to SUID):
I suggest you pick or make a group (in /etc/group) and make
the pppd wrapper group executable, SUID (root owned), and
completely NON-ACCESSIBLE to "other" (and make sure to just
as the "trusted" users to the group.
'sudo' (University of Colorado, home of Evi Nemeth) is a
generalized package for provided access to privileged programs.
You might consider grabbing it and installing it.
I'd really suggest diald -- which will dynamically bring the
link up and down as needed. Thus your users will just try to
access their target -- wait a long time for dialing, negotiation,
etc (just like pppd only a little faster) and away you go
(until your connection is idle long enough to count as a
"timeout" for diald.
2) http works, and mail works, and telnet works, but ftp does not
work. I can connect, login, poke around, and all that. But when I
try to get a file, it opens the file for writing on my machine and
then just sits there. No data received, ever. Happens with
Netscape, ftp, ncftp, consistently, at all sites. Even if user is
root. Nothing is recorded in messages or in ppp-log.
/etc/protocols, /etc/services and all that seems to be set up
correctly. Any suggestions?
Can you dial into a shell account and do a kermit
or zmodem transfer? What does 'stty -a < /dev/modem'
say? Make sure you have an eight-bit clean session.
Do you have 16550 (high speed) UARTS.
Do you see any graphics when you're using HTTP?
(that would suggest that binary vs. text is not the
problem).
--
Jim
From: Zia Khan, khanz@foxvalley.net
I have a question regarding fetchmail. i've been successful at using it
to send and recieve mail from my ISP via a connection to their POP3
server. there is a slight problem though. the mail that i send out has
in its from: field my local login and local hostname e.g.
ruine@clocktower.net. when it should be my real email address
khanz@foxvalley.net those who recieve my message recieve an non existant
email address to reply to. is there any way in modifying this behavior?
i've been investigating sendmail with hopes it may have have a means of
making this change,to little success.
Technically this has nothing to do with fetchmail or POP.
'fetchmail' just *RECIEVES* your mail -- POP is just the
protocol for storing and picking up your mail. All of your
outgoing mail is handles by a different process.
Sendmail has a "masquerade" feature and an "all_masquerade"
feature which will tell it to override the host/domain portions
of the headers addresses when it sends your mail. That's
why my mail shows up as "jimd@starshine.org" rather than
"jimd@antares.starshine.org."
The easy way to configure modern copies of sendmail is to use
the M4 macro package that comes with it. You should be able to
find a file in /usr/lib/sendmail-cf/cf/
Mine looks something like:
(I've removed all the UUCP stuff that doesn't apply to you
at all).
Note: This will NOT help with the user name -- just the host and
domain name. You should probably just send all of your outgoing
mail from an account name that matches your account name at your
provider. There are other ways to do it -- but this is the
easiest.
Another approach would require that your sendmail "trust"
your account (with a define line to add your login ID as one
which is "trusted" to "forge" their own "From" lines in
sendmail headers. Then you'd adjust your mail-reader to
reflect your provider's hostname and ID rather than your local
one. The details of this vary from one mailer to another --
and I won't give the gory details here).
Although I said that this is not a fetchmail problem -- I'd
look in th fetchmail docs for suggestions. I'd also read
(or re-read) the latest version of the E-Mail HOW-TO.
--
Jim
Justin Mark Tweedie, linda@zanet.co.za
Our users no not have valid command shells in the /etc/passwd file (they
have /etc/ppp/ppp.sh). I would like the users to use procmail to process
each users mail but .forward returns an error saying user does not have a
vaild shell.
The .forward file has the following entry
How can I make this work ???
Cheers Justin
I suspect that its actually 'sendmail' that issuing the
complaint.
Add the ppp.sh to your /etc/shells file.
procmail will still use /bin/sh for processing the
recipes in the .procmailrc file.
Another method would be to use procmail as your local
delivery agent. In your sendmail "mc" (m4 configuration
file) you'd use the following:
(and make sure that your copy of procmail is in a place
where sendmail can find it -- either using symlinks or
by adding:
Then you don't have to muss with .forward files at all.
'sendmail' will hand all local mail to procmail which will
look for a .procmailrc file.
Another question to as is whether you want to use your
ppp.sh has a login shell at all. If you want people to
login in and be given an automatic PPP connection I'd look
at some of the cool features of mgetty (which I haven't
used yet -- but seen in the docs).
These allow you to define certain patterns that will be
caught by 'mgetty' when it prompts for a login name --
so that something like Pusername will call .../ppplogin
while Uusername will login with with 'uucico' etc.
If you want to limit your customers solely to ppp services
and POP (with procmail) then you've probably can't do it in
any truly secure or reasonably way. Since the .procmailrc
can call on arbitrary external programs -- the user with a
valid password and account can access other services on the
system. Also the ftp protocol can be subverted to provide
arbitrary interactive access -- unless it is run in a
'chroot' environment -- one which would make the processing
of updating the user's .procmailrc and any other .forward or
configuration files a hassle.
It can be done -- but it ultimately is more of a hassle than
it's worth. So if you want to securely limit your customers'
from access to interactive services and arbitrary commands
you'll want to look at a more detailed plan than I could
write up here.
--
Jim
From: Mike West, mwest@netpath.net Hi Jim,
This may seem like a silly question, but I've been unable to find any
HOW-TOs or suggestions on how to do it right. My question is, how should
I purge my /var/log/messages file? I know this file continues to grow.
What would be the recommended way to purge it each month? Also, are
there any other log files that are growing that I might need to know
about? Thanks in advance Jim.
I'm sorry to have dropped the ball on your message.
Usually when I don't answer a LG question right away
it's because I have to go do some research. In this case
it was that I knew exactly what I wanted to say -- which would be
"read my 'Log Management' article in the next issue of LG"
However haven't finished the article yet. I have finished
the code.
Basically the quick answer is:
The HUP signal being send to the syslogd process is to
tell it to close and re-open its files. This is necessary
because of the way that Unix handles open files.
"unlinking" a file (removing the directory entry for it)
is only a small part of actually removing it. Remember that
real information about a file (size, location on the device,
ownership, permissions, and all three date/time stamps for
access, creation, and modification) is stored in the
"inode." This is a unique, system maintained data structure.
One of the fields in the inode is a "reference" or "link"
count. If the name that you supplied to 'rm' was the only
"hard link" to the file than the reference count reaches
zero. So the filesystem driver will clear the inode and
return all the blocks that were assigned to that file to the
"free list" -- IF THE FILE WASN'T OPEN BY ANY PROCESS!
If there is any open file descriptor for the file -- then
the file is maintained -- with no links (no name). This
is because it could be critically bad to remove a file out
from under a process with no warning.
So, many daemons interrupt a "Hang-up" signal (sent via
the command 'kill -HUP') as a hint that they should
"reinitialize in some way. That usually means that they
close all files, re-read any configuration or options files
and re-open any files that they need for their work.
You can also do a
I don't really know why this doesn't get the syslog
confused -- since it's offset into the file is all
wrong. Probably this generates a "holey" file -- which
is a topic for some other day.
Another quick answer is:
Use the 'logrotate' program from Red Hat.
(That comes with their 4.1 distribution -- and
is probably freely usable if you just want to
fetch the RPM from their web site. If you don't
use a distribution that support RPM's you can
get converters that translate .rpm files into
tar or cpio files. You can also just use
Midnight Commander to navigate through an RPM
file just like it was a tar file or a directory).
The long answer looks a little more like:
That should be fairly self explanatory except for the
part at the end with the (....) | sendmail ....
stuff. The parenthese here group the output from all
of those commands into the pipe for sendmail -- so the
provide a whole message for sendmail. (Otherwise
only the last echo would go to sendmail and the
rest would try to go to the tty of the process that ran
this -- which (when cron runs the job) will generate a
different -- much uglier -- piece of mail.
Now there is one line in the sendmail group that bears
further explanation:
/root/bin/filter.log /root/lib/messages.filter OLD/messages.$TODAY
This is a script (filter.log) that I wrote -- it
takes a data file (messages.filter) that I have created
in little parts over several weeks and still have to
update occasionally.
Here's the filter.log script:
That's about eight lines of gawk code.
I hope the comments are clear enough. All this
does is reads one file full of pattern, and then
use that set of patterns as a filter for all of the
rest of the files that are fed through it.
Here's an excerpt from my ~root/lib/messages.filter
file:
Basically those first seventeen characters on each
line match any date/time stamp -- the antares
obviously matches my host name and the rest of each
line matches items that might appear in my messages
file that I don't care about.
I use alot of services on this machine. My filter
file is only about 100 lines long. This scheme trims
my messages file (several thousand lines per day)
down to about 20 or 30 lines of "different" stuff
per day.
Everyone once in awhile I see a new pattern that
I add to the patterns list.
This isn't an ideal solution. It is unreasonable to
expect of most new Linux users (who shouldn't "have to"
learn this much about regular expressions to winnow
the chaff from their messages file. However it is
elegant (very few lines of code -- easy to understand
exactly what's happening).
I thought about using something like swatch or some other
log management package -- but my concern was that these are
looking for "interesting things" and throwing the rest
away. Mine looks for "boring things" and whatever is
left is what I see. To me anything that is "unexpected"
is interesting (in my messages file) -- so I have to use a
fundamentally different approach.
I look at these messages files as a professional sysadmin.
They may warn me about problems before my users notice them.
(incidentally you can create a larger messages file that
handles messages for many hosts -- if you are using
remote syslogging for example).
Most home users can just delete these files with abandon.
They are handy diagnostics -- so I'd keep at least a few
days worth of them around.
--
Jim
From: William Macdonald will@merchant.clara.net Hi,
I was reading one of the British weekly computing papers this week and
there was an article about a shoot out between Intranetware and NT.
This was to take place on 20th May in the Guggenhiem museum in NYC.
Intranetware sounds interesting. Sadly I think it may be
too little, too late in the corporate world. However, if
Novell picks the right pricing strategy and niche they may be
able to come back in from the bottom.
I won't talk about NT -- except when someone is paying me
for the discomfort.
The task was to have a system offering an SQL server that could process
1 billion transasctions in a day. This was supposed to be 10 time what
Visa requires and 4 time what a corporation like American Airlines. It
was all about proving that these OSs could work reliably in a mission
critical environment.
If I wanted to do a billion SQL transactions a day I'd probably
look at a Sun Starfire running Solaris. The Sun Starfire
has 64 SPARC (UltraSPARC's??) running in parallel.
Having a face off between NT and Netware (or "Intra" Netware
as they've labelled their new release) in this category is
really ignoring the "real" contenders in the field of SQL.
Last I heard the world record for the largest database system
was owned by Walmart and ran on Tandem mini-computers. However
that was several years ago.
I haven't seen the follow up article yet so I can't say what the result
was. The paper was saying it was going to be a massive comp with both
the boss' there etc.
Sounds like typical hype to me. Pick one or two companies
that you think are close to you and pretend that your small
group comprises the whole market.
How would linux fair in a comp like this ?? The hardware resources were
virtually unlimited. I think the NT box was a compaq 5000 (proliant
??). Quad processors, 2 GB RAM, etc.
The OS really doesn't have to much to do with the SQL
performance. The main job of the OS in running an SQL
engine is to provide system and file services as fast as
possible and stay the heck out of the way the real work.
The other issue is that the hardware makes a big difference.
So a clever engineer could make a DOG of a OS still look
like a charging stallion -- by stacking the hardware in
his favor.
If it was me -- I'd think about putting in a few
large (9 Gig) "silicon disks." A silicon disk is really
a bunch of RAM that's plugged into a special controller
that makes it emulate a conventional IDE or SCSI hard
drive. If you're Microsoft or Novell and you're serious
about winning this (and other similar) face offs -- the
half a million bucks you spend on the "silicon disks"
may pay for itself in one showing.
In answer to your question -- Linux, by itself, can't
compete in this show -- it needs an SQL server. Postgres
'95 is, from what I've seen and heard, much too lightweight
to go up against MS SQL Server -- and probably no match for
whatever Novell is using. mSQL is also pretty lightweight.
Mind you P'gres '95 and mSQL are more than adequate for
most businesses -- and have to offer a price performance
ratio that's unbeatable (even after figuring in "hidden"
and "cost of ownership" factors). I'm not sure if Beagle
is stable enough to even run.
So we have to ask: That's all that are listed in the Commercial-HOWTO
However -- here's a few more:
Sadly the "big three" (Informix, Oracle, and Sybase)
list nothing about Linux on their sites. I suspect they
still consider themselves to be "too good" for us -- and
they are undoubtedly tangled in deep licensing aggreements
with SCO, Sun, HP, and other big money institutions. So
they probably view us as a "lesser threat" -- (compared
to the 800 lb gorilla in Redmond). Nonetheless -- it doesn't
look like they are willing to talk about Linux on their
web pages.
I'd also like to take this opportunity to lament the
poor organization and layout of these three sites. These
are the large database software companies in the world --
and they can create a simple, INFORMATIVE web site. Too
much "hype" and not enough "text."
(My father joked: "Oh! you meant 'hypertext' -- I thought
it was 'hype or text'" -- Obviously too many companies
hear it the same way and choose the first option of a
mutually exclusive pair).
--
Jim
From: Alex Pikus of WEBeXpress alex@webexpress.net
I have a DEC XLT-366 with NTS4.0 and I would like to add Linux to it. I
have been running Linux on an i386 for a while.
I have created 3 floppies:
I have upgrade AlphaBIOS to v5.24 (latest from DEC) and added a Linux
boot option that points to a:\
You have me at a severe disadvantage. I'll be running
Linux on an Alpha based system for the first time next
week.
So I'll have to try answering this blind.
When I load MILO I get the "MILO>" prompt without any problem. When I
do "show" or "boot ..." at the MILO>" I get the following result ...
SCSI controller gets identified as NCR810 on IRQ 28 ... test1 runs and
gets stuck "due to a lost interrupt" and the system hangs ...
In WinNTS4.0 the NCR810 appears on IRQ 29.
My first instinct is the ask if the autoprobe code in
Linux (Alpha) is broken. Can you use a set of command-line
(MILO) parameters to tell pass information about your
SCSI controller to your kernel? You could also see about
getting someone else with an Alpha based system to compile
a kernel for you -- and make sure that it has values in
it's scsi.h file that are appropriate to your system -- as
well as insuring that the corrective drivers are built in.
How can make further progress here?
It's a tough question. Another thing I'd look at
is to see if the Alpha system allows booting from a
CD-ROM. Then I'd check out Red Hat's (or Craftworks')
Linux for Alpha CD's -- asking each of them if they
support this sort of boot.
(I happened to discover that the Red Hat Linux 4.1 (Intel)
CD-ROM was bootable when I was working with one system that
had an Adaptec 2940 controller where that was set as an
option. This feature is also quite common on other Unix
platforms such as SPARC and PA-RISC systems -- so it is
a rather late addition to the PC world).
--
Jim
From: Stuby Bernd, eacj1049@inuers17.inue.uni-stuttgart.de
Hello there,
First I have to metion that my Soundcard (MAD16 Pro from Shuttle
Sound System with an OPTi 82C929 chipset) works right under Windows.
I tried to get my Soundcard configured under Linux 2.0.25.with the same
Parameters as under Windows but as I was booting the new compiled Kernel
the Soundcard whistled and caused terrible noise. The same happened
as I compiled the driver as a module and installed it in the kernel.
In the 'README.cards' file the problem coming up just with this
Soundcard is mentioned (something like line 3 mixer channel).
I don't know what to do with this information and how to change the
sounddriver to getting it working right.
May be there's somebody who knows how to solve this problem or where
I can find more information.
With best regards
Bernd
Sigh. I've never used a sound card in my machine.
I have a couple of them floating around -- and will
eventually do that -- but for now I'll just have to
depend on "the basics"
Did you check the
Hardware-HOWTO?
I see the MAD16 and this chipset listed there. That's
encouraging.
How about the
Soundcard-HOWTO?
Unfortunately this has no obvious reference to your
problem. I'd suggest browsing through it in detail.
Is your card a PnP (plug and "pray")? I see notes
about that being a potential source of problems.
I also noticed a question about "noise" being "picked
up" by the sound card Did you double check for IRQ and DMA conflicts?
The thing I hate about PC sound cards is that most of them
use IRQ's and DMA channels. Under DOS/Windows you used to be
able to be fairly sloppy about IRQ's. When your IRQ conflicts
caused conflicts the symptoms (like system lockups) tend to
get lost in the noise of other problems (like system lockups
and mysterious intermittent failures). Under Linux these
problems usually rear their ugly heads and have nowhere to
hide.
Have you contacted the
manufacturer
of the card?
I see a Windows '95 driver. No technical notes on
their sound cards -- and no mention of anything other
than Windows on their web site (that I could find).
That would appear to typify the "we only do Windows"
attitude of so many PC peripherals manufacturers.
I've blind copied their support staff on this -- so
they have the option to respond.
If this is a new purchase -- and you can't resolve the
issue any other way -- I'd work with your retailer or
the manufacturer to get a refund or exchange this with
hardware that meets your needs.
An interesting side note. While searching through
Alta
Vista on
Yahoo!
I found a page that described itself as
The Linux Ultra Sound
Project.
Perhaps that will help you choose your next PC sound system
(if it comes to that).
--
Jim
From: Larry Snyder, larrys@lexis-nexis.com
Just re-read your excellent article on procmail in the May LJ.
(And yes, I've read both man pages :-). What I want to try is:
This should be a MUCH cheaper (in cpu cycles) way of implementing a spam
filter than reading the header then going through all the possible domains
that might be applicable. Most of the headers are forged in your
average spam anyway....
Not my idea, but it sounds good to me. What do you think, and how would
I code a body scan in the rc?
I think it's a terrible idea.
The code would be simple -- but the patterns you suggest
are not very specific.
Here's the syntax (tested):
... note the capital "B" specifies that the recipe
applies to the "Body" of the message -- the line
that starts with an asterisk is the only conditional
(pattern) the parentheses enclose/group the regular
expression (regex) around the "pipe" character. The
pipe character means "or" in egrep regex syntax. Thus
(foo|bar) means "'foo' or 'bar'"
The square brackets are a special character in regexes
(where they enclose "classes" of characters). Since
you appeared to want to match the literal characters
-- i.e. you wanted your phrases to be enclosed in
square brackets -- I've had to "escape" them in my
pattern -- so they are treated literally and not taken
as delimiters.
The * (asterisk) character in the regex means
"zero or more of the preceding element" and the . (dot or
period) means "any single character" -- so the
pair of them taken together means "any optional characters"
If you use a pattern line like:
... it can match fool fooool and fooooolk and even fol but
not forl or foorl. The egrep man page is a pre-requisite to
any meaningful procmail work. Also O'Reilly has an entire
book (albeit a small one) on regular expressions.
The gist of what I'm trying to convey is that .* is needed
in regex'es -- even though you might use just * in shell
or DOS "globbing" (the way that a shell matches filenames
to "wildcards" is called "globbing" -- and generally does
NOT use regular expressions -- despite some similarities
in the meta characters used by each).
Not also that the * token at the beginning of this line
is a procmail thing. It just identifies this as being
a "condition" line. Lines in procmail recipes usually start
with a token like a : (colon), a * (asterisk), a | (pipe) or
a ! (bang or exclammation point) -- any that don't
may consist of a folder name (either a file or a directory)
or a shell variable assignment (which are the lines with
= (equal signs) somewhere on them.
In other words the * (star) at the begining of that line
is NOT part of the expression -- it's a token that tells
the procmail processor that the rest of the line is a regex.
Personally I found that confusing when I first started with
procmail.
Back to your original question:
I'm very hesitant to blindly throw mail away.
I'd consider filing spam in a special folder which is
only review in a cursory fashion. That would go something
like this:
Note that I've added a trailing : (colon) to the start
of the recipe. This whole :x FLAGS business is a throwback
to an early procmail which required each recipe to specify
the number of patterns that followed the start of a recipe.
Later :0 came to mean "I didn't count them -- look at the
first character of each line for a token." This means that
procmail will can forward through the patterns and -- when
one matches -- it will execute ONE command line at the end
of the recipe (variable assignments don't count).
I'm sure none of that made any sense. So :0 starts a
recipe, the subsequent * ... lines provide a list of patterns,
and each recipe ends with a folder name, a pipe, or a
forward (a ! -- bang thingee). The : at the *END* of the :0 B
line is a signal that this recipe should use locking -- so that
to pieces of spam don't end up interlaced (smashed together)
in your "prob.spam" mail folder. I usually use MH folders
(which are directories in which each message takes up a single
file -- with a number for a filename). That doesn't require
locking -- you'd specify it with a folder like:
... (notice the "/." (slash, dot) characters at the end of this).
Also note that folder names don't use a path. procmail
defaults to using Mail (like elm and pine). You can set
the MAILDIR variable to over-ride that -- mine is set to
$HOME/mh. To write to /dev/null (where you should NOT
attempt to lock the file!) you must use a full path
(I suppose you could make a symlink named "null" in your
MAILDIR or even do a mknod but....). When writing procmail
scripts just think of $MAILDIR as your "current" directory
(not really but...) and either use names directly under it
(no leading slashes or dot/slash pairs) or use a full path.
The better answer (if you really want to filter
mail that looks like spam) is to write an auto-responder.
This should say something like:
The mail you've sent to foo has been trapped
by a filtering system. To get past the filter
you must add the following line as the first
line in the body of your message:
......
... Your original message follows:
......
... using this should minimize your risks. Spammers
rely on volume -- no spammer will look through thousands
of replies like this and manually send messages with the
requisite "pass-through" or "bypass" directive to all of
them. It's just not worth it. At the same time your
friends and business associates probably won't mind pasting
and resending (be sure to use a response format that
"keeps" the body -- since your correspondents may get
irritated if they have to dig up their original message for
you.
Here's where we can work the averages against the spammer.
He uses mass mailings to shove their message into our view
-- we can each configure our systems to require unique
(relatively insecure -- but unique) "pass codes" to reject
"suspicious" mail. Getting the "pass codes" on thousands
of accounts -- and using them before they are changed -- is
not a task that can be automated easily (so long as we each
use different explanations and formatting in our "bypass"
instructions.
More drastic approaches are:
I hope some of these ideas help.
Here is a copy of one of my autoresponders for your
convenience:
I realize this looks ugly. The first condition is to
respond only to requests that are under 1K in size.
(An earlier recipe directs larger messages to me).
The next two try to prevent reponses to mail lists and
things like "Postmaster@..." (to prevent some forms of
"ringing") and check against the "eXtended" (custom)
header that most procmail scripts use to identify
mail loops. The next one matches subjects of "procmail"
or "mailbot."
If all of those conditions are met than the message is
piped to a complex command (spread over four lines -- it
has the trailing "backslash" at the end of each of those --
to force procmail to treat it all as a single logical line:
This command basically breaks down like so:
... the two parenthese have to do with how the
data passes through the shell's pipes. Each set
allows me to group the output from a series of
commands into each of my pipes.
.... the formail command creates a mail header
the -r means to make this a "reply" and the -k
means to "keep" the body. The two -A parameters are
"adding" a couple of header lines. Those are enclosed
in quotes because they contain spaces.
... the echo command adds a "timestamp" to when
I received the mail. The `date` (backtick "date")
is a common shell "macro expansion" construct --
Korn shell and others allow one to use the $(command)
syntax to accomplish the same thing.
Now we close the inner group -- so formail's output --
and the echo's output are fed into my little awk
script: insert.doc. This just takes a parameter
(the -v file=) and scans its input for a blank line.
After the first blank line insert.doc prints the
contents of "file." Finally it then just prints
all of the rest of it's input.
Here's a copy of insert.doc:
... that's just three lines: the pattern matches any line
with nothing or just whitespace on it. INSERTED is a variable
that I'm using as a flag. When those to conditions are met
(a blank line is found *and* the variable INSERTED has not
yet been set to anything) -- we print a blank line, call
the system() function to cat the contents of a file -- whose
name is stored in the 'file' variable, and we set the
INSERTED flag. The '1' line is just an "unconditional true"
(to awk). It is thus a pattern that matches any input --
since no action is specified (there's nothing in braces on
that line) awk takes the default action -- it prints the
input.
In awk the two lines:
... and
... are basically the same. They both match
every line of input that reaches them and they
both just print that and continue.
... Back to our ugly procmail recipe. 'insert.doc'
has now "inserted" the contents of a doc file between
formail's header and the body of the message that was
"kept." So we combine all of that and pipe it into
the local copy of sendmail. procmail thoughtfully presets
the variable $SENDMAIL -- so we can use it to make our
scripts (recipes) more portable (otherwise they would
break when written on a system with /usr/lib/sendmail and
moved to a system that uses /opt/local/new/allman/sendmail
(or some silly thing like that)).
The switches on this sendmail command are:
... I'll leave it as an exercise to the reader to look
those up in the O'Reilly "bat" book (the "official" Sendmail
reference).
There are probably more elegant ways to do the
insertion. However it is a little messy that
our header and our "kept" body are combined in
formail's output. If we had a simple shell syntax
for handling multiple file streams (bash has this
feature -- but I said *simple*) then it would be
nice to change formail to write the header to one
stream and the body to another. However we also want
to avoid creating temp files (and all the hassles
associated with cleaning up after them). So -- this is
the shortest and least resource intensive that I've
come up with.
So that's my extended tutorial on procmail.
I'd like to thank Stephen R. van den Berg (SRvdB)
(creator of procmail), Eric Allman (creator of sendmail),
and Alan Stebbens (an active contributor to the procmail
mailing list -- and someone who's written some nice
extensions to SmartList).
Alan Stebbens' web pages on mail handling can be found
at:
http://reality.sgi.com/aks/mail
--
Jim
From: David Cook, david_cook@VNET.IBM.COM We have spoken before on this issue over the caldera-users list (which I
dropped because of too much crap).
I recently gave up on Caldera's ability to support/move forward and acquired
redhat 4.1.
All works well, except I cannot get uucico & cu to share properly the modem
under control of uugetty. Other comm programs like minicom and seyon have no
problem with it.
Both uucico and cu connect to the port and tell me that they cannot change
the flow control !? and exit.
If I kill uugetty, both uucico and cu work perfectly.
In your discussion on the caldera newsgroup of Nov 2/96 you don't go into the
details of your inbound connection, but you mention "mgetty" as opposed to
uugetty.
What works/why doesn't mine? By the way, I agree wholeheartedly with your rational for UUCP. Nobody else seems to
apreciate the need for multiple peer connections and the inherit security
concerns with bringing up an unattended TCP connection with an ISP.
Dave Cook, IBM Global Solutions.
The two most likely problems are:
lock files
or
permissions
There are three factors that may cause problems with
lock files: location, name, and format.
For lock files to work you must use the same device
names for all access to a particular device -- i.e. if
you use a symlink named 'modem' to access your modem
with *getty -- then you must use the same symlink for
your cu, uucico, pppd, minicom, kermit, seyon, etc.
(or you must find some way to force them to map the
device name to a properly named LCK..* file).
You must also configure each of these utilities to look
for their lock files in the same location -- /var/lock/
under Red Hat. This configuration option may need to be
done at compile time for some packages (mgetty) or it
might be possible to over-ride it with configuration
directives (Taylor UUCP) or even command line options.
The other things that all modem using packages have to
agree on is the format of the lock file. This is normally
a PID number of the process that creates the lock. It can
be in "text" (human readable) or "binary" form.
Some packages never use the contents of the lock file --
its mere existence is sufficient. However most Linux/Unix
packages that use device lock files will verify the validity
of the lock file by reading the contents and checking the process
status of whatever PID they read therefrom. If there is
"no such process" -- they assume that it is a "stale" lock
file and remove it.
I currently have all of my packages use text format and
the /dev/modem symlink to /dev/ttyS1 (thus if I move my
modem to /dev/ttyS2 or whatever -- say while migrating
everything to a new machine -- all I have to change is
the one symlink). My lock files are stored in /var/lock/
Permissions are another issue that have to be co-ordinated
among all of the packages that must share a modem. One
approach is to allow everyone write access to the modem.
This, naturally, is a security whole large enough to steer
an aircraft carrier through.
The most common approach is to make the /dev/ node owned
by uucp.uucp or by root.uucp and group writable. Then we
make all of the programs that access it SGID or SUID (uucp).
Here are the permissions I currently have set:
On the next installation I do I'll probably experiment
with tightening these up a little more. For example I
might try setting the sticky bit on the /var/lock directory
(forcing all file removals to be by the owner or root).
That might prevent some programs from removing stale
lock files (they would have to be SUID uucp rather than
merely SGID uucp).
'cu' and 'uucico' are both SUID and SGID because they
need access to configuration files in which passwords
are stored. Those are mode 400 -- so a bug in minicom
or kermit won't be enough to read the /etc/uucp/call
file (for example). uucico is started by root run
cron jobs and sometimes from a root owned shell at
the console. cu is called via wrapper script by members
of a modem group.
Things like pppd, diald, and mgetty are always exec'd by
root (or SUID 'root' wrappers). mgetty is started by
init and diald and pppd need to be able to set routing
table entries (which requires root). So they don't need
to be SUID anything. (If you want some users to be able to
execute pppd you can make it SUID or you can write a simple
SUID wrapper or SUID perl script. I favor perl on my home
system and I make the resulting script inaccessible (unexecutable)
by "other". At customer sites with multi-user systems I
recommend C programs as wrappers -- a conservative approach
that's been re-justified by recent announcements of new
buffer overflows in sperl 5.003).
Oddly enough ttyS2 is the null modem that runs into the
living room. I do a substantial portion of my writing
while sitting in my easy chair watching CNN and SF
(Babylon 5, Deep Space 9, Voyager that stuff).
Permissions are a particularly ugly portion of Unix
since we rightly don't trust SUID things (with all of the
buffer overflows, race conditions between stat() and open()
calls and complex parsing trickery (ways to trick embedded
system(), popen() and other calls that open a shell behind
the programmer's back -- and are vulnerable to the full range
of IFS, SHELL, alias, and LD_* attacks).
However I'm not sure that the upcoming Linux implementation
of ACL's will help with this. I really need to read more
about the planned approach. If it follows the MLS (multi-
layer security) model of DEC and other commercial Unix
implementations -- then using them make the system largely
unusable for general-purpose computing (i.e. -- cast them
solely as file servers).
From what I've read some of the problem is inherent in basing
access primarily on ID and "group member ship" (really an
extension of "identity"). For a long time I racked my brains
to try to dream up alternative access control models -- and
the only other one I've heard of is the "capabilities" of
KeyKOS, Multics, and the newer Eros project.
Oh well -- we'll see. One nice thing about having the
Linux and GNU project consolidating some much source code
in such a small number of places is that it may just be
possible to make fundamental changes to the OS design and
"fix" enough different package to allow some those changes
to "take" (attain a critical mass).
--
Jim
To: John D. Messina, messina@bellatlantic.net I was recently at the AIIM trade show in New York. There was nothing
for Linux there, but I happened to wander over to the cyber cafe that
was set up. I happened to be reading last month's Linux Gazette when a
Microsoft employee walked up behind me. He was excited to find someone
who was knowledgeable about Linux - he wanted to get a copy for himself.
This doesn't tell me whether or not the rumor is
"true" -- but it does suggest that it is an
"officially condoned leak." Even if I'd heard an
estimated ship date (I heard this back in Nov. or
Dec.) I wouldn't give it much credence.
(That is not MS bashing by the way --
I consider ship dates from all software
companies and groups -- even our own
Linus and company -- to be fantasies).
To be honest I didn't pursue the rumor. I asked
the gentlemem I spoke to what ActiveX provides that
CGI, SSI (server side includes), XSSI (extended
server side includes), FastCGI, SafeTCL, Java and
JavaScript don't. About the only feature they could
think of is that it's from Microsoft. To be honest
they tried valiantly to describe something -- but I
just didn't get it.
So, your message as prompted me to ask this question
again. Switching to another VC and firing up Lynx and
my PPP line (really must get that ISDN configured one
of these dasy) I surf on over to MS' web site.
After a mildly amusing series of redirects (their sites
seems to be *all* .ASP (active server procedures?) files)
I find my self at a reasonably readable index page. That's
hopeful -- they don't qualify for my "Lynx Hall of Shame"
nomination. I find the "Search" option and search on the
single keyword "Linux."
"No Documents Match Query"
... hmm. That would be *too* easy wouldn't it. So I search
on ActiveX:
"No Documents Match Query"
... uh-oh! I thought this "Search" Feature would search
massive lists of press releases and "KnowlegeBase" articles
and return thousands of hits. Obviously MS and I are
speaking radically different languages.
Let's try Yahoo!
So I try "+ActiveX +Linux."
Even more startling was the related rumor -- that
I heard at the same Java SIG meeting. The Microsoft
reps there announced Microsoft's intention to port
IE (Internet Explorer) to Unix. They didn't say which
implementations of Unix would be the recipients of this
dubious honor -- but suggested that Linux was under
serious consideration.
(We can guess that the others would include SCO, Solaris,
Digital, and HP-UX. Some of MS' former bed partners
(IBM's AIX) would likely be snubbed -- and more "obscure"
OS' (like FreeBSD???), and "outmoded" OS' like SunOS
are almost certainly to be ignored).
It appears that the plan is to port ActiveX to a few
X86 Unix platforms -- and use that to support an IE
port (I bet IE is in serious trouble without ActiveX))
They'll run the hype about this for about a year before
shipping anything -- trying to convince people to wait a
little longer before adopting any other technologies.
"No! Joe! Don't start that project in Java -- wait a
couple of months and those "Sun" and "Linux" users will
be able to use the ActiveX version."
Some Links on this:
Everybody who uses NetNews or E-Mail should read the little
essay on "Good Subject Lines."
A promising page which I didn't have time to properly
peruse is
There was alot of good info on Java, Linux, HTML,
Ada, TCL and many other topics. I wouldn't be surprised
if there was something about ActiveX somewhere below
this page. Sounds interesting and wholly unrelated to ActiveX.
Conclusion:
Microsoft's mumblings to Linux users about porting IE and
ActiveX to Linux is interesting. The mumbling is more
interesting than any product they deliver is likely to be.
I still don't know what ActiveX "does" well enough to
understand what "supporting ActiveX under Linux" would mean.
It seems that ActiveX is a method of calling OCX and DLL
code. That would imply that *using* ActiveX controls on
Linux would require support for OCS and DLL's -- which would
essentially mean porting all of the Windows API to work
under Linux.
Now I have alot of trouble believing that Microsoft will
deliver *uncompromised* support for Windows applications
under Linux or any other non-Microsoft OS.
Can you imaging Bill Gates announcing that he's writing a
multi-million dollar check to support the WINE project?
If that happens I'd suggest we call in the Air Force with
instructions to rescue the poor man from whatever UFO
snatched him -- and get the FBI to arrest the imposter!
What's amazing is that this little upstart collection of
freeware has gotten popular enough that the largest software
company in the world is paying any attention to it at all.
Given Microsoft's history we have to assume that any
announcement they make regarding Linux is carefully
calculated to offer them some substantial benefit in
their grand plan. That grand plan is to dominate the
world of software -- to be *THE* software that controls
everything (including your toaster and your telephone)
(and everyone???).
This doesn't mean that we should react antagonistically
to these announcements. The best bet -- for everyone
who must make development or purchasing plans for any
computer equipment -- is to simply cut through as much
of the hype as possible and ask:
What are the BENEFITS of the package
that is shipping NOW?
Don't be swayed by people who talk about FEATURES
(regardless of whether they are from from Microsoft,
the local used car lot, or anywhere else).
The difference between BENEFITS and FEATURES is simply
this --
Benefits are relevant to you.
The reason software publishers and marketeers in general
push "features" is because they are engaged in MASS
marketing. Exploring and understanding individual
set of requirements is not feasible in MASS marketing.
(Personally one of the features that I find to be a
benefit in the Linux market is the lack of hype. I
don't have to spend time translating marketese and
advertisian into common English).
I hope this answers your question. The short answers are:
Is it true (that MS is porting ActiveX to *ix)?
The rumor is widespread by their employees
-- but there are no "official" announcements
that can be found on their web site with
their own search engine.
When might we see it?
Who nows. Let's stick with NOW.
Finally let me ask this:
What would you do with ActiveX support under Linux?
Have you tried WABI? Does ActiveX work under Windows 3.1
and/or Windows 3.11? Would you try it under WABI?
What are your requirements (or what is your wishlist)?
(Perhaps the Linux programming community can
meet your requirements and/or fullfill your
wishes more directly).
From: buck, buck@athenet
I just installed Redhat 4.1 and was not sure what packages that I really
needed so I installed a lot just to be safe. The nice thing is that
Redhat 4.1 has the package manager that I can use to safely remove
items. Well seeing as how my installation was about 400 megs I really
need to clean house here to reclaim space. Is is save to remove the
developement packages and a lot of the networking stuff that I
installed. And what about the shells and window managers that I don't
use. I have Accelerated X so I know that I can get rid of a lot off the
X stuff. I need my space back!
Since you just installed this -- and haven't had much time
to put alot of new, unrecoverable data on it -- it should be
"safe" to do just about anything to it. The worst that will
happen if you trim out to much is that you'll have to re-install.
I personally recommend the opposite approach. Install the
absolute minimum you think is usable. Then *add* packages
one at a time.
I also strongly suggest creating a /etc/README file.
Create it *right after* you reboot you machine following
the install process. Make a dated note in there for
each *system* level change you make to your system.
(My rule of thumb is that anything thing I edited
or installed as 'root' is a "system" level change).
Most of my notes are in the form of comments near the top
of any config files or scripts that support them. Typical
notes in /etc/README would be like:
Notice that these are free form -- a date, and login
name (not ROOT's id -- but whoever is actualy doing
work as root). I maintain a README even on my
home machines.
The goal is to keep notes that are good enough that
I could rebuild my system with all the packages I
currently use -- just using the README. It tells me
what packages I installed and what order
I installed them in. It notes what things seemed
important to me at the time (like the note that
trying to start a kernel whose root filesystem is on
a SCSI disk requires that the kernel be compile with
that driver built-in -- easy to overlook and time consuming
to fix if you forget it).
Sometime I ask myself questions in the README -- like:
"Why is rnews throttling with this error:..."
(and an excerpt from my /var/log messages).
This is handy if you later find that you need to correlate
an anomaly on your system with some change made by your
ISP -- or someone on your network.
Of course you could succumb to the modern trend -- buy
another disk drive. I like to keep plenty of those
around. (I have about 62Mb of e-mail currently cached
in my mh folders -- that's built up since I did a fresh
install last August -- with a few megs of carry over from
my previous installation).
--
Jim
To: John E. (Ned) Patterson, jpatter@flanders.mit.edu,br>
As a college student on a limited budget, I am forced to comprimise
between Win95 and Linux. I use linux for just about everything, but
need the office suite under Win95 since I can't afford to buy
something for Linux. (Any recommendations you have for cheep
alternatives would be appreciated, but that is not the point of the
question.)
I presume you mean MS Office. (Caps mean a bit here).
I personally have managed to get by without a couple of
Office (Word or Excel) for some time. However I realize
that many of us have to exchange documents with So getting MS Office so you can handle .DOC and .XLS
(and maybe PowerPoint) files is only a venial sin in
the Church of Linux (say a few "Hail Tove's" and go in
peace).
As for alternatives: Applixware, StarOffice, CliqSuite,
Corel Application Suite (in Java), Caldera's Internet Office
Suite, and a few others are out there. Some of them can
do some document conversions from (and to??) .DOC format.
Those are all applications suites. For just spreadsheets
you have Xess, Wingz and others.
In addition there are many individual applications.
Take a look at the Linux Journal Buyer's Guide Issue for
a reasonably comprehensive list of commercial applications
for Linux (and most of the free was as well).
Personally I use vi, emacs (in a vi emulation mode -- to
run M-x shell, and mh-e), and sc (spreadsheet calculator).
Recently I've started teaching myself TeX -- and I have
high hopes for LyX though I haven't even seen it yet.
Unfortunately there is no good solution to the problem of
proprietary document formats. MS DOC and MS XLS files are
like a stranglehold on corporate America. I can't really
blame MS for this -- the competition (including the
freeware community) didn't offer a sufficiently attractive
alternative. So everyone seems to have stepped up to the
gallows and stuck their own necks in it.
"Owning" an ubiquitous data format is the fantasy of
every commercial software company. You're customers will
pass those documents around to their associates, vendors,
even customers, and *expect* them to read it. Obviously
MS is trying to leverage this by "integrating" their
browser, mailer, spreadsheet, and word processors together
with OLE, DSOM, ActiveX and anything else they can toss
together.
The idea is to blur everything together so that customers
link spreadsheets and documents into their web pages and
e-mail -- and the recipients are then forced to have the
same software. Get a critical mass doing that and
"everyone" (except a few fringe Unix weirdos like me)
just *HAS* to belly up and buy the whole suite.
This wouldn't be so bad -- but then MS has to keep revenues
increasing (not just keep them flowing -- but keep them
*increasing*). So we get upgrades. Each component of your
software system has to be upgraded once every year or two --
and the upgrade *MUST* change some of the data (a one way
conversion to the new format) -- which transparently makes
your data inaccessible to anyone who's a version behind.
Even that wouldn't be so bad. Except that MS also has its
limits. It can't be on every platform (so you can't access
that stuff from your SGI or your Sun or your HP 700 or your
OS/400). Not that MS *couldn't* create applications for
these platforms. However that might take away some of Intel's
edge -- and MS can't *OWN* the whole OS architecture on your
Sun, SGI, HP or AS/400.
But enough of that diatribe. Let's just say -- I don't
like proprietary file formats.
(note: you must use numeric GID and UID values here
-- mount would look them up by name!)
This will allow anyone in group 10 (wheel on my system)
to write to /mnt/c.
There are a few oddities in all of this. I personally
would prefer to see a version of 'mount' -- or an option
to 'mount' that would mount the target with whatever
permissions and modes the underlying mount point had
at mount time. In other words, as an admin., I'd like to
set the ownership and permissions on /mnt/c to something
like joeshmo user with a mode of 1777 (sticky bit set).
Then I'd use a command like:
Unfortunately I'm not enough of a coder to feel comfortable
make this change (yet) and my e-mail with the current
maintainer of the Linux mount (resulting from the last time
I uttered this idea in public) suggests that it won't come
from that source.
(While we were at it I'd also add that it would be nice
to have a mount -o asuser -- which would be like the
user option in that it would allow any user (with access
to the SUID mount program) to mount the filesystem. The
difference would be that the resulting mount point would be
owned by the user -- and the nodev, nosuid etc, options would
be enforced.)
Getting back to your question:
Another way to accomplish a similar effect (allowing
some of your users to put files on under you /mnt/Win95
directory) would be to create a /usr/Win95 directory --
allow people to write files into that and use a
script to mirror that over to the /mnt/Win95 tree.
(Personally I think the whole this is pretty dangerous
-- so using the -o gid=... is the best bet).
--
Jim
To: I have a client who would like to use the left arrow key to backspace
and erase characters to the left of the cursor. Is this possible? And
how? Thanks for an answer.
Read the Keyboard-HOWTO (section 5).
The loadkeys and xmodmap man pages, and the
Backspace-Mini-HOWTO are also related to this. It is
possible to completely remap your keys in Linux and in
X Windows. You can also set up keybindings that are
specific to bash (using the built in bind command) and
to bash and other programs that use the "readline"
library using the .inputrc file.
The Keyboard-HOWTO covers all of this.
--
Jim
To: Ronald B. Simon, rbsimon@anet.bna.boeing.com I have written several utility programs that I use all the time. I
would like to add them to either the Application or Utility "pull
down" menu of the Start menu. Could you address this in your Linux
Gazette article?
I assume you are referring to the menus for your
X "Window Manager."
Since you don't specify which window manager you're using
(fvwm, fvwm95, twm, gwm, ctwm, mwm, olwm, TheNextLevel ---
there are lots of wm's out there) -- I'll have to guess
that you're using fvwm (which is the default) on most
XFree86 systems. The fvwm95 (which is a modification of
fvwm to provide a set of menus and behaviors that is
visually similar to that of Windows '95) uses the same
file/menu format (as far as I know).
The way you customize the menus of almost any wm is to
edit (possibly creating) an rc file. For fvwm that would be
~/.fvwmrc
Here's an excerpt from mine (where I added the Wingz
demo):
... you'll have created your on submenu.
Most other Window Managers have similar features and
man pages to describe them.
--
Jim
To: Greg C. McNichol, greg_c_mcnichol@em.fcnbd.com I am new to LINUX (and NT 4.0 for that matter) and would like any and all
information I can get my hands on regarding the dual-boot issue. Any help
is appreciated.
More than you wanted to know about:
Booting Multiple Operating Systems
There are several mini-HOW-TO documents specifically
covering different combinations of multi-boot. Here's
some that can be found at:
http://www.linuxresources.com//LDP/HOWTO/HOWTO-INDEX.html
Personally I think the easiest approach to make
Linux co-exsist with any of the DOS derived OS'
(Win '95, OS/2, or NT) is to use Han Lerman's
LOADLIN package. Available at "Sunsite":
ftp://sunsite.unc.edu/pub/Linux/system/Linux-boot/lodlin16.tgz
(85k)
To use this -- start by installing a copy of DOS
(or Win '95). Be sure to leave some disk space
unused (from DOS/Win '95's perspective) -- I like
to add whole disks devoted to Linux.
Now install Linux on that 2nd, 3rd or nth hard drive --
or by adding Linux partitions to the unused portion of
whichever hard drives you're already using. Be sure to
configure Linux to 'mount' your DOS partition(s)
(make them accessible as parts of the Unix/Linux directory
structure). While installing be sure to answer "No"
or "Skip" to any questions about "LILO" (Feel free to
read the various HOW-TO's and FAQ's so you'll understand
the issues better -- I'd have to give a rather complete
tutorial on PC Architecture, BIOS boot sequence and
disk partitioning to avoid oversimplifying this last item)
Once you're done with the Linux installation find and
install a copy of LOADLIN.EXE. The LOADLIN package
is a DOS program that loads a Linux kernel. It can be
called from a DOS prompt (COMMAND.COM or 4DOS.COM) or
it can be used as a INSTALL directive in your CONFIG.SYS
(which you'd use with any of the multi-boot features
out there -- including those that were built into DOS
6.x and later). After installation you'd boot into DOS
(or into the so-called "Safe-Mode" for Windows '95) and
call LOADLIN with a batch file like:
(Note the value of your root= parameter must correspond
to the Linux device node for the drive and partition on
which you've installed Linux. This example shows the
second partition on the first IDE hard drive. The first
partition on the second IDE drive would be /dev/hdb1
and the first "logical" partition within an extended partition
of your fourth SCSI hard drive would be /dev/sdd5. The
PC Architecture specifies room for 4 partitions per drive.
Exactly one of those (per drive) may be an "extended" partition.
An extended partition may have an arbitrary number of
"logical" drives. The Linux nomenclature for logical drives
always starts at 5 since 1 through 4 or reserved for the
"real" partitions).
The root= parameter may not be necessary in some cases
since the kernel has a default which was compiled into
it -- and which might have been changed with the rdev
command. rdev is a command that "patches" a Linux kernel
with a pointer to it's "root device."
This whole concept of the "root device" or "root filesystem"
being different than the location of your kernel may be
confusing at first. Linux (and to a degree other forms
of Unix) doesn't care where you put you kernel. You can
put it on a floppy. That floppy can be formatted with a DOS,
Minix or ext2 filesystem -- or can be just a "raw" kernel
image. You can put your kernel on ANY DOS filesystem
so long as LOADLIN can access it.
LOADLIN and LILO are "boot loaders" they copy the
kernel into RAM and execute it. Since normal DOS
(with no memory managers loaded -- programs like EMM,
QEMM, and Windows itself) has no memory protection
mechanisms it is possible to load an operating sytem
from a DOS prompt. This is, indeed, how the Netware 3.x
"Network Operating System" (NOS) has always been loaded
(with a "kernel" image named SERVER.EXE). It is also
how one loads the TSX-32 (a vaguely VMS like operating
system for 386 and later PC's).
My my example RH2013.KRN is the name of a kernel file.
Linux doesn't care what you name it's kernel file. I
use the convention of naming mine LNXvwyy.KRN -- where
v is the major version number, w is the minor version and
yy is the build. LNX is for a "general use" kernel that
I build myself, RH is a kernel I got from a RedHat CD,
YGG would be from an Yggdrasil, etc).
One advantage of using LOADLIN over LILO is that can
have as many kernels and your disk space allows. You can
have them arranged in complex hierarchies. You can have as
many batch files passing as many different combinations of
of kernel parameters as you like. LILO is limited to
16 "stanzas" in its /lilo.conf file.
The other advantage of LOADLIN over LILO is that it is
less scary and hard to understand for new users. To them
Linux is just a DOS program that you have to reboot to get
out of. It doesn't involve any of that mysterious
"master boot record" stuff like a computer virus.
A final advantage of LOADLIN over LILO is that LOADLIN
does not require that the root file system be located
on a "BIOS accessible" device. That's a confusing
statement -- because I just tossed in a whole new
concept. The common system BIOS for virtually ALL
PC's can only see one or two IDE hard drives (technically
ST-506 or compatible -- with a WD8003 (???) or register
compatible controller -- however ST-506 (the old MFM and
RLL drives) haven't been in use on PC's since the XT)
To "see" a 3rd or 4th hard drive -- or any SCSI hard
drive the system requires additional software or firmware
(or an "enhanced BIOS"). There is a dizzying array of
considerations in this -- which have almost as many
exceptions. So to get an idea of what is "BIOS" accessible
you should just take a DOS boot floppy -- with no CONFIG.SYS
at all -- and boot off of it. Any drive that you can't see
is not BIOS accessible.
Clearly for the vast majority of us this is not a problem.
For the system I'm on -- with two IDE drives, two internal
SCSI drives, one internal CD reader, an external SCSI
hard drive, a magneto optical drive, a 4 tape DAT autochanger
and a new CD-Writer (which also doubles as a CD reader, of
course) -- with all of that it makes a difference.
Incidentally this is not an "either/or" proposition.
I have LILO installed on this system -- and I have
LOADLIN as well. LILO can't boot my main installation
(which is on the SCSI drives. But it can boot a second
minimal root installation -- or my DOS or OS/2 partitions.
(I'm not sure the OS/2 partition is still there -- I
might have replaced that with a FreeBSD partition at
some point).
Anyway -- once you have DOS and Linux happy -- you can
install NT with whatever "dual boot" option it supports.
NT is far less flexible about how it boots. So far as
I know there is no way to boot into DOS and simply
run NT.
It should be noted that loading an OS from DOS (such as
we've described with LOADLIN, or with FreeBSD's FBSDBOOT.EXE
or TSX-32's RUNTSX.EXE) is a ONE WAY TRIP! You load them
from a DOS prompt -- but DOS is completely removed from
memory and there is no way to exit back to it. To get back
to DOS you much reboot. This isn't a new experience to
DOS users. There have been many games, BBS packages and
other pieces of software that had not "exit" feature.
(In the case of Netware there is an option to return to
DOS -- but it is common to use an AUTOEXEC.NCF (netware
control file) that issues the Netware command REMOVE DOS
to free up the memory that's reserved for this purpose).
In any event those mini-HOWTO's should get you going.
The rest of this is just background info.
--
Jim
To: Brian Justice I was browsing the web and noticed your web page on Linux. I am not
familar with Linux but have an ISP who uses the software on their
server.
I was wondering if anyone at your organization knew of any problems with
I'm the only one at my organization -- Starshine is a
sole proprietorship.
Pentium notebooks with 28.8 modems connecting to Linux 1.2.13 internet
servers that would do the following:
It sounds like you're saying that the Pentium Notebook
is running some other OS -- like Windows or DOS and that
it is using a PCMCIA modem to dial into another system
(with unspecified modem and other hardware -- but which
happens to run Linux).
If that's the case then you're troubleshooting the
wrong end of the connection.
First identify which system is having the problem --
use the Pentium with the "piecemeal" (PCMCIA) modem to
call a BBS or other ISP at 28.8. Try several.
Does your Pentium sytem have problems with all or most of them?
If so then it is quite likely a problem with the combination
of your Pentium, your OS, and your piecemeal modem.
Try booting the Pentium off of a plain boring copy of DOS
(with nothing but the PCMCIA drivers loaded). Repeat the
other experiments. Does it still fail on all or most of
them?
If so then it is probably the PCMCIA drivers.
Regular desktop 28.8 modems seem to work fine. I have a few 14.4 PCMCIA
modems that seem to work fine.
Would incorrect settings cause this? Or could this be a program glitch
that doesn't support these 28.8 modems due to the low level of the
release? I noticed their are higher versions of Linux out there.
"incorrect settings" is a pretty vague term. Yes. The
settings on your hardware *AND THEIRS* and the settings
in your software *AND THEIRS* has to be right.
Yes. The symptoms of incorrect settings (in the server
hardware, the modem hardware, the OS/driver software or the
applications software *AT EITHER END OF THE CONNECTION* could
cause sufficiently sporadic handshaking that one or the other
modem in a connection "gives up" and hangs up on the other.
The BIG question is "Have you heard of any 28.8 PCMCIA modem problems
with Linux internet servers? " If so, could you drop me a few lines so
I can talk this over with my ISP. If not , do you know of any other
sites or places I can check for info about this subject.
I've heard of problems with every type of modem for every
type of operating system running on every platform.
None of them has been specific to PCMCIA modems with
Linux. I've operated a couple of large BBS' (over a 100
lines on one and about 50 on the other) and worked with
a number of corporate modem pools and remote access servers.
I don't understand why your ISP would want a note from
me before talking to you.
It sounds like your asking me to say:
"Oh yeah! He shouldn't be running Linux there!"
... or to say"
"1.2.13! That fool -- he needs to upgrade to 2.0.30!"
... so you can then refer this "expert" opinion to some
support jockey at your ISP.
Now if you mean that your ISP is running Linux 1.2.13
on a Pentium laptop with PCMCIA modems -- and using that
as a server for his internet customers -- I'd venture to
say that this is pretty ludicrous.
If you were running Linux on your laptop and having problems
with your PCMCIA modem I wouldn't be terribly surprised.
PCMCIA seems to be an unruly specification -- and the designers
of PCMCIA equipment seem to have enough trouble in their
(often unsuccessful) attempts to support simple DOS and
Windows users. The programmers that contribute drivers for
Linux often have to work with incomplete or nonexistent
specifications for things like video cards and chipsets --
and PCMCIA cards of any sort.
I mostly avoid PCMCIA -- it is a spec that is ill-suited
to any sort of peripheral other than *MEMORY CARDS*
(which is, after all, what the letters MC stand for in this
unpronounceable stream of gibberish that I dubbed "piecemeal"
a few years ago).
Any help would be appreciated.
I could provide much better suggestions if I had more
information about the setup. I could even provide
real troubleshooting for my usual fees.
However, if the problem really is specific to your
connections with your ISP (if these same 28.8 "piecemeal"
modems work fine with say -- your Cubix RAS server or
your favorite neighborhood BBS), then you should probably
work with them to resolve it (or consider changing
ISP's).
As a side note: Most ISP's use terminal servers on their
modem banks. This means that they have their modems plugged
into a device that's similar to a router (and usually made be
a company that makes routers). That device controls the
modems and converts each incoming session into an rlogin or
"8-bit clean" telnet session on one more more ethernet
segments.
Their Unix or other "internet servers" don't have any
direct connections to any of the normal modems. (Sometimes
an sysadmin will connnect a modem directly to the serial ports
of one or more of these systems -- for administrative access
so they can call on a special number and bypass the terminal
servers, routers, etc).
It's possible that the problem is purely between the two
brands of modems involved. Modern modems are complex
devices (essentiall dedicated microcomputers) with substantial
amounts of code in their firmware. Also the modem business
sports cutthroat competition -- with great pressure to add
"enhancements," a lot of fingerpointing, and *NO* incentive
to share common code bases for interoperability's sake.
So slight ambiguities in protocol specification lead to
sporadic and chronic problems. Finally we're talking about
analog to digital conversion at each end of the phone line.
The phone companies have *NO* incentive to provide good
clean (noise free) phone lines to you and your ISP. They make
a lot more money on leased lines -- and get very little
complaint for "voice grade" line quality.
The problem is that none of us should have been using modem
for the last decade. We should have all had digital signals
coming into our homes a long time ago. The various phone
companies (each a monopoly in it's region -- and all stemming
from a small set of monopolies) have never had any incentive
to implement this, every incentive NOT to (since they can charge
a couple grand for installationn and several hundred per month
on the few T1's they to do sell -- and they'll never approach
that with digital lines to the home. They do, however, have
plenty of money to make their concerns heard in regulatory
bodies throughout the government. So they cry "who's going
to pay for it?" so loudly and so continuously that no one can
hear the answer of the American people. Our answer should be
"You (monopolies) will pay for it -- since we (the people)
provided you with a legal monopoly and the funds to build OUR
copper infrastructure" (but that answer will never be heard).
If you really want to read much more eloquent and much
better researched tirades and diatribes on this topic --
subscribe to Boardwatch magazine and read Jack Rickard
(the editor) -- who mixes this message with new information
about communications technology every month.
--
Jim
The bash shell has many features that are
sufficiently obscure you almost never see them used. One of
the problems is that the man page offers no examples.
Here I'm going to show how to use some of these features to do
the sorts of simple string manipulations that are commonly
needed on file and path names.
In traditional Bourne shell programming you might see references
to the basename and dirname commands.
These perform simple string manipulations on their arguments. You'll
also see many uses of sed and awk or
perl -e to perform simple string manipulations.
Often these machinations are necessary perform on lists of filenames
and paths. There are many specialized programs that are conventionally
included with Unix to perform these sorts of utility functions:
tr, cut, paste, and join.
Given a filename like /home/myplace/a.data.directory/a.filename.txt
which we'll call $f you could use commands like:
Despite their simplicity these two commands are used frequently in
shell programming because most shells don't have any built-in string
handling functions -- and we frequently need to refer to just the
directory or just the file name parts of a given full file specification.
Usually these commands are used within the "back tick" shell operators
like TARGETDIR=`dirname $1`. The "back tick" operators
are equivalent to the $(...) construct. This latter construct
is valid in Korn shell and bash -- and I find it easier to read
(since I don't have to squint at me screen wondering which direction the
"tick" is slanted).
Naturally you can call on sed, awk, TCL or
perl for more flexible and complete string handling.
However this can be overkill -- and a little ungainly.
So, bash (which long ago abandoned the "small is beautiful"
principal and went the way of emacs) has some built in
syntactical candy for doing these operations. Since bash
is the default shell on Linux systems then there is no reason not to
use these features when writing scripts for Linux.
The bash man page is huge. In contains a complete
reference to the "readline" libraries and how to write a .inputrc
file (which I think should all go in a separate man page) -- and a
run down of all the csh "history" or bang! operators
(which I think should be replaced with a simple statement like:
"Most of the bang! tricks that work in csh work the
same way in bash").
However, buried in there is a section on Parameter Substitution
which tells us that $foo is really a shorthand for ${foo} which is
really the simplest case of several ${foo:operators} and similar
constructs.
Are you confused, yet?
Here's where a few examples would have helped. To understand the
man page I simply experimented with the echo command and several
shell variables. This is what it all means:
It's important to understand that these use shell "globbing"
rather than "regular expressions" to match these patterns.
Naturally a simple string like "txt" will match sequences of exactly
those three characters in that sequence -- so the difference between
"shortest" and "longest" only applies if you are using a shell
wild card in your pattern.
A simple example of using these operators comes in the common
question of copying or renaming all the *.txt to change the
.txt to .bak (in MS-DOS' COMMAND.COM that would be REN *.TXT *.BAK).
This is complicated in Unix/Linux because of a fundamental difference
in the programming API's. In most Unix shells the expansion of a
wild card pattern into a list of filenames (called "globbing") is done
by the shell -- before the command is executed. Thus the command normally
sees a list of filenames (like "foo.txt bar.txt etc.txt") where DOS
(COMMAND.COM) hands external programs a pattern like *.TXT.
Under Unix shells, if a pattern doesn't match any filenames the parameter
is usually left on the command like literally. Under bash
this is a user-settable option. In fact, under bash you can
disable shell "globbing" if you like -- there's a simple option to do this.
It's almost never used -- because commands like mv, and
cp won't work properly if their arguments are passed to them
in this manner.
However here's a way to accomplish a similar result:
I generally just take a whole different approach. Rather than trying
to use cp to make a backup of each file under a slightly
changed name I might just make a directory (usually using the date
and my login ID as a template) and use a simple cp command
to copy all my target files into the new directory.
Another interesting thing we can do with these "parameter expansion"
features is to iterate over a list of components in a single variable.
For example, you might want to do something to traverse over every
directory listed in your path -- perhaps to verify that everything
listed therein is really a directory and is accessible to you.
Here's a command that will echo each directory named on your path
on it's own line:
Another case might be where you'd want to traverse a list of directories
that were all part of a path. Here's a command pair that echos each
directory from the root down to the "current working directory":
Of course, its important to realize that this is not the only, or
necessarily the best method to parse a line or value into separate
fields. Here's an example that uses the old IFS variable
(the "inter-field separator in the Bourne, and Korn shells as well as
bash) to parse each line of /etc/passwd and extract
just two fields:
After that we see a typical while read loop -- where we
read values from each line of input (from /etc/passwd into
seven variables per line. This allows us to use any of these fields
that we need from within the loop. Here we are just using the
echo command -- as we have in the other examples.
My point here has been to show how we can do quite a bit of
string parsing and manipulation directly within bash
-- which will allow our shell scripts to run faster with less overhead
and may be easier than some of the more complex sorts of pipes and
command substitutions one might have to employ to pass data to the
various external commands and return the results.
Many people might ask: Why not simply do it all in perl?
I won't dignify that with a response. Part of the beauty of Unix is
that each user has many options about how they choose to program something.
Well written scripts and programs interoperate regardless of what particular
scripting or programming facility was used to create them. Issue the
command file /usr/bin/* on your system and and you may be
surprised at how many Bourne and C shell scripts there are in there
In conclusion I'll just provide a sampler of some other
bash parameter expansions:
Oddly enough -- while it is easy to redirect the standard error
of processes under bash -- there doesn't seem to be an
easy portable way to explicitly generate message or redirect output
to stderr. The best method I've come up with is to use
the /proc/ filesystem (process table) like so:
I believe there's strong potential now for the growing LUG phenomenon to
intertwingle with both the Linux Documentation Project and the Linux support
network of the c.o.l.* newsgroups and create the next "level" of support for
Linux. The net result of this would be a self-documenting, technical
support, training and social network on an Internet-wide scale (perhaps some
would say that's what it already is -- then I mean it would be the same only
exponentially better). Right now, I see a lot of work (documentation,
debugging, support) being duplicated. If these efforts could be combined
(LUG + LDP + c.o.l.*), it would eliminate a lot of this excess work; the net
result would would be greater than its parts, a synergy.
Many LUGs give demos and post the notes on their web servers. That
information is diffused across many obscure sites, but bringing these
efforts together with the LDP folks, I wonder if a new breed of HOWTOs
(DEMOs?) could be created; a common indexing scheme could have a list of all
demos or tutorials ever given at any LUG, both searchable and listed by
subject or other criteria.
And while the c.o.l.* newsgroups are invaluable for a great many things,
sometimes local help is preferable. With the right organization,
community-based LUGs could be the first stop for a Linux user's questions
and problems, with an easy forwarding mechanism to go up a chain to be
broadcast to the next larger bioregion, then continent-wide and finally, if
the question is still not answered, world-wide.
By not duplicating the work, we'll be freeing up our time to develop even
more things than the current rate, plus the increased support net, replete
with documentation and local support, will allow for a greater user base.
More ideas could be implemented to strengthen this base, such as
"adopt-a-newbie" programs. For instance, there's a guy in town named Rockie
who's in this rock band called Craw; I once saw in a zine he published that
he was starting a volunteer initiative to collect old donated computer
equipment, refurbish them, and make them available to musicians who
otherwise wouldn't be able to use computers. Why not take that a step
further and make them Linux boxes? Not only would you get a non-corporate,
rock-solid OS, but you'd have an instant support network in your own town.
This kind of community-based approach seems the best way to "grow" GNU/Linux
at this stage.
This community-based LUG network would be capable of handling any and all
GNU/Linux support, including the recently-discussed Red Hat Support
Initiative, as well as Debian support, Slackware support, etc. It's above
and beyond any single "distribution" and in the interest of the entire Linux
community.
I think the key to all this is planning. It need not happen all at once.
It's happening already, with local LUGs making SQL databases of LUG user's
special interests and/or problems, and their own bioregional versions of the
Consultants-HOWTO, etc. What is needed most of all is a formal protocol, a
set of outlines and guidelines, that all LUGs, when ready, can initiate --
from technical details such as "What format to develop the database?" to
everything else. It need not be centralized -- like the rest of Linux, it
will probably come together from all points in the network -- but our base
is large enough now that taking a look at the various Linux efforts from a
biological and geographical community-based standpoint, and re-coordinating
from there, is something that only makes sense.
Copyright (C) 1997 Michael Stutz; this information is free; it may be
redistributed and/or modified under the terms of the GNU General Public
License, either Version 2 of the License, or (at your preference) any later
version, and as long as this sentence remains.
I've been in the habit for years of building my own PCs, partly for
the cost savings, partly because I'm a geek, and partly (mostly), because
I've found the best way to tune a system exactly to my liking is to pick
only and exactly the parts that I need. Once I discovered Linux a couple of
years ago, I had the perfect match for my hobby. I'll lay out on these
pages what I've learned by trial and error, what to look for in a DIY
computer, and how to best mix-and-match according to your desires and budget.
For starters, the key to building your own system is to find the best sources
for parts. Computer Shopper is probably the DIY bible, crammed with
mail--order ads from companies selling parts. I prefer the face-to-face
purchase, myself. Most of my buying takes place at the ubiquitous
"computer flea markets" that take place every month or so in most
major metropolitan areas. In Greater Boston (my stomping grounds), there are
two major shows put on; KGP and Northern. These are held in halls around the
metro area, and there's one every few weeks within driving distance.
Typically, many vendors attend all the shows in a given area.
Most vendors are pretty reliable in my area (your mileage may vary), and are
usually willing to play the deal game. This is where your objectives come
into play.
Fortunately, Linux isn't too picky about the hardware it runs on--just
about any old CPU will suffice. The major areas of concern are in deciding
whether or not to use IDE or SCSI drives and what type of video card to
install. Assuming that you will use a standard Linux
distribution, the screaming video card that plays Doom at warp speed under DOS
may not be supported by Xfree 86. For instance, the immensely popular Trident
9440 VGA chipset only recently became supported by X, though it shipped with
Windows 95and OS/2 drivers. Anyhow, in making these decisions, I have a
simple checklist:
The answers to these questions should help determine what you need to
purchase. First off, let's cover processor type/speed and RAM. Linux is
somewhat more efficient in its consumption of system resources than DOS (or
pretty much any other Intel OS), so you may not necessarily need the screaming
Pentium 200 that you need for your Windows 95 system. In the Pentium class
processors, currently the 100 and 133 MHz Pentiums are the best values in
bang-for-the-buck specs. Both chips are well under $200, and the
100 MHz processor is close to $100. I tend to suggest those processors that
operate on a 66 MHz motherboard bus clock (like the above two chips--the P166
and P200 are also in that category). Generally speaking, the faster clock
speed of the Pentium 120 and 150 are offset by the slower 60 MHz bus and
higher price. A good PCI motherboard to accompany the chip costs about
$100 to $150. Stick with boards that use the Intel chipset for safest results,
though I have had good luck with other vendors.
If you don't need to go Pentium class, there are some bargains out there.
AMD makes some very good 486 chips, running at up to 120 MHz. This is about
equivalent in horsepower to the original Pentiums, but without the math
errors. The most recent system I built uses a hybrid motherboard (one older
VL-bus slot, 4 PCI slots), and has an AMD 5x86-133 chip. This processor is
kind of a cross between a 486 and a Pentium, and competes very well with the
Pentium Overdrive upgrades that Intel sells to 486 owners. The 5x86's
performance is roughly on a par with a Pentium-90, and motherboard/processor
combined cost roughly $100 (as opposed to about $150 for the Overdrive itself).
Basically; you can factor out the price/performance scale like this:
When you buy the motherboard, there is another factor that has recently become
worth considering: what form factor do you use? Newer Pentium and Pentium
Pro-based motherboards are often available in the ATX form factor.
The board is easier to service, and the cases are easier to take apart. ATX
boards and cases are a little tougher to find, but there is no real cost
difference between ATX and the traditional Baby-AT form factor, so
you may wish to consider the ATX alternative at purchase time.
If you buy the motherboard and case from the same vendor, often they will
mount it in the case for you. If you do it ourself, be careful to make sure
that the power supply is properly connected, both to the motherboard and to
the power switch. Power supplies have two keyed connectors attaching them to
the motherboard. It is difficuly, but not impossible, to wire them wrong (I
have a friend who did), so make sure the black wires on the power leads are
touching on the inside:
ADD DIAGRAM HERE
The motherboard also should be connected to the case with at least two
spacers that screw down in addition to all the plastic posts that will be in
the case kit. This insures that cards fit properly, and keeps the board
stable.
Besides the processor/motherboard combination, there are other performance
issues, of course. RAM is finally cheap enough that you should buy at least
16 MB worth (about $100 at current street prices). Linux will run OK in 8 MB
(and even 4 MB is OK for text-based work), but why scrimp there when it costs
so little to do it right? If you buy from a show vendor, make sure they test
it in front of you. Any reputable vendor has their own RAM tester.
Generally, there is no real price difference between conventional fast-page
RAM and the slightly faster EDO variety, but make sure your motherboard uses
the type of RAM you're buying. Most better motherboards will happily
auto-detect the type of RAM you use and configure themselves correctly. But
you can't mix, so make sure you only install one type, whatever that is.
Newer Pentium chipsets support the newer SDRAM, which promises even more
speed. I have not yet tried it in a system, so I cannot tell you whether or
not that is so. Buy 32 MB if you can afford it--you won't regret it.
There's also the IDE-SCSI decision. IDE interfaces are built into most
modern motherboards, so it costs nothing extra. And IDE hard drives are a
little cheaper, and IDE CD-ROMs are fast, cheap (under $80 for a 4x drive),
and easy to set up. But the controllers only support four devices total (two
ports, with two devices each), and each IDE channel is only as fast as the
slowest device on it (meaning you really can only have two hard drives, and
the CD-ROM has to go on channel 2). And modern multitasking OSs like
Linux can't get their best performance out of IDE. But it's cheap
and easy. SCSI is higher performance, and has none of IDE's restrictions
(up to 7 devices per controller, no transfer rate limit beyond the
adapter's), but the controller will set you back $70 (for a basic Adaptec
1522) to $200 (a PCI controller) plus. The drives don't cost much more,
and you can only get the highest performance drives in SCSI versions. SCSI
CD-ROM drives are a little harder to find, but the basic 4x drive will only
cost you about $125. And SCSI tape drives (you were planning to back up your
data, weren'>t you?), are much easier to install and operate than their
non-SCSI counterparts (faster, too). I'd say the decision is one to be
made after you've priced the rest of the system out. If you can afford
it, SCSI will make for a better system in the long run.
The video card decision is also an important one. The critical part of this
decision is picking a card that uses a chipset (the actual brains of the card)
which is supported by XFree86, the standard Linux XWindows with most
distributions. A few distributions (Caldera, Red Hat) ship with commercial X
implementations that have a little more flexibility in video support. I find
S3-based video cards to be the most universally supported--the S3 driver in
XFree86 is very solid and works even with most of the generic, no-name video
cards on the market. The S3 cards generally have a large (about 1.5" x
1.5") chip with the S3 brand name prominently displayed on it. Diamond
and Number Nine make extensive use of S3 chips in their video card lines, to
name a couple of brands. Among other SVGA chipset makers, Cirrus and Trident
are also well-supported. Only the latest X versions include support for the
popular Trident 9440 chips, so be careful before buying a video card with that
chipset. XFree86 includes a very complete readme with the status of support
for most video cards/chipsets, so consult it if you have any questions.
Your sound card (if you want one) is a relatively simple decision. The
SoundBlaster 16 is the defacto standard for sound cards, and is supported by
virually all software. Some motherboards even include the SB16 chipset on
them. If at all possible, buy your card in a jumpered version, rather than
the SoundBlaster 16 Plug-and-Play that is popular today. Most vendors have
jumpered versions available. There are also SB16-compatible cards out on the
market, and they are definitely worth considering. Expect to pay around $80
for your sound card.
Possibly the choice that'll get me in the most trouble is the Ethernet
card selection (if your system is going on a LAN). A Novell NE2000 clone is
the cheapest choice you can make (the clones cost around $20), but most clones
will hang the machine at boot time if the kernel is probing for other Ethernet
card brands when the NE2000 is set to its default address of 300h. The
solution is to either boot from a kernel with no network support (then
recompile the kernel without the unneeded drivers), or to move the address of
the NE2000 to another location. I've used 320h without problems to avoid
this hang.
But the best way around the problem is to use a major-brand card. I currently
rely on 3Com's EtherLink III series cards (the 3C5x9), which are
universally supported, and software-configurable (from DOS, so keep a DOS
floppy around). It's available in ISA or PCI versions, ISA being
cheaper. This card costs around $90 from most vendors. I know that's
more expensive than some motherboards, but it's a worthwhile investment.
If you are using dial-up access to the Internet instead (or just want a modem
anyways), you can approach buying a modem with two alternatives. If your
motherboard has built-in serial ports (almost all the non-VL bus boards do),
then you could buy an external modem. I prefer them to internal modems, since
the possibility of setting an address incorrectly is then gone, ad you can
always tell if it is working from the status lights on the front of the modem.
Internal modems generally cost a little less, but there's a greater risk
of accidentally creating an address or interrupt conflict in the process of
installing it. An additional problem is that many modems sold now are
plug-and-play compatible. Unless you're already running Windows 95,
P&P is a scourge on the Intel computing world (Macs do P&P in a
fashion that actually works). Because most Intel-based OSs need to know
the interrupt and memory location of peripherals at boot time, any inadverdent
change caused by a P&P device can adversely impact the boot process.
Linux can find many devices regardless (SCSI controllers, most Ethernet
cards), but serial ports and sound devices are hard-mapped to interrupts at
the OS level. So try to make sure that any such devices can be operated in a
non-P&P mode, or in the case of modems, buy an external one if possible to
avoid the situation entirely.
Remember, there are really two bottom-line reasons to build your Linux box
yourself. One is to save money (and I hope I've shown you how to do
that), but the real main reason is to have fun. Computing is a fun hobby, and
building the system yourself can be a fun throwback to the early days when a
computer was bought as a bag of parts and a schematic. I've been
building machines like this for several years, and never had trouble--not to
mention that I've gotten away with bringing in a lot of stuff under my
wife's nose by buying them a part at a time! (Oops, the secret's out)
So, for your next computer, give homebrewing a whirl. It'ss
easier than you think, and what better companion for a free, home-brewed OS
than a cheap, home-brewed PC?
Removing temporary files left over in your /tmp directory,
is not as easy as it looks like. At least not on a multi-user system that's
connected to a network. If you do it the wrong way, you can leave your system open to attacks
that could compromise your system's integrity. So, you have your Linux box set up. Finally, you have installed everything
you want, and you can have some fun! But wait. Free disk space is slowly
going down. So, you start looking where this disk space is going to. Basically,
you will find the following disk hogs: Of course, there are others, but in this article, I'll concentrate on
these three, because you normally don't lose data when you erase the contents.
At the most, you will have to wait while the files are regenerated. Digging through a few man pages, you come up with something like this:
find /var/catman -type f -atime 7 -print | xargs -- rm -f -- This will remove all formatted man pages that have not been read for
7 days. The find command makes a list of these, and sends them
to the xargs. xargs puts these files on the command line,
and calls rm -f to delete them. The double dashes are there so
that any files starting with a minus will not be misinterpreted as options. (Actually, in this case, find prints out full path names, which are
guaranteed to start with a /. But its better to be safe than sorry.) This will work fine, and you can place this in your crontab file or
one of your start-up scripts. Note that I used /var/catman in the previous example. You might
be thinking ``So, why not use it for /tmp?'' There is a good reason
for this. Let me start by elaborating on the difference between /var/catman
and /tmp directories. (The situation for /var/tmp is
the same as for /tmp. So you can change all instances of /tmp
by /var/tmp in the following text.) If you look at the files in /var/catman, you will notice that
all the files are owned by the same user (normally man). This
user is also the only one who has write permissions on the directories.
That is because the only program that ever writes to this directory tree
is man . Let's look at /usr/bin/man: (Notice the two letters `s' in the first column.) The program is running setuid man, i.e., it takes the identity and privileges
of this `user'. (It also takes the group privileges, but that is not really
important in our discussion.) man is not a real user: nobody will
ever log in with this identity. Therefore, man (the program) can write
to directories a normal user cannot write to. Because you know all files in the directory tree are generated by one
program, it is easy to maintain. In /tmp, we have a totally different situation. First of all,
the file permissions: We can see that everyone can write to this directory: everyone
can create, rename or delete files and directories here. There is one limitation: the `sticky bit' is switched on. (Notice the
t at the end of the first column.) This means a user can only delete or
rename files owned by himself. This prohibits users peskering each other
by removing the other one's temporary files. If you were to use the simple script above, there are security risks
involved. Let me repeat the simple one-line script from above: Suppose there is a file /tmp/dir/file, and it is older than
7 days. By the time find passes this filename to xargs, the
directory might have been renamed to something else, and there might even
be another directory /tmp/dir. (And then I didn't even mention the possibility of embedded
newlines. But that can be easily fixed by using -print0 instead of
-print.)
All this could lead to a wrong file being deleted, Either
intentionally or by accident. By clever use of symbolic links, an
attacker can exploit this weakness to delete some important system
files.
For an in-depth discussion of the problem, see the Bugtraq mailing
list archives. (Thread ``[linux-security]
Things NOT to put in root's crontab''). This problem is inherently linked with find's algoritm: there can be
a long time between the moment when find generates a filename internally
and when it is passed on to the next program. This is because find recurses
subdirs before it tests the files in a particular directory. A first idea might be: find ... -exec rm {} \; but unfortunately, this suffers from the same problem, as the `exec'
clause passes on the full pathname. In order to solve the problem, I wrote this perl
script , which I named cleantmp. I will explain how it works, and why it is safer than the aforementioned
scripts. First indicate I'm using the File::Find module. After this statement,
I can call the &find subroutine. Then do a chroot to /tmp. This changes the root directory for
the script to /tmp. It will make sure the script can't access
any files outside of this hierarchy. Perl only allows a chroot when the user is root. I'm checking for this
case, to facilitate testing. Then we come to these lines: &find(\&do_dirs, $root); Here, I let the find subroutine recurse through all the subroutines
of /tmp. The functions do_files and do_dirs are called for each file found.
There are two passes over the directory tree: one for files, and one for
directories. Now we have the function do_files. Basically, this is the output of the find2perl program, with a little
changes. This routine is called with $_ set to the filename under inspection,
and the current directory is the one in which it resides. Now let's see
what it does. (In case you don't know perl: the && operator short-circuits,
just like in C.) The removefile subroutine merely tests if the $test flag is set, and
if not, deletes the file. The do_dirs subroutine is very similar to this one, and I won't go into
the details. I use the access time to determine the file's age. The reason for
this is simple. I sometimes unpack archives into my /tmp directory.
When it creates files, tar gives them the date they had in the archive
as the modification time. In one of my earlier scripts, I did test on
the mtime. But then, I was looking in an unpacked archive, at the same
time when cron started to clean up. (Hey?? Where did my files go?)
As I said before, the script checks for some special files (and
also directories in do_dirs). This is because they are important for
the system. If you have a separate /tmp partition, and have quota
installed on it, you should also check for quota's support files -
quota.user and quota.group. The script also generates a list of all deleted files and directories.
If you don't want this output, send the output to /dev/null. The main difference with the find constructions I have shown before
is this: the file to be deleted is not referenced by its full pathname.
If the directory is renamed while the script is scanning it, this doesn't
have any effect: the script won't notice this, and delete the right files.
I have been thinking about weaknesses, and I couldn't find one. Now
I'm giving this to you for inspection. I'm convinced that there are no
hidden security risks, but if you do find one, let me know.
If you've been experimenting with linux, reading all the docs you can
get your hands on, downloading software to try, and generally cleaning up
after the inevitable ill advised rm as root, you are probably starting to
get enough confidence in linux to use it to do more than browse the
internet. After all, why use Gates when you can jump the fences?
This month I'm going to discuss some strategies for damage control, and
how you can safely upgrade without losing valuable files and
configurations, as well as some more general scouting around the
filesystem.
If you have your entire linux installation on one partition, or partition,
you could be putting your files and accmulated data in jeopardy as well as
making the business of upgrading more difficult.
I understand that some distributions, notably Debian, are capable of
upgrading any part of the system's component software without a full
install, but I'm running Slackware, and it's generally recommended that
when certain key system components are upgraded, a full reinstall is the
safest way to avoid conflicts between old and new parts. What to do when
the time comes can be much simpler if you have installed at least your
/home direcory on a separate partition.
When you do a fresh install you are asked to describe mount points for
your partitions. You are also asked if you want to format those
partitions. If your /home directory doesn't contain much in the way of
system files you can opt to skip formatting it, thereby reducing the
chance that you'll have to use your backup to recover lost files in those
directories. No, I'm not suggesting tht you don't have to backup your
/home or other personal files, since there is no reliable undelete for
linux that I'm aware of at this time. However, if you are just
experimenting with linux and using a separate OS to do your important
work and it's located on another disk, you may not feel to compelled to
backup much in the way of linux files. Sooner or later though, if you are
committed(or ought to be :) ) enough to linux to drop the other system,
you WILL want to rethink that omission.
When you format a floppy disk in MSDOS you do several operations in one
fell swoop. You erase files, line up the tracks, sectors, etc, and install
a MSDOS compatible filesystem. Another thing to recognize is that MS
mounts the floppy drive as a device, while in linux the device is mounted
as a part of the filesystem, to a specific directory.
There is a suite of utilities called mtools that can be used to create DOS
formatted floppies, as well as some other MS specific operations, but I
haven't had a lot of fun with it. I use the standard utilities instead
Here is how I format a floppy disk:
where xxx is the full device name. My floppy drive is /dev/fd0u1440
but your mileage may vary. Try ls'ing your /dev directory to see.
I installed from floppies, so I'm not real sure about CDROM installation
but I took note of the drive specified to install the system. When the
drive finishes formatting, you can type:
once again if necessary adding any specifiers.
Your disk should be formatted.
You are probably sitting there with a newly msdos formatted floppy disk
and wondering how to write to it. If you use mtools, you are on your own,
but don't feel bad you will save some steps, ie. mount and umount the
floppy drive before and after writing to the drive, but it seems that I
always fail to remember some option when I try to use mtools, so I don't
use them. I type :
you can specify another mount point besides /mnt if you would like,
perhaps a different mount point for each filesystem type that you might
want to use, ext2, or minix for example, but if you or people that you
work with use MS the msdos format might be the best, at least for now.
You can put an entry in your /etc/fstab that specifies the mount point for
your floppy drive, with a line that looks something like:
This particular line will keep the floppy drive from mounting on bootup
(noauto), and allow users to mount the drive. You should take the time to
alert your users that they MUST mount and umount /dev/fd0 each time they
change a disk, otherwise they will not get a correct ls when they try to
read from the mount point.
Assuming that this line is added to the /etc/fstab file the correct
command for mounting the drive is:
which will automatically choose /mnt as the mount point.To read from the
drive, the present working directory must be changed by:
after which the contents of the disk can be read or written to>
Linux is capable of reading files from several filesystem types, so it's a
pretty good first choice, since you can share files with DOS users.
Anyway, assuming you didn't get any error messages, you are ready to copy
a file to the disk using the:
assuming tha /mnt is the mount point that you specified in the mount
command, you should have copied the file to your floppy disk. Try:
you should see the file you just cp'ed. if not, you should retry the mount
command, but if you didn't get any error messages when you tried to mount
the drive, you should be OK. To verify that you did write to the floppy
instead of the /mnt directory, (there is a difference, if no drive is
mounted it's just a directory) you can:
and then try:
upon which you should get a shell prompt. If you get the file name that
you tried to copy to floppy, merely rm it and try the whole routine again.
If you find this confusing, read up on mtools by:
You may like what you see, give them a try. As I said I haven't had much
luck with them, but basically the mformat command should do the
abovementioned format tasks in one pass. Mcopy should likewise copy the
named file to the floppy without the need to separately mount the drive.
There are several filesystems, as mentioned above that can be read by
linux. Minix, ext2, ext, xiaf, vfat, msdos(I'm still a little bit foggy
on the difference between these two).Still others can be read with the use
of applications, amiga for instance. That's why it makes sense to split up
what is a single step process in DOS.
I got a lot of mail regarding the locate command, which I'm woefully
guilty of spreading misinformation about. The real poop is that locate is
a byproduct of a command, updatedb, which can be run at any time. It is
run as default in the wee hours of the morning from /usr/bin/crontab,
which is where I got the idea to leave the computer on overnight.
0000000  46 69 6c 65 6e 61 6d 65  0000000 F i l e n a m e
0000008  3a 20 2f 6a 6f 65 2f 62  0000008 :   / j o e / b
0000010  6f 6f 6b 73 2f 52 45 41  0000010 o o k s / R E A
0000018  44 4d 45 0a 0a 62 6f 6f  0000018 D M E . . b o o
0000020  6b 2e 74 6f 2e 62 69 62  0000020 k . t o . b i b
0000028  6c 69 6f 66 69 6e 64 2e  0000028 l i o f i n d .
0000030  70 65 72 6c 20 69 73 20  0000030 p e r l   i s
The 0000000 is the hexadecimal address of the dump
46 is the hexadecimal value at 0000000
69 is the hexadecimal value at 0000001
6c is the hexadecimal value at 0000002
...and so on.
hexdump -f /joe/scripts/hexdump.dashx.format $1 > /tmp1.tmp
hexdump -f /joe/scripts/hexdump.perusal.format $1 > /tmp2.tmp
gawk -f /joe/scripts/combine /tmp1.tmp > /tmp3.tmp
less /tmp3.tmp
rm /tmp1.tmp
rm /tmp2.tmp
rm /tmp3.tmp
Here is the file combine:
# this is /joe/scripts/combine -- it is invoked by /joe/scripts/jhex
{  getline < "/tmp1.tmp"
   printf("%s  ",$0)
   getline < "/tmp2.tmp"
   print
}
Here is the file hexdump.dashx.format:
"%07.7_ax " 8/1 "%02x " "\n"
Here is the file hexdump.perusal.format:
"%07.7_ax " 8/1 "%_p " "\n"
0000820  75 65 6e 63 65 20 61 66  0000820 u e n c e   a f
0000828  74 65 72 20 74 68 65 20  0000828 t e r   t h e
0000830  0a 20 20 20 20 20 20 20  0000830 .
0000838  20 20 20 20 20 20 20 20  0000838
*  *
0000868  20 20 20 20 20 6c 61 73  0000868           l a s
0000870  74 20 72 65 63 6f 72 64  0000870 t   r e c o r d
* * .
A Fast and Simple Printing Tip
From: Tim Bessell tbessell@buffnet.net
Tim Bessell
Grepping Files in a Directory Tree
From: Earl Mitchell earlm@Terayon.COM
grep foo `find . -name \*.c -print`
ViRGE Chipset
From: Peter Amstutz amstpi@freenet.tlh.fl.us
Date: Sun, 04 May 1997 21:02:10 +0200
Maintaining Multiple X Sessions
From: David Kastrup dak@neuroinformatik.ruhr-uni-bochum.de
startx -- :1
will work, however (if screen 0 is already taken). Start another one
with
startx -- :2
if you want. You want that to have hicolor, and your Xserver would
support it?
startx -- -bpp 16 :2
startx -- -bpp 16
or
startx -- -bpp 8
or whatever happens to be non-standard with you.
--
David Kastrup
Automatic File Transfer
From: Gregor Gerstmann gerstman@tfh-berlin.de
#!/bin/bash
#
date > prot
#
ftp -v $1 >> prot
#
#
date >> prot
#
...
machine ftp.ssc.com login anonymous password -gerstman@tfh-berlin.de
macdef T131
binary
prompt
cd ./pub/lg
pwd
dir . C131.2
get lg_issue17.tar.gz SSC17

macdef init
$T131
bye
...
Setting Up Newsgroups
From: "Michael J. Hammel" mjhammel@emass.com
Color Applications in X
From: Oliver Oberdorf oly@borg.harvard.edu
X With 256 Colors
From: Oliver Oberdorf oly@borg.harvard.edu
startx -- -cc 4
(I use xdm, so I don't have to do it this way)
Video Cards on the S3/ViRGE
From: Peter Amstutz amstpi@freenet.tlh.fl.us
	    case 0x11E0:
		s3_chiptype = S3_TRIO64;
		break;
becomes
	    case 0x11E0:
	    case 0x31E1:
		s3_chiptype = S3_TRIO64;
		break;
Replace 0x31E1 with the appropriate ID if your card returns a different code.
C Source with Line Numbers
From: joeh@sugar-river.net
jnl () {
           for args
         do
           nl -ba $args > /tmp.tmp
         done
         lpr /tmp.tmp
       }
jnl kdb.c
Joe Harmann
ncftp Vs. ftplib
From: Igor Markov imarkov@math.ucla.edu
Domain and Dynamic IP Names
From: Igor Markov imarkov@math.ucla.edu
netcfg Tool
From: Joseph Turian turian@idt.net
Putting Links to Your Dynamic IP
From: Nelson Tibbitt nelson@interpath.com
machine ftp.server.com login ftpusername password ftppassword
#!/bin/sh
# *** This script relies on the user having a valid local .netrc ***
# *** file permitting automated ftp logins to the web server!!   ***
#
# Slightly modified version of:
# Nelson Tibbitt's insignificant bash script, 5-6-97
# nelson@interpath.com
#
# Here are variables for the customizing...
# Physical destination directory on the remote server
# (/usr/apache/htdocs/nelson/ is the httpd root directory at my virtual
domain)
REMOTE_PLANDIR="/usr/apache/htdocs/nelson/LinuX/Magnon"
# Desired destination filename
REMOTE_PLANNAME="sonny.htm"
# Destination ftp server
# Given this and the above 2 variables, a user would find my IP address
at
# http://dedicated.web.server/LinuX/Magnon/sonny.htm
REMOTE_SERVER="dedicated.web.server"
# Local (writable) temporary directory
TMPDIR="/usr/tmp"
# Title (and header) of the html file to be generated
HTMLHEAD="MAGNON"
# Existing image on remote server to place in html file..
# Of course, this variable isn't necessary, and may be commented out.
If commented out,
# you'll want to edit the html file generation below to prevent an empty
image from appearing
# in your web page.
HTMLIMAGE="/LinuX/Magnon/images/mobile_web.gif"
# Device used for ppp connection
PPP_DEV="ppp0"
# Local temporary files for the html file/ftp script generation
TFILE="myip.htm"
TSCPT="ftp.script"
# Used to determine local IP address on PPP_DEV
#  There are several ways to get your IP, this was the first
command-line method I came
# up with.   It works fine here.  Another method, posted in May 1997
LJ  (and which looks
# much cleaner) is this:
#  `/sbin/ifconfig | awk 'BEGIN { pppok = 0} \
#   /ppp.*/ { pppok = 1; next } \
#  {if (pppok == 1 ) {pppok = 0; print} }'\
#  | awk -F: '{print $2 }'| awk  '{print $1 }'`
GETMYIP=$(/sbin/ifconfig | grep -A 4 $PPP_DEV \
  | awk '/inet/ { print $2 } ' | sed -e s/addr://)
# Used to place date/time of last connection in the page
FORMATTED_DATE=$(date '+%B %-d, %I:%M %p')
#
#
# Now, do it!  First give PPP_DEV time to settle down...
sleep 5
echo "Current IP: $GETMYIP"

# Generate the html file...
# Edit this part to change the appearance of the web page.
rm -f $TMPDIR/$TFILE
echo "Writing $REMOTE_PLANNAME"
echo >$TMPDIR/$TFILE
echo "<html><head><title>$HTMLHEAD</title></head><center>"   >>
$TMPDIR/$TFILE
echo "<body bgcolor=#ffffff><font size=+3>$HTMLHEAD</font>"  >>
$TMPDIR/$TFILE
# Remove the <imgtag in the line below if you don't want an image
echo "<p><img src='$HTMLIMAGE' alt='image'<p>The last "     >>
$TMPDIR/$TFILE
echo "time I connected was <b>$FORMATTED_DATE</b>, when the " >>
$TMPDIR/$TFILE
echo "Net Gods dealt <b>$GETMYIP</bto Magnon. <p><a href="  >>
$TMPDIR/$TFILE
echo "http://$GETMYIP target=_top>http://$GETMYIP</a><p>"     >>
$TMPDIR/$TFILE
echo "<a href=ftp://$GETMYIP target=_top>ftp://$GETMYIP"  >>
$TMPDIR/$TFILE
echo "<p><a href=telnet://$GETMYIP>telnet://$GETMYIP</a><br>" >>
$TMPDIR/$TFILE
echo "(Telnet must be properly configured in your browser.)"  >>
$TMPDIR/$TFILE
# Append a notice about the links..
echo "<p>The above links will only work while I'm connected." >>
$TMPDIR/$TFILE

# Create an ftp script to upload the html file
 echo "put $TMPDIR/$TFILE" $REMOTE_PLANDIR/$REMOTE_PLANNAME >
$TMPDIR/$TSCPT
 echo "quit" >$TMPDIR/$TSCPT

# Run ftp using the above-generated ftp script (requires valid .netrc
file for ftp login to work)
 echo "Uploading $REMOTE_PLANNAME to $REMOTE_SERVER..."
 ftp $REMOTE_SERVER > $TMPDIR/$TSCPT &/dev/null

# The unset statements are probably unnecessary, but make for a clean
'look and feel'
echo -n "Cleaning up... "
rm -f $TMPDIR/$TFILE ; rm -f $TMPDIR/$TSCPT
unset HTMLHEAD HTMLIMAGE REMOTE_SERVER REMOTE_PLANDIR REMOTE_PLANNAME
unset GETMYIP FORMATTED_DATE PPP_DEV TMPDIR TFILE TSCPT
echo "Done."

exit
Hard Disk Duplication
From: Michael Jablecki mcablec@ucsd.edu
Untar and Unzip

This page maintained by the Editor of Linux Gazette,
gazette@ssc.com
Copyright © 1997 Specialized Systems Consultants, Inc. "Linux Gazette...making Linux just a little more fun!"
Contents:
News in General
 Atlanta Linux Showcase
Linux Speakers Bureau
The Linux System Administrator's Guide (SAG)
http://www.iki.fi/liw/linux/sag
Free CORBA 2 ORB For C++ Available
The Wurd Project
Linus in Wonderland
http://www.metroactive.com/metro/cover/linux-9719.html
Software Announcements
BlackMail 0.24
CDE--Common Desktop Environment for Linux
TCFS 2.0.1
Qddb 1.43p1
Golgotha
ImageMagick-3.8.5-elf.tgz
Slackware 3.2 on CD-ROM
mtools
http://www.club.innet.lu/~year3160/mtools
ftp://prep.ai.mit.edu/pub/gnu
or look at:
http://www.gnu.ai.mit.edu/order/ftp.html
CM3
http://www.cmass.com
Extracts exactly what you want from your news feed. Cuts down
on "noise". Sophisticated search algorithms paired with
numerous filters cut out messages with ALL CAPS, too many $ signs,
threads which won't die, wild cross posts and endless discussions
why a Mac is superior to a Chicken, and why it isn't.
newsBot is at:
http://www.dsb.com/mkt/newsbot.html
Provides itendical functionality but reads mailing lists and e-zines
instead of news groups. Both are aimed at responsible Marketers
and Information managers. The *do not* extract email addresses and
cannot be mis-used for bulk mailings.
mailBot is at:
http://www.dsb.com/mkt/mail.bot.html
A search engine running on your web server and using the very same
search technology: a very fast implementation of Boyer Moore.
siteSee differs from other search engines in that it does not require
creation and maintenance of large index files. It also becomes
an integrated part of your site design. You have full control over
page layout.
siteSee is located at:
http://www.dsb.com/publish/seitesee.html
linkCheck
A hypertext link checker, used to keep your site up to date. Its
client-server implementation allows you to virtually saturate
your comms link without overloading your server. LinkCheck is fast
at reading and parsing HTML files and builds even large deduplicated
lists of 10,000 or more cross links faster than interpreted languages
take to load.
linkCheck is at:
http://www.dsb.com/maintain/linkckeck.html
ftp://ftp.cs.su.oz.au/mik/red
Also, take a look at the web site at:
http://www.cs.su.oz.au/~mik/red-manual/red-main-page.html
Emacspeak-97++
http://cs.cornell.edu/home/raman/emacspeak
ftp://ftp.cs.cornell.edu/pub/raman/emacspeak
This page written and maintained by the Editor of Linux Gazette,
gazette@ssc.com
Copyright © 1997 Specialized Systems Consultants, Inc. "Linux Gazette...making Linux just a little more fun!"
 The Answer Guy
By James T. Dennis,
jimd@starshine.org
Starshine Technical Services,
http://www.starshine.org/ Contents:
 Tcl/tlk Dependencies
  libtcl7.5.so is needed by some-app
       libtk4.1.so is needed by some-app
(where some-app is python, expect, blt, ical, tclx, tix, tk, tkstep,...)
 Networking Problems
Fetchmail
Networking Problems
Fetchmail
divert(-1)
include(`../m4/cf.m4')
VERSIONID(`@(#)antares.uucp.mc  .9 (JTD) 8/11/95')
OSTYPE(`linux')

FEATURE(nodns)
FEATURE(nocanonify)
FEATURE(local_procmail)
FEATURE(allmasquerade)
FEATURE(always_add_domain)
FEATURE(masquerade_envelope)

MAILER(local)
MAILER(smtp)

MASQUERADE_AS(starshine.org)
define(`RELAY_HOST', a2i)
define(`SMART_HOST', a2i)
define(`PSEUDONYMS', starshine|antares|antares.starshine.org|starshine.org)
Procmail
|IFS=' '&&exec /usr/local/bin/procmail -f-||exit 75 #justin
FEATURE(local_procmail)
define(`PROCMAIL_PATH', /usr/local/your/path/to/procmail);
/var/log/messages
		rm /var/log/messages
		kill -HUP $(cat /var/run/syslog.pid)
(on systems that are configured to conform to the FSSTND
and putting a syslog.pid file in /var/run).
cp /dev/null /var/log/messages
.. and you get away without doing the 'kill -HUP'.
#! /bin/bash
## jtd: Rotate logs

## This is intended to run as a cron job, once per day
## it renames a variety of log files and then prunes the
## oldest.

cd /var/log
TODAY=$(date +%Y%m%d)	# YYYYMMDD convenient for sorting

function rotate {
	cp $1 OLD/${1}.$TODAY
	cp /dev/null $1
	}

rotate maillog
rotate messages
rotate secure
rotate spooler
rotate cron

( echo -n "Subject: Filtered Logs for:  " ; date "+%a %m/%d/%Y"
echo; echo; echo;
echo "Messages:"
/root/bin/filter.log /root/lib/messages.filter  OLD/messages.$TODAY

echo; echo; echo "Cron:"
/root/bin/filter.log /root/lib/cron.filter OLD/cron.$TODAY

echo; echo; echo "--"; echo "Your Log Messaging System"
echo; echo; echo ) | /usr/lib/sendmail -oi -oe  root
## End of rotate.logs
#!  /usr/bin/gawk -f
	# filter.log
	# by James T. Dennis

	# syntax filter.log patternfile  datafile [datafile2 .....]

	# purpose -- trim patterns, listed in the first filename
	# from a series of data files (such as /var/adm/messages)
	# the patterns in the patternfile should take the form
	# of undelimited (no '/foo/' slashes and no "foo" quotes)

        # Note:  you must use a '-' as the data file parameter if
        # if you to process stdin (use this as a filter in a pipe
        # otherwise this script will not see any input from it!

ARGIND == 1  {
		# ugly hack.
	# allows first parameter to be specially used as the
	# pattern file and all others to be used as data to
	# be filtered; avoids need to use
	# gawk -v patterns=$filename ....  syntax.
	if ( $0 ~/^[ \t]*$/ ) { next }  # skip blank lines
		# also skip lines that start with hash
		# to allow comments in the patterns file.
	if ( $0 !~ /^\#/ ) { killpat[++i]=$0 }}

ARGIND > 1 {
	for( i in killpat ) {
	 	if($0 ~ killpat[i]) { next }}}

 ARGIND > 1 {
	 print FNR ": " $0 }
... ..? ..:..:.. antares ftpd\[[0-9]+\]: FTP session closed
... ..? ..:..:.. antares getty\[[0-9]+\]: exiting on TERM signal
... ..? ..:..:.. antares innd: .*
... ..? ..:..:.. antares kernel:[ \t]*
... ..? ..:..:.. antares kernel:   Type: .*
OS Showdown
Subject: OS showdown
What other SQL packages are available for Linux?
Pulling out my trusty _Linux_Journal_1997_Buyers's_Guide_
(and doing a Yahoo! search) I see:
Adding Linux to a DEC XLT-366
Configuration Problems of a Soundcard
http://sunsite.unc.edu/LDP/HOWTO/Sound-HOWTO-6.html#ss6.23
That might not match your probelm but it's worth looking at.
Procmail Idea and Question
[*emov* *nstruction*]
or remove@*
		:0 B
		* (\[.*remove.*instruction.*\]|\[.*remove@.*\])
		/dev/null
* foo*l
		:0 B:
		* (\[.*remove.*instruction.*\]|\[.*remove@.*\])
		prob.spam
		:0
		* ^TO.*tag
		linux.gazette/.
:0
* < 1000
* !^FROM_DAEMON
* !^X-Loop:[    ]*info@starshine.org
* ^Subject:[    ]*(procmail|mailbot)
| ((formail -rk -A "Precedence: junk" \
-A "X-Loop: info@starshine.org" ; \
echo "Mail received on:" `date`)  \
| $HOME/insert.doc -v file=$DOC/procmail.tutorial ) | $SENDMAIL -t -oi -oe
(( formail -rk ...
#! /usr/bin/gawk -f
/^[ \t]*$/ && !INSERTED { print; system("cat " file ); INSERTED=1}
1
1
{print}
UUCP/Linux on Caldera
What are pros/cons of mgetty?
$ ls -ald `which uucico` `which cu`  /dev/modem /dev/ttyS* /var/lock
-r-sr-s---   1 uucp     uucp       /usr/bin/cu
-r-sr-s---   1 uucp     uucp       /usr/sbin/uucico
lrwxrwxrwx   1 uucp     uucp       /dev/modem -> /dev/ttyS1
crw-rw----   1 root     uucp       /dev/ttyS0
crw-rw-r--   1 root     uucp       /dev/ttyS1
crw-------   1 root     tty        /dev/ttyS2
crw-rw----   1 root     uucp       /dev/ttyS3
drwxrwxr-x   6 root     uucp       /var/lock
ActiveX for Linux
I presume that you're directing this to the "Linux Gazette
Answer Guy."
Anyway, we got to talking and he told me that Linux was getting so
popular that Microsoft had decided to port ActiveX to Linux. Do you
know if, in fact, this is true? If so, when might we see this port
completed?
I have heard the same story from other Microsoft
representatives (once at a Java SIG meeting where
the MS group was showing off their J++ package).
"This server is: Digital Multia VX40 - Running RedHat Linux"
Here's one that meets my criteria for "Hall of Shame",
<META Name="KEYWORDS" Content="....>
(Which repeated every term about four times -- this tag was
a half a screenful long). Unfortunately it showed up
first in the hits list (first page in English that is --
the one French page that preceded just had an "I've moved
notice" -- or maybe it was a "You're a silly goat" message
-- my French never was that good).
"ActiveX Sucks!"
... and said nothing else on the matter. However,
it doesn't make it into the Hall of Shame -- because
the page is well organized, easily read -- only two
"un-ALT'd" icons on several pages of information -- and
has many good Linux and other links. Even the "hit counter"
works in Lynx saying,
"You are visitor number 253 since 8.4.97"
Suggestion: Sean -- Install Glimpse!
(I've copied many of the owners/webmasters at the
sites I'm referring to here).
What Packages Do I Need?
Sun Apr 13 15:32:00 PDT 1997: jimd

			Installed mgetty.  See comments in
			/usr/local/etc/mgetty/*.config.

		Sun May  4 01:21:11 PDT 1997: jimd

			Downloaded 2.0.30 kernel.
			unpacked into /usr/local/src/linux-2.0.30
			and replace /usr/src/linux symlink
			accordingly.

			Picked *both* methods of TCP SYN
			cookies.  Also trying built-in kerneld
			just about everything is loadable modules.
			Adaptec SCSI support has to be built-in
			though.

			Needed to change rc files to do the
			mount of DOS filesystem *after* rc.modules.

	... etc.
Users and Mounted Disks
I mount my Win95 partition under /mnt/Win95, and would like to have
write permission enabled for only certain users, much like that which
is possible using AFS. Recognizing that is not terribly feasable, I
have resorted to requireing root to mount the partition manually, but
want toi be able to write to it as a random user, as long as it is
mounted. The rw option for mount does not seem to cut the mustard,
either. it allows write for root uid and gid, but not anyone else.
Any suggestions?
You can mount your Win95 system to be writable by a
specific group. All you have to do is use the right
options. Try something like:
mount -t umsdos -w -ogid=10,uid=0,umask=007 /dev/hda1 /mnt/c
mount -o inherit /mnt/c /dev/hda1
[q] Map Left Arrow to Backspace
Adding Programs to the Pull Down Menus
Popup "Apps"
        Exec    "Wingz"         exec /usr/local/bin/wingz &
        Nop     ""
        Exec    "Netscape"      exec netscape &
        Exec    "Mosaic"        exec Mosaic &
        Nop     ""
        Exec    "Elm"           exec xterm -e elm &
        Nop     ""
EndPopup

	You'd just add a line like:

	Exec	"Your App"	exec /path/to/your/app &

	.... to this.

	If you add a line like:

	PopUp	"My Menu"	MyMenu

	... and a whole section like:

PopUp "MyMenu"
	Exec	"One App"	exec /where/ever/one.app &
	Exec	"Another Toy"   exec /my/bin/toy &
EndPopUp
Linux and NT
How to use Linux and DOS and Windows95 together.
Updated 10 September 1996.
How to use Linux and OS/2 and DOS together.
Updated 20 May 1996.
How to use Linux and DOS and OS/2 and Win95 together.
Updated 6 March 1996.
How to use Linux and Windows95 together.
Updated 25 June 1996.
How to use Linux and WindowsNT together.
Updated 19 February 1997.
How to use Linux and
WindowsNT together, with NT preinstalled.
Updated 21 December 1996.
		C:
		CD \LINUX
		LOADLIN.EXE RH2013.KRN root=/dev/hda2 .....
pcmcia 28.8 Modems and Linux 1.2.13 Internet Servers
Copyright © 1997, James T. Dennis
Published in Issue 18 of the Linux Gazette June 1997
"Linux Gazette...making Linux just a little more fun!"
bash String Manipulations
By Jim Dennis,
jimd@starshine.org
Background
... to see output like:
	dirname $f
	basename $f
	basename $f .txt
Notice that the GNU version of basename takes an
optional parameter. This handy for specifying a filename "extension"
like .tar.gz which will be stripped off of the output. Note that
basename and dirname don't verify that these parameters
are valid filenames or paths. They simple perform simple
string operations on a single argument. You shouldn't use wild cards
with them -- since dirname takes exactly one argument
(and complains if given more) and basename takes one argument
and an optional one which is not a filename.
	/home/myplace/a.data.directory
	a.filename.txt
	a.filename
A Better Way
Although the basename and dirname commands
embody the "small is beautiful" spirit of Unix -- they may push the
envelope towards the "too simple to be worth a separate program" end
of simplicity.
The bash Man Page
We can use these expressions:
Note that the last two depend on the
assignment made in the second one
Here we notice two different "operators" being used inside the
parameters (curly braces). Those are the # and the %
operators. We also see them used as single characters and in pairs.
This gives us four combinations for trimming patterns off the
beginning or end of a string:
for i in *.txt; do cp $i ${i%.txt}.bak; done
... obviously this is more typing. If you tried to create a
shell function or alias for it -- you have to figure out how to
pass this parameters. Certainly the following seems simple enough:
function cp-pattern {
for i in $1; do cp $i ${i%$1}$2; done
... but that doesn't work like most Unix users would expect. You'd
have to pass this command a pair of specially chosen, and
quoted arguments like:
cp-pattern '*.txt' .bak
... note how the second pattern has no wild cards and how the first is
quoted to prevent any shell globbing. That's fine for something you
might just use yourself -- if you remember to quote it right. It's
easy enough to add check for the number of arguments and to ensure that
there is at least one file that exists in the $1 pattern. However it
becomes much harder to make this command reasonably safe and robust.
Inevitably it becomes less "unix-like" and thus more difficult to use
with other Unix tools.
p=$PATH
until [ $p = $d ]; do d=${p%%:*}; p=${p#*:}; echo $d; done
... obviously you can replace the echo $d part of this
command with anything you like.
p=$(pwd)
until [ $p = $d ]; do p=${p#*/}; d=${p%%/*}; echo $d; done
... here we've reversed the assignments to p and d
so that we skip the root directory itself -- which must be "special cased"
since it appears to be a "null" entry if we do it the other way. The
same problem would have occurred in the previous example -- if the value
assigned to $PATH had started with a ":" character.
Here we see the parentheses used to isolate the contents in a subshell
-- such that the assignment to IFS doesn't affect our current shell.
Setting the IFS to a "colon" tells the shell to treat that character as
the separater between "words" -- instead of the usual "whitespace" that's
assigned to it. For this particular function it's very important that
IFS consist solely of that character -- usually it is set to "space,"
"tab," and "newline.
		cat /etc/passwd | ( \
			IFS=: ; while read lognam pw id gp fname home sh; \
				do echo $home \"$fname\"; done \
				)
This one just uses the shell "null command" (the : command) to
evaluate the expression. If the variable doesn't exist or has a
null value -- this will print the string to the standard error
file handle and exit the script with a return code of one.
Example:
... self is always a set of entries that refers to the current
process -- and self/fd/ is a directory full of the currently
open file descriptors. Under Unix and DOS every process is given
the following pre-opened file descriptors: stdin, stdout, and stderr.
function error { echo "$*" > /proc/self/fd/2 }
use /mnt/tmp instead of $TMP but do nothing if TMP was
unset. This is a weird one that I can't ever see myself
using. But it is a logical complement to the ${var:-value}
we saw above.
Example:
Copyright © 1997, Jim Dennis
Published in Issue 18 of the Linux Gazette, June 1997
"Linux Gazette...making Linux just a little more fun!"
Brave GNU World: Towards A Bioregional, Community-based Linux Support
Net
By Michael Stutz,
stutz@dsl.org
Copyright © 1997, Michael Stutz
Published in Issue 18 of the Linux Gazette, June 1997
"Linux Gazette...making Linux just a little more fun!"
Building Your Linux Computer Yourself
By Josh Turial,
josht@janeshouse.com
ProcessorBus Performance Price
486 (66-120MHz) VL bus low-decent $75-$100
5x86VL PCI or both low-end Pentium $100-$120
Pentium 100PCI only Good for multiple OS $200-$250
Pentium 133PCI only Fast Linux, games'll rock $300-$350
Pentium 166PCI only Wow, that's fast! $475-$550
Pentium 200PCI only Ahead ludicrous speed, cap'n! $700+
Pentium ProPCI only If you need it, buy it built...
Copyright © 1997, Josh Turiel
Published in Issue 18 of the Linux Gazette, June 1997
"Linux Gazette...making Linux just a little more fun!"
Cleaning Up Your /tmp...The Safe Way
By Guy Geens,
ggeens@iname.com
Introduction
What's eating my disk space?
The quick and dirty solution
Why /var/catman is easy
-rwsr-sr-x 1 man man 29716 Apr 8 22:14 /usr/bin/man*
And now /tmp
drwxrwxrwt 10 root root 3072 May 18 21:09 /tmp/
find /tmp -type f -atime 7 -print | xargs -- rm -f --
So how do we get around this?
use File::Find;
# Security measure: chroot to /tmp

$tmpdir = '/tmp/';

chdir ($tmpdir) || die "$tmpdir not accessible: $!";

if (chroot($tmpdir)) { # chroot() fails when not run by root

($prefix = $tmpdir) =~ s,/+$,,;

$root = '/';

$test = 0;

} else {

# Not run by root - test only

$prefix = '';

$root = $tmpdir;

$test = 1;

}
&find(\&do_files, $root);
sub do_files {

(($dev,$ino,$mode,$nlink,$uid,$gid) = lstat($_)) &&

(-f _ || -l _ ) &&

(int(-A _) > 3) &&

! /^\.X.*lock$/ &&

&removefile ($_) && push @list, $File::Find::name;
}
A few remarks
Why this is safe
Copyright © 1997, Guy Geens
Published in Issue 18 of the Linux Gazette, June 1997
"Linux Gazette...making Linux just a little more fun!"
By Mike List,
troll@net-link.net
Welcome to installment 5 of Clueless at the Prompt:
a new column for new users.
Getting Serious
Partitions as Safety Devices
Formatting Floppies
fdformat /dev/fd0xxx
mkfs -t msdos /dev/fd0xxxx
Writing to your Floppy Disk
mount -t msdos /dev/fd0xxxx /mnt
/dev/fd0 /mnt msdos rw,user,noauto 0 0
mount /dev/fd0
cd /mnt
cp anyfile.type /mnt
ls /mnt
umount /dev/fd0xxxx
ls /mnt
info mtools
Other Filesystems
Humbly acknowledging...
Next Time- Let me know what you would like to see in here and I'll
try to
oblige just e-mailtroll@net-link.net
me and ask, otherwise I'll just write about what gave me trouble
and
how I got past it.
TTYL, Mike List
An irksome job that most system administrators have to perform at some stage or other is the implementation of a disk quota policy. Being a maintainer of quite a few machines (mostly Linux and Solaris, but also including AIX) without system enforced quotas, I needed an automatic way of tracking disk quotas. To this end, I created a Perl script to regularly check users disk usage, and compile a list of the largest hoggers of disk space. Hopefully, in this way, I can politely intimidate people into reducing the size of their home directories when they get ridiculously large.
The du command summarises disk usage for a given directory hierarchy. When run in each users home directory, it can report how much disk space the user is occupying. At first, I had written a shell script to run du on a number of user directories, with an awk back-end to provide nice formatting of the output. This proved difficult to maintain if new users were added to the system. Users home directories were unfortunately located in different places on each operating system.
Perl provided a convenient method of rewriting the shell / awk scripts into a single executable, which not only provided more power and flexibility but also ran faster! Perl's integration of standard Unix system calls and C library functions (such as getpwnam() and getgrname()) makes it perfectly suited to tasks like this. Rather than provide a tutorial on the Perl language, in this article I will describe how I used Perl as a solution to my particular need. The complete source code to the Perl script is shown in listing 1.
The first thing I did was to make a list of the locations in which users home directories resided, and isolate this into a Perl array. For each sub-directory in the directories listed in this array, a disk usage summary was required. This was implemented by using the Perl system command to spawn off a process running du.
The du output was redirected to a temporary file. The temporary file was named using the common $$ syntax, which is replaced at run time by the PID of the executing process. This guaranteed that multiple invocations of my disk usage script (while unlikely) would not clobber each others temporary working data.
All the sub-directories were named after the user who owned the account. This assumption made life a bit easier in writing the Perl script, because I could skip users such as root, bin, etc.
I now had, in my temporary file, a listing of a disk usage and username, one pair per line of the file. I wanted to split these up into an associated hash of users and disk usage, with users as the index key. I also wanted to keep a running total of the entire disk usage, and also the number of users. Once Perl had parsed all this information from the temporary file, I could delete it.
I decided the Perl script would dump its output as an HTML formatted page. This allowed me great flexibility in presentation, and also permitted the information to be available over the local intranet - quite useful when dealing with multiple heterogeneous environments.
Next I had to work out what information I needed to present. Obviously the date when the script had run was important, and a sorted table listing disk usage from largest to smallest was essential. Printing the GCOS information field from the password file allowed me to view both real names, and usernames. I also decided it might be nice to provide a hypertext link to the users homepage, if one existed. So extracting their official home directory from the password file, and adding on to it the standard user directory extensions to it (typically public_html or WWW) allowed this.
Sorting in Perl usually involves the use of the spaceship operator ( <=>). The sort function sorts a list and returns the sorted list value. It comes in many forms, but the form used in the code is:
sort sub_name list
where sub_name is a Perl subroutine. sub_name is call during element comparisons, and it must return an integer less than, equal to, or greater than zero, depending on the desired order of the list elements. sub_name may also be replaced with an inline block of Perl code.
Typically sorting numerically ascending takes the form:
@NewList = sort { $a <=> $b } @List;
whereas sorting numerically descending takes the form:
@NewList = sort { $b <=> $a } @List;
I decided to make the page a bit flashier by adding a few of those omnipresent coloured ball GIFs. Green indicates that the user is within allowed limits. Orange indicates that the user is in a danger buffer zone - no man's land, from which they are dangerously close to the red zone. The red ball indicate a user is over quota, and depending on the severity multiple red balls may be awarded to really greedy, anti-social users.
Finally, I plagued all the web search engines until I found a suitable GIF image of a pigglet, which I included on the top of the page.
The only job left was to include the script to run nightly as a cron job. It needed to be run as root in order to accurately assess the disk usage of each user - otherwise directory permissions could give false results. To edit roots cron entries (called a crontab), first ensure you have the environment variable VISUAL (or EDITOR) set to your favourite editor. Then type
crontab -e
Add the line from listing 2 to any existing crontab entries. The format of crontab entries is straightforward. The first five fields are integers, specifying the minute (0-59), hour (0-23), day of the month (1-31), month of the year (1-12) and day of the week(0-6, 0=Sunday). The use of an asterix as a wild-card to match all values is permitted, as is specifying a list of elements separated by commas, or a range specified by start and end (separated by a minus). The sixth field is the actual program to being scheduled.
A script of this size (which multiple invocations of du) takes some time to process. As a result, it is perfectly suited for scheduling under cron - I have it set to run once a day on most machines (generally during the night, which user activity is low). I believe this script shows the potential of using Perl, Cron and the WWW to report system statistics. Another variant of it I have coded performs an analysis of web server log files. This script has served me well for many months, and I am confident it will serve other sysadmins too.
#!/usr/local/bin/perl -Tw

# $Id: issue18.html,v 1.2 2002/10/09 22:24:18 lg Exp $
#
# Listing 1:
# SCRIPT:       diskHog
# AUTHOR:       Ivan Griffin (ivan.griffin@ul.ie)
# DATE:         14 April 1996
#
# REVISION HISTORY:
#   06 Mar 1996 Original version (written using Bourne shell and Awk)
#   14 Apr 1996 Perl rewrite
#   01 Aug 1996 Found piggie image on the web, added second red ball
#   02 Aug 1996 Added third red ball
#   20 Feb 1997 Moved piggie image :-)

#
# outlaw barewords and set up the paranoid stuff
#
use strict 'subs';
use English;

$ENV{'PATH'} = '/bin:/usr/bin:/usr/ucb'; # ucb for Solaris dudes
$ENV{'IFS'} = '';

#
# some initial values and script defines
#
$NumUsers = 0;
$Total = 0;
$Position = 0;

$RED_ZONE3 = 300000;
$RED_ZONE2 = 200000;
$RED_ZONE = 100000;
$ORANGE_ZONE = 50000;

$CRITICAL = 2500000;
$DANGER   = 2200000;

$TmpFile = "/var/tmp/foo$$";
$HtmlFile = '>/home/sysadm/ivan/public_html/diskHog.html';
$PerlWebHome = "diskHog.pl";

$HtmlDir = "WWW";
$HtmlIndexFile = "$HtmlDir/index.html";
$Login = " ";
$HomeDir=" ";
$Gcos = "A user";

@AccountDirs = ( "/home/users", "/home/sysadm" );
@KeyList = ();
@TmpList = ();

chop ($Machine = `/bin/hostname`);
# chop ($Machine = `/usr/ucb/hostname`); # for Solaris


#
# Explicit sort subroutine
#
sub by_disk_usage
{
    $Foo{$b} <=> $Foo{$a};  # sort integers in numerically descending order
}


#
# get disk usage for each user and total usage
#
sub get_disk_usage
{
    foreach $Directory (@AccountDirs)
    {
        chdir $Directory or die "Could not cd to $Directory\n";
        # system "du -k -s * >> $TmpFile"; # for Solaris
        system "du -s * >> $TmpFile";
    }

    open(FILEIN, "<$TmpFile") or die "Could not open $TmpFile\n";

    while (<FILEIN>)
    {
        chop;
        ($DiskUsage, $Key) = split(' ', $_);

        if (defined($Foo{$Key}))
        {
            $Foo{Key} += $DiskUsage;
        }
        else
        {
            $Foo{$Key} = $DiskUsage;

            @TmpList = (@KeyList, $Key);
            @KeyList = @TmpList;
        };

        $NumUsers ++;
        $Total += $DiskUsage;
    };

    close(FILEIN);
    unlink $TmpFile;
}


#
# for each user with a public_html directory, ensure that it is
# executable (and a directory) and that the index.html file is readable
#
sub user_and_homepage
{
    $User = $_[0];

    ($Login, $_, $_, $_, $_, $_, $Gcos, $HomeDir, $_) = getpwnam($User)
        or return "$User</td>";

    if ( -r "$HomeDir/$HtmlIndexFile" )
    {
        return "$Gcos <a href=\"/~$Login\">($User)</a>";
    }
    else
    {
        return "$Gcos ($User)</td>";
    };
}

#
# generate HTML code for the disk usage file
#
sub html_preamble
{
    $CurrentDate = localtime;

    open(HTMLOUT, $HtmlFile) or die "Could not open $HtmlFile\n";
    printf HTMLOUT <<"EOF";
<!DOCTYPE HTML PUBLIC "-//IETF//DTD HTML 3.0//EN">

<!--
  -- Automatically generated HTML
  -- from $PROGRAM_NAME script
  --
  -- Last run: $CurrentDate
  -->

<html>
<head>
<title>
Disk Hog Top $NumUsers on $Machine
</title>
</head>

<body bgcolor="#e0e0e0">
<h1 align=center>Disk Hog Top $NumUsers on $Machine</h1>

<div align=center>
<table>
<tr>
    <td valign=middle><img src="images/piggie.gif" alt="[PIGGIE!]"></td>
    <td valign=middle><em>This is a <a href=$PerlWebHome>Perl</a>
        script which runs<br>
        automatically every night</em><br></td>
</tr>
</table>

<p>
<b>Last run started</b>: $StartDate<br>
<b>Last run finished</b>: $CurrentDate
</p>

<p>
<table border=2>
<tr>
<th>Status</th>
<td>
EOF

    if ($Total > $CRITICAL)
    {
        print HTMLOUT "CRITICAL!!! - Reduce Disk Usage NOW!";
    }
    elsif (($Total <= $CRITICAL) && ($Total > $DANGER))
    {
        print HTMLOUT "Danger - Delete unnecessary Files";
    }
    else
    {
        print HTMLOUT "Safe";
    }


    printf HTMLOUT <<"EOF";
</td>
</tr>
</table>
</P>

<hr size=4>

<table border=2 width=70%%>
    <tr>
        <th colspan=2>Chart Posn.</th>
        <th>Username</th>
        <th>Disk Usage</th>
    </tr>

EOF
}

#
#
#
sub html_note_time
{
    $StartDate = localtime;
}


#
# for each user, categorize and display their usage statistics
#
sub dump_user_stats
{
    foreach $Key (sort by_disk_usage @KeyList)
    {
        $Position ++;

        print HTMLOUT <<"EOF";
    <tr>\n
        <td align=center>
EOF

        #
        # colour code disk usage
        #
        if ($Foo{$Key} > $RED_ZONE)
        {
            if ($Foo{$Key} > $RED_ZONE3)
            {
                print HTMLOUT "        <img src=images/ball.red.gif>\n";
            }

            if ($Foo{$Key} > $RED_ZONE2)
            {
                print HTMLOUT "        <img src=images/ball.red.gif>\n";
            }

            print HTMLOUT "        <img src=images/ball.red.gif></td>\n";
        }
        elsif (($Foo{$Key} <= $RED_ZONE) && ($Foo{$Key} > $ORANGE_ZONE))
        {
            print HTMLOUT "        <img src=images/ball.orange.gif></td>\n";
        }
        else
        {
            print HTMLOUT "        <img src=images/ball.green.gif></td>\n";
        }

        print HTMLOUT <<"EOF";

        <td align=center>$Position</td>
EOF

        print HTMLOUT "        <td align=center>";
        print HTMLOUT &user_and_homepage($Key);
        print HTMLOUT "</td>\n";

        print HTMLOUT <<"EOF";
        <td align=center>$Foo{$Key} KB</td>
    </tr>

EOF
    };
}

#
# end HTML code
#
sub html_postamble
{
    print HTMLOUT <<"EOF";
    <tr>
        <th></th>
        <th align=left colspan=2>Total:</th>
        <th>$Total</th>
    </tr>
</table>

</div>

<hr size=4>
<a href="/">[$Machine Home Page]</a>

</body>
</html>
EOF


    close HTMLOUT ;

#
# ownership hack
#
    $Uid = getpwnam("ivan");
    $Gid = getgrnam("users");

    chown $Uid, $Gid, $HtmlFile;
}


#
# main()
#

&html_note_time;
&get_disk_usage;
&html_preamble;
&dump_user_stats;
&html_postamble;

# all done!
0 0 * * * /home/sysadm/ivan/public_html/diskHog.pl
First, the
necessary version info: dosemu
is an MS-DOS emulator for Linux. The on-line
manual describes it as I installed version 0.66.1 because I read
that it supported MIDI, and I was curious to find whether I would be
able to run my favorite DOS MIDI sequencer, Sequencer Plus Gold from
Voyetra. Installation proceeded
successfully, and after some initial fumbling (and a lot of help from
the Linux newsgroups), I was running some DOS programs under Linux.
However, the MIDI implementation eluded me. I followed the directions
given in the dosemu package: they are simple enough, basically setting
up a link to /dev/sequencer. But since Sequencer Plus requires a Voyetra
API driver, I ran into trouble: the VAPI drivers wouldn't load. I
tried to use the VAPIMV (Voyetra API for Media Vision) drivers, but they
complained that MVSOUND.SYS wasn't loaded. These drivers are specific
to the PAS16 soundcard, so I was puzzled that they couldn't detect
MVSOUND.SYS (which was indeed successfully loaded by config.sys). I
also tried using the SAPI drivers, Voyetra's API for the SoundBlaster:
the PAS16 has a SB emulation mode which I had enabled in MVSOUND.SYS,
but those drivers wouldn't load, again complaining that MVSOUND.SYS
wasn't installed. VAPIMQX, the driver for the MQX32M, refused to
recognize any hardware but a true MQX. Checking the Linux sound driver
status with 'cat/dev/sndstat' reported my MQX as installed, but complete
support for the sound driver (OSS/Free) has yet to be added to dosemu.
Since MVSOUND.SYS was indeed installed (I checked it in dosemu
using MSD, the Microsoft Diagnostics program), and since the MIDI
interface on the soundcard was activated, I began to wonder whether that
interface could be used. I tested the DOS MIDI programming environment
RAVEL, which is
"hardwired" internally to only an MPU-401 MIDI interface: to my surprise
and satisfaction, the soundcard's MIDI interface worked, and I now had a
DOS MIDI program working under Linux. Following that line of action,
I figured that the Voyetra native MPU driver just might load. I tried
VAPIMPU: it failed, saying it couldn't find the interrupt. I added the
command-line flag /IRQ:7 and the driver loaded. I now had a Voyetra MIDI
interface device driver loaded, but would Sequencer Plus Gold run ?
Not only does Sequencer Plus run, I am also able to use Voyetra's
Sideman D/TX patch editor/librarian for my TX802s. And I can run RAVEL,
adding a wonderful MIDI programming language to my Linux music & sound
arsenal. All is not perfect: RAVEL suffers the occasional stuck
note, and the timing will burp while running Seq+ in xdos, particularly
when the mouse is moved. The mouse is problematic with Seq+ in xdos
anyway, sometimes locking cursor movement. Since my configuration
for the dosemu console mode doesn't support the mouse, that problem
doesn't arise there. Switching to another console is possible; this is
especially useful if and when dosemu crashes. Also, programs using VGA
"high" graphics will crash, but I must admit that I have barely begun to
tweak the video subsystem for dosemu. It may eventually be possible to
run Sound Globs, Drummer, and perhaps even M/pc, but for now it seems
that only the most straightforward DOS MIDI programs will load and
run without major problems. And there is a much greater problem:
only version 1.26 of the VAPIMPU driver appears to work properly. A more
recent version (1.51) will not load, even with the address and interrupt
specified at the command-line. However, Rutger Nijlunsing has mentioned
that he is working on an OSS/Free driver for dosemu which would likely
permit full use of my MQX interface card. When that arrives I may be able
to utilize advanced features of Seq+ such as multiport MIDI (for 32 MIDI
channels) and SMPTE time-code. [Since writing the above text, I have
tweaked /etc/dosemu.conf for better performance in both X and console
modes. Setting hogthreshold 0seems to improve playback stability. I
have yet to fix the problem with the mouse in xdos, but it isn't much of
a real problem. Linux is free, dosemu is free, RAVEL is free. My
DOS MIDI software can't be run in a DOS box under Win95 with my hardware:
it canbe done, but I'd have to buy another soundcard. Linux will run
its DOS emulator, with MIDI and sound support, from an X window or from a
virtual console (I have six to choose from). If I want to run Sequencer
Plus in DOS itself, I have to either drop out of Win95 altogether
(DOS mode) or not boot into Win95 at all. With Win95 I get one or the
other; with Linux, I get the best of all possible worlds.
Nothing massively special about this release, really, but some of the
new features are useful, and there is an important bugfix.
Editors Note:
I don't normally include packages that aren't X-based, but the
number of announcements for this month were relatively small so I
thought I'd go ahead and include this one. I don't plan on making
it a practice, however.
The URL below explains a fast and effective technique for applying
texture mapped text onto 3D surfaces. The full source code for a
tool to generate texture font files (.txf files) and an API for
easy rendering of the .txf files using OpenGL is provided.
For a full explanation of the technique including sample images
showing how the technique works, please see:
Direct3D programmers are invited to see how easy and powerful OpenGL
programming is. In fact, the technique demonstrated is not
immediately usable on Direct3D because it uses intensity textures (I
believe not in Direct3D), polygon offset, and requires alpha testing,
alpha blending, and texture modulation (not required to be implemented
by Direct3D). I mean this to be a constructive demonstration of the
technical inadequacies of Direct3D.
I hope you find the supplied source code, texture font
generation utility, sample .txf files, and explanation quite useful.
Note: for those that aren't aware of it, Direct3D is Microsoft's
answer to OpenGL. Despite their original support of OpenGL, they
aparently decided to go with a different 3D standard, one they
invented (I think). Anyway, the discussion on
comp.graphics.api.opengl of late has been focused on which of the two
technologies is a better solution.
Eugene Crosser wrote a C library and a command-line tool to
perform the same tasks under UNIX. See
ftp://ftp.average.org/pub/photopc/
MD5(photopc-1.0.tar.gz)= 9f286cb3b1bf29d08f0eddf2613f02c9
Eugene Crosser; 2:5020/230@fidonet;
http://www.average.org/~crosser/
ImageMagick-3.8.5-elf.lsm
This is the newest version of my binary distribution of ImageMagick.
It will move to the places listed in the LSM-entry at the end of this
message. Please remember to get the package libIMPlugIn-1.1 too,
to make it working.
This version brings together a number of minor changes made to
accomodate PerlMagick and lots of minor bugs fixes including
multi-page TIFF decoding and writing PNG.
ImageMagick (TM), version 3.8.5, is a package for display and
interactive manipulation of images for the X Window System.
ImageMagick performs, also as command line programs, among others
these functions:
Version 1.15A of the free version for Linux
is now available for download at:
xv-3.10a-shared is available from
ftp://ftp.ctd.comsat.com/pub/.
libgr-2.0.12.tar.gz is available from
ftp://ftp.ctd.comsat.com:/pub/linux/ELF/.
You can get t1lib by anonymous ftp at:
An overview on t1lib including some screenshots of xglyph can be
found at:
What you'll find in this release are:
Finally, the FreeType Alpha Release 4 is released for informative and
demonstration purpose only. The authors provide it 'as is', with no
warranty.
The file freetype-AR4.tar.gz (about 290K)
is available now at
ftp://sunsite.unc.edu/pub/Linux/X11/fonts
or at the FTP site in:
ftp://ftp.physiol.med.tu-muenchen.de/pub/freetype
Web page:
I got the following message from a reader. Feel free to contact
him with your comments. I have no association with this project.
Q and A
Q: Can someone point me to a good spot to download
some software to make a good height map?
A:
I'd suggest you try either John Beale's hflab available at:
http://shell3.ba.best.com/~beale/
Look under sources. You will find executables for Unix and
source code for other systems. It is pretty good at manipulating
and creating heightfields and is great at making heightfields
made in a paint program more realistic.
Q: Sorry to pester you but I've read your minihowto on
graphics in Linux and I still haven't found what I'm
looking for. Is there a tool that will convert a collection
of TGA files to one MPEG file in Linux?
A:
I don't know of any off hand, but check the following pages. They might
have pointers to tools that could help.
Q: Where can I find some MPEG play/encode tools?
A:
http://sunsite.unc.edu/pub/multimedia/animation/mpeg/berkeley-mirror/
Q:
Where can I find free textures on the net in BMP, GIF, JPEG, and
PNG formats?
A:
Try looking at:
These are the textures I've started using in my OpenGL demos.
They are very professional. There are excellent brick and
stone wall textures. If you are doing a lot of modeling of
walls and floors and roads, the web site offers a CD-ROM
with many more textures.
Generally, I load them into "xv" (an X image viewer utility)
and resample them with highest-quality filtering to be on
even powers of two and then save them as a TIFF file. I
just wish they were already at powers of two so I didn't have
to resample.
Then, I use Sam Leffler's very nice libtiff library to read
them into my demo. I've got some example code of loading TIFF
images as textures at:
From: Mark Kilgard
<mjk@fangio.asd.sgi.com>,
author of OpenGL Programming for the X Window System, via the
comp.graphics.api.opengl newsgroup.
Q: Why can't I feed the RIB files exported by AMAPI directly
into BMRT?
A:
According to
shem@warehouse.net:
Q:
Is there an OpenGL tutorial on-line? The sample
code at the OpenGl WWW center seems pretty advanced to me.
A:
There are many OpenGL tutorials on the net. Try looking at:
Some other good ones are:
Q: So, like, is anyone really reading this column?
A:
I have no idea. Is anyone out there?
Yonowat, the maker of AMAPI,
has a trial version, 2.11, available for download from their
web site. They are also porting another of their products
AMAPI Studio 3.0, a more advanced modeling tool, to Linux.
The web site doesn't mention when it might be ready but the
description on the pages look *very* interesting.
What distinguishes Leo 3D from most other modelling applications
is that all object transformations are done directly in the
viewing window (no need for three seperate x, y, and z windows).
For example, to move an object, all you need to do is grab and
drag (with the mouse) one of the 'blue dots' which corresponds to
the 2D Plane for which you wish to move the object. Scaling and
rotation is done in the same way with the yellow and magenta dots
respectively.
The DOS version is being ported to Windows but it doesn't
appear a port of this version will be coming for Linux.
The original Linux-port author says he's still interested in doing
bug fixes but doesn't expect to be doing any further
feature enhancement.
Sced uses constraints to allow for the accurate placement of
objects, and provides a maintenance system for keeping this
constraints satisfied as the scene is modified.
SCEDA is a port of SCED that allows for keyframed animation.
Objects are given initial and ending positions and the modeller
creates the frames that will fill in the spaces between these
two points.
% export HFLHELP=$HOME/hf/hf-lab.hlp
and in csh type
% setenv HFLHELP $HOME/hf/hf-lab.hlp
Note that the path you use for the HFHELP environment variable
depends on where you installed the hf-lab.hlp file from the distribution.
The build process does not provide a method for installing this file
for you so you'll need to be sure to move the file to the appropriate
directory by hand. You definitely want to make sure this file is
properly installed since the online help features in HF-Lab are
quite nice.
Linux Graphics mini-Howto
Some of the Mailing Lists and Newsgroups I keep an eye on and where I get alot
of the information in this column:
The Gimp User and Gimp Developer Mailing Lists.
Figure 1: HF-Lab command line interface
Figure 4: leathery surface, which I created completely by accident
Allow me to state up front that I'm not a computer graphics professional
(or even much of an amateur!) and I've never used any of the common commercial
tools such as Photoshop. Thus it's not too surprising that my efforts to use
version 0.54 of the Gimp, the GNU-licensed image-editing tool developed by
Spencer Kimball and Peter Matis, often were frustrating. But one day I
happened upon the developer's directory of the Gimp FTP site and saw there a
beta release, version 0.99.9. This sounded awfully close to version 1.00, so
I thought I'd give it a try.
At first it absolutely refused to compile. After downloading this large
archive, I wasn't about to give up, and after several false starts I found
that if I compiled each subdirectory first, followed by installation of the various libs
and running ldconfig to let ld.so know about them, the main
Makefile in the top directory would compile without errors. The Motif libs
aren't needed with this release, as the new Gimp ToolKit (GTK) has been
implemented as a replacement.
An analogy occurred to me as I gradually discovered how complicated and
powerful this application is. It's the XEmacs of image editors! The plug-ins
and scripts are like Emacs LISP extensions and modes, both in their
relationship with the parent application and in their origin: contributed by a
wordwide community of users and developers.
This release does have a few problems. Occasionally it will crash, but politely;
i.e. it doesn't kill the X-server or freeze the system. The benefits of this
release far outweigh these occasional inconveniences, especially for a rank
beginner.
Image editing is a notorious consumer of memory. This new version has a
method of attempting to minimize memory usage called tile-based
memory management. This allows the Gimp to work with images larger than
can be held in physical memory. Disk space is heavily used instead, so make
sure you have plenty of swap!
A new file format specific to the Gimp, (*.xcf), allows an image to
be saved with it's separate layers, channels, and tiles intact. In ordinary
image formats all such information disappears when the image is saved. This
would be ideal if an image had to be changed at a later date, allowing
effective resumption of an editing session.
An extension is like a plug-in but is not called from or associated with a
specific image; the first of these is described in the next section.
The Gimp now has a built-in scripting language, based on Scheme, which
bears some resemblance to LISP. An extension called Script Fu (which can be
started from the Gimp menubar) can read these scripts and perform a series of
image manipulations on user-specified text or images, using user-selected
fonts and colors. What this means for a beginner like myself is that a
complicated series of Gimp procedures (which would probably take me a day to
laboriously figure out) is now automated. A collection of these scripts is
installed along with the other Gimp files, and more are periodically released
by skilled Gimp users. Many of the scripts facilitate the creation of text
logos and titles suitable for use in web pages.
Here is a screenshot of the Script Fu window:
As you can see, entry-boxes are available for filling in. Most scripts
have default entries, and scripts will certainly fail if the default font is
not available on your system.
This script-processing ability should greatly expand the popularity of the
Gimp. I showed Script-Fu to my teenage kids and they took to it like ducks
to water, whereas before they had been intimidated by the Gimp's complexity
and deeply nested menus. A little easy success can give enough impetus to
explore further.
I believe that among the most important factors contributing to the
success and continuing development of the Gimp are the built-in "hooks"
allowing third-party plug-in modules to add capabilities to the program. The
GTK ends up doing all of the mundane tasks such as creating windows and their
components; all a plug-in needs to do is manipulate graphics data. One result
is that the plug-ins are surprisingly small considering what they can accomplish.
One reason the release of Gimp version 1.00 has been delayed is that the
plug-ins which had been written for version 0.54 won't work with version 1.00
(or any of the recent betas). This was partly due to the switch from Motif to
the GTK, and partly to the new memory-management scheme. The plug-in
developers have been busily modifying their modules and the great majority
have been successfully ported. Since the release of 0.99.9 several
interesting new plug-ins have been released, including: As well as these and other new plug-ins, many of the old ones were enhanced
in the process of adapting them to the new release. Several now have
real-time preview windows, in which the results of changes can be seen without
committing them.
The Gimp has never had much documentation included with the archive. This
will eventually be remedied; the Gimp Documentation Project, analogous to the
Linux Documentation Project, will be making documentation freely available.
Until the fruits of that project begin to appear there are some excellent
tutorials, written by various charitable Gimp users and developers and available
on the WWW.
The Gimp Tutorials Collection is a site which has links to many of the
tutorials out there. The tutorials situation is in flux at the moment, as
some are specific to Gimp 0.54 while others are intended for the newer betas.
A site which has helped me get started is
Jens Lautenbacher's Home Page. His tutorials are very lucid and easy to
follow, and are specific to version 0.99.9. This site is also an inspiring
example of how the Gimp can contribute to the design of a web-page.
If you'd like to keep up with the rapidly evolving Gimp scene, these links
are among the best I've found and can serve as starting points.
Last month I wrote about Cthugha, a sound-to-image converter and display
engine. Bomb is another image-generating program, but the sound component is
subsidiary. The images produced have an entirely different character than
those produced by Cthugha. Rather than working with and displaying audio
data, bomb uses a variety of algorithms to generate images. Most of these are
one form or another of artificial life (John Conway's Life is the most
familiar of these), while some others are fractal, reaction-diffusion, or IFS-related.
Bomb is a console Svgalib program, with no X11 version at this time.
The output of bomb has a distinctive character, due in large part to the
color palettes used by the program, which are contained in the file
cmap-data. The images have a naturalistic, painting-like character,
with earth-tones predominating. The reason for this is that Scott Draves
generated the palettes using his program image2cmap, which extracts a
representative 256-color palette from an image file. Scott used a variety of
scanned photographs as input. The result is that bomb is strongly marked by
Scott Draves' esthetic preferences.
The format of the cmap-data file is ascii text, with an example
palette's first lines looking like this:
(comment leafy-face) This is similar to the format of the palette files used by Fractint and
Cthugha; it probably wouldn't be too difficult to convert one format to the other.
The images are displayed full-screen, at 320x200 resolution. This gives
them a somewhat chunky, pixel-ish appearance, and also seems to contribute to the
painting-like quality. Many of the screens are reminiscent of a magnified
view of microorganisms; there is an illusion of opaque, non-human purpose.
Here are a pair of sample bomb screens. The program has a built-in capture
facility with the images saved as ppm files.
The bomb archive file is rather large, over two megabytes; installed the
bomb directory occupies nearly four and one-half mb., which seems like a lot
for a relatively small program. Most of this space is taken up by the
suck subdirectory. Suck contains about 200 TIFF image
files. Some of the bomb modes use these images as seeds. The program will
work fine without these images, so if you're short of disk space they could be
deleted; another approach is to weed through the images and retain just a few
favorites. If examined with an image viewer the TIFF files can be seen
to be mostly basic, small black-and-white images, including large
heavily-serifed single letters and logo-like images from a variety of
cultures. When used as a seed, the image appears nearly full-screen
but is eventually "eaten" by the pullulating AI organisms until it is
unrecognizable.
Another subdirectory, called dribble, is where your
screen-captures end up. Each captured PPM image takes up 197 kb., so
it is wise to check the directory from time to time and weed through the captures.
Bomb is rather picky about the versions of the required JPEG and TIFF libs
on your system; they must be compatible with each other in some mysterious
way. Initially I couldn't get it to run at all, but a reinstallation of the
two graphics lib packages (from the same distribution CD, so that
theoretically they would be compatible) cured this. Oddly enough my previous
TIFF and JPEG libs, though updated independently of each other, worked with
other programs which required them. Another argument for staying with a
distribution!
A binary is included in the distribution; the source is there if for some
reason the binary won't work, or if you'd like to modify it.
This program is one of those which is designed to be run from its own
directory; in other words, you just can't move the executable to a pathed
directory and leave the datafiles somewhere else. The easiest way to install
it is to unarchive the package right where you want it to stay. Then when you
want to run bomb, cd to its directory and start it from there.
You can get by using bomb just knowing that the spacebar randomizes all
parameters and control-c quits. I found it worthwhile to print out the
section of the readme file which details the various keyboard commands, as
nearly every key does something.
A different mode of keyboard control is enabled by pressing one of the
first four number keys. Scott calls this the "mood organ", and when in this
mode subtle parameters of the currently active display-type can be changed.
In this state the entire keyboard changes parameters within the current mode;
it's completely remapped, and can be returned to the default mode by pressing
the "1" key.
Left to its own devices, bomb periodically randomizes its parameters. Some
combinations of color-map and algorithm are more appealing than others, so
that if it seems stuck in a type of image you don't like, just press the
spacebar and give it a fresh start. Another approach is to key in some
preferred parameters; the display will still randomly change but will remain
within the category selected.
Bomb is the sort of program I like to set running when I'm doing something
else within sight of the computer; if something interesting appears some
tweaking will often nudge the program along a fruitful channel.
The current version of bomb (version 1.14) can be obtained from
Sunsite or from
the Bomb Home FTP site.
Aside from the obvious real-time entertainment value, programs such as
bomb, cthugha, and xlockmore can serve as grist for the Gimp, the incredible
(but difficult to learn) GNU image-processing tool. Lately I've been
fascinated by the 0.99.9 developer's version of the Gimp. In this release an
image can be saved as a *.pat file, which is a Gimp-specific image
format used most often as flood-fill material. There is a "Patterns" window
which, when invoked, shows thumbnails of all of the *.pat files in the
Gimp pattern directory, including new ones you've dropped in. These are
available for flood-fill if, in the "Tool Options" dialog, patterns
rather than color has been checked. (Don't ask how long it took me to
discover this!) Many of the bomb modes will produce tileable images, which
makes them particularly useful as background fill material. The tricky aspect
of this (as is true with any animated image generator) is capturing the screen
at the right time. All too often the perfect image fleetingly appears (on its
way to /dev/null) and is gone before you can save it.
OS/2 used to be my main operating system, and there are still a few OS/2
applications which I miss. One of them is Zipstream, a commercial product
from the Australian firm Carbon Based Software. Zipstream enables a
partition to be mirrored to another drive letter; all files on the mirrored
virtual partition are transparently decompressed when accessed
and recompressed when they are closed. The compression and decompression
are background processes, executed in a separate thread during idle processor
time. Zipstream increased the system load somewhat, but the benefits
more than adequately compensated for this. I had a complete OS/2 Emacs
installation which only occupied about four and one-half megabytes!
A few weeks ago I was wandering down an aleatory path of WWW links and came
across
the e2compr home page . This looked interesting: a new method of
transparent, on-the-fly disk compression implemented as a kernel-level
modification of the ext2 filesystem. Available from that page are kernel
patches both for Linux 2.0.xx and 2.1.xx kernels. I thought it might be worth
investigating so I downloaded a set of patches, while I thought about how I
may be just a little too trusting of software from unknown sources halfway
across the world.
The set of patches turned out to be quite complete, even going so far as to
add a choice to the kernel configuration dialog. As well as patches for source files
in /usr/src/linux/fs/ext2, three new subdirectories are added, one for
each of the three compression algorithms supported. The patched kernel source
compiled here without any problems. Also available from the above web-page is a
patched version of e2fsprogs-1.06 which is needed to take full
advantage of e2compr. If you have already upgraded to
e2fsprogs-1.07 (as I had) the patched executables (e2fsck,
chattr, and lsattr seem to coexist well with the remainder of the
e2fsprogs-1.07 files.
Not surprisingly, a small hard-drive was what led Antoine Dumesnil de
Maricourt to think about finding a method of automatically compressing and
decompressing files. He was having trouble fitting all of the Linux tools he
needed on the 240 mb. disk of a laptop machine, which led to a search for
Linux software which could mitigate his plight.
He found several methods implemented for Linux, but they all had
limitations. Either they would only work on data-files (such as zlibc), or
only on executables (such as tcx). He did find one package, DouBle, which
would do what he needed, but it had one unacceptable (to Antoine at least)
characteristic. DouBle transparently compresses and decompresses files, but
it also compresses ext2 filesystem administrative data, which could lead to
loss of files if a damaged filesystem ever had to be repaired or
reconstructed.
Monsieur de Maricourt, after some study of the extended-2 filesystem code,
ended up by writing the first versions of the e2compr patches. The
package is currently maintained by
Peter Moulder,
for both the 2.0.x and the 2.1.x kernels.
E2compr is almost too transparent. After rebooting the patched
kernel of course the first thing I wanted to do was to compress some
nonessential files and see what would happen. Using the modified chattr
command, chattr +c * will set the new compression flag on every file in
the current directory. Oddly enough, though, running ls -l on the
directory afterwards shows the same file sizes! I found that the only way to
tell how much disk space has been saved is to run du on the
directory both before and after the compression attribute has been toggled.
Evidently du and ls use different methods of determining
sizes of files. If you just want to see if a file or directory has been
compressed, running the patched lsattr on it will result in
something like this: The "c" in the third field shows that the file is compressed, "gzip9" is
the compression algorithm used, and "32" is the blocksize. If a file hasn't
been compressed the output will just be a row of dashes.
E2compr will work recursively as well, which is nice for deeply nested
directory hierarchies. Running the command: will compress everything beneath the specified directory.
If an empty directory is compressed with chattr, all files
subsequently written in the directory will be automatically compressed.
Though the default compression algorithm is chosen during kernel
configuration, the other two can still be specified on the command line. I
chose gzip, only because I was familiar with it and had never had problems.
The other two algorithms, lzrw3a and lzv1, are faster but don't compress quite
as well. A table in the package's README file shows results of a
series of tests comparing performance of the three algorithms.
The delay caused by decompression of accessed files I haven't found
to be too noticeable or onerous. One disadvantage in using e2compr is that
file fragmentation will increase somewhat; Peter Moulder (the current
maintainer) recommends against using any sort of disk defragmenting utility in
conjunction with e2compr.
I have to admit that, although e2compr has caused no problems whatsoever
for me and has freed up quite a bit of disk space, I've avoided compressing
the most important and hard-to-replace files. The documentation specifically
mentions the kernel image (vmlinuz) and swap files as files not to
compress.
It's ideal for those software packages which might not be used very often
but are nice to have available. An example is the StarOffice suite, which I
every now and then attempt to figure out; handicapped by lack of
documentation, I'm usually frustrated. I'd like to keep it around, as it was
a long download and maybe docs will sometime be available. E2compr halved its
size, which makes it easier to decide to keep.
Another use of e2compr is compression of those bulky but handy directories
full of HTML documentation which are more and more common these days. They
don't lend themselves to file-by-file compression with gzip; even though
Netscape will load and display gzipped HTML files, links to other files will
no longer work with the .gz suffix on all of the files.
E2compr is still dubbed an alpha version by its maintainer, though few
problems have been reported. I wouldn't recommend attempting to install it if
you aren't comfortable compiling kernels and, most important, reading
documentation!
Several years ago, in the dark backward and abysm of (computing) time,
Patrick J. Naughton collected several screen hacks and released them to other
Unix users as a package called Xlock. A screen hack is a clever bit of
programming which will display a changing image to the computer screen.
People felt vaguely guilty about wasting time writing these little programs
and gazing at the hypnotic, often geometrical patterns which they produced,
and thus the concept of the screensaver was born. The rationale was that if a
screen statically displayed text (or whatever) for a long period of time, a
faint imprint of the display would "burn in" and would thereafter be faintly
visible on the monitor screen. This actually did happen with early monitors,
but modern monitors are nearly impervious to the phenomenon (i.e, it would
take months). Nonetheless, the screensaver has survived, which is evidence
that its appeal ranges beyond the merely prudent and practical.
David A. Bagley has become the
current maintainer of Xlock, which is now known as Xlockmore, due to the many
new modes included in the package.
Xlockmore can be thought of as a museum of screen hacks. The old Xlock
modes are all still included, and some of them (at least to this jaded
observer) aren't particularly impressive. On the other hand, there is a
certain haiku-like charm to certain of the older modes. The pyro mode, for
example, manages to convey something of the appeal of a fireworks display with
nothing more than parabolically arcing dots which explode just over the peak
of the trajectory.
Over the years as computers have become more powerful the complexity of the
added modes has increased. Some of the newer ones are CPU-intensive and need
a fast processor to run well.
David Bagley must be receiving contributed modes and bugfixes quite often,
as he releases a new version every couple of months. Some of the newer modes
are amazing to behold and take full advantage of modern graphics hardware.
I'm sure most of you have seen some of the OpenGL screensavers which many
Win95 and NT users run. Even though many of them advertise one product or
another, they tend to be visually compelling, with a three-dimensional and
shaded appearance. In the latest Xlockmore package the option is offered to
compile in several flashy new modes based on the Mesa OpenGL libraries.
Gears is an impressive Mesa mode: nicely shaded gears
turning against each other while the group slowly rotates.
The Pipes mode, displaying a self-building network of 3D pipes, is
also OpenGL-dependent. Marcelo F. Vianna came up with this one. Luckily most
Linux distributions these days have prebuilt Mesa packages available.
Ed Mackey contributed the Superquadrics mode, which displays
esoteric mathematical solids morphing from one to another. He also is
responsible for porting the Gears mode to
Xlockmore.
Jeremie Petit, a French programmer, has written one of the most intriguing
"starfield" modes I've ever seen. It's called Bouboule, and if you
can imagine an ellipsoidal aggregation of stars... I really can't describe
this one well, and a screenshot wouldn't do it justice. It's appeal is in
part due to the stately movement of the star-cloud, somehow reminiscent of a
carnival Tilt-A-Whirl ride in slow motion.
Another excellent mode which doesn't show well in a screenshot is
Ifs. If you have never seen Iterated Functions Systems images
(Fractint and Dick Oliver's Fractal Graphics program display them well) this
mode would be a good introduction. IFS fractals seem to have two poles: at
one extreme they are severely geometrical (Sierpinski's pyramid comes to mind)
and at the other, organic-looking forms which resemble ferns, shells, and
foliage predominate. The Ifs mode induces a cloud of particles to
fluidly mutate between various of these IFS forms. The result (at least to my
mathematically-inclined eyes) is often spectacular.
The upcoming Gimp version 1.0 will include a
nicely-implemented plug-in called IFS-Explorer, which enables the
creation of IFS forms in an interactive fashion.
Massimino Pascal, another Frenchman, wrote Ifs,
and as if that wasn't enough, he has contributed another math-oriented mode
called Strange. This one recruits the ubiquitous cloud of particles
and convinces them to display mutating strange attractors. They are
strange to behold, diaphanous sheets and ribbons of interstellar dust (or is
that subatomic dust?) twisting and folding into marvellously intricate
structures which almost look familiar.
The eminent British physicist Roger Penrose invented (discovered?) a
peculiar method of tiling a plane in a non-repeating manner many years ago.
The Penrose tiling (as it came to be known) was popularized by several
articles by Martin Gardner in his Mathematical Recreations column, which
appeared in Scientific American magazine in the late sixties and seventies.
The tessellation or tiling is based on a rhombus with angles of 72 and 108 degrees. The
resulting pattern at first glance seems symmetrical, but looking closer you
will notice that it varies from region to region. Timo Korvola wrote the
xlock mode, and it can render two of the several variations of the tiling.
An aside: recently Roger Penrose noticed the Penrose tiling embossed into
the surface of a roll of toilet paper, of all things. He previously had patented the
pattern, thinking that it might be profitably implemented in a puzzle game, so
now he has sued the manufacturer. It'll be an interesting and novel trial, I imagine.
Another mathematical mode, very spare but elegant and pleasing to
regard, is Caleb Cullen's Lisa mode. This one displays an animated lissajous
loop which bends and writhes in a remarkably three-dimensional manner.
As with so many of these modes, a still shot doesn't really do it justice.
The modes I've described are just a sampling of newer ones; the
Xlockmore package contains many others, and more are continually added.
Xlockmore is included with most Linux distributions and tends to be taken
for granted; the default configuration files for Fvwm and Afterstep (which
most users use as templates for customization) include root-menu items for
several of the older modes. I'd like to encourage anyone who has used
Xlockmore to take the time to download the current version (4.02 as I write
this). Not only because of the newer screensaving modes, but also because
compiling it from source allows you to easily tailor Xlockmore to your tastes.
Here is the procedure I follow when compiling an Xlockmore release: first
I'll try to compile it "as is", just running the configure script and then
compiling it. If by chance it can't find, say, your X11 or Xpm libs, you may
have to point the Makefile in the right direction by editing in the correct
paths.
If you are unfamiliar with Xlockmore, now is a good time to try out all of
the modes. The quickest way to run through all of them is to run Xlock from
an xterm window, with the following command line: xlock -inwindow -mode [name of mode]
A window will open up with the mode displayed. Dismiss it with a left-
mouse-button click, press the up-arrow key to redisplay the command, and edit the
command for the next mode. Keep track of the ones you would rather not keep,
perhaps in a small editor window. There are three files which need to be
edited: the Makefile, mode.c, and mode.h. Just edit out
references to the unwanted modes (you can grep for the mode names to
find the line numbers). Recompile, and you will have a smaller executable
with only your selected modes included. You also will now be able to run
xlock with the -fullrandom switch, which will display a random mode
selected from the ones you chose to keep.
Something to consider -- since at this point you have a compiled source
tree there on your hard disk, you might want to take a look at the source
files for some of the modes. In general, the *.c files for the various
modes are unusually well commented. If you are curious about the origin or
author of a mode, you'll find it in the source. There are often parameters
that can be changed, if you like to experiment, and some files can be altered
to suit your processor speed. A few modes even have entire commented-out
sections which can be uncommented and thus enabled. It may not work, but if
you save the original xlock executable before you start fooling with
the source you can always revert to it. An advantage of keeping a built
source tree while experimenting is that if you modify a single C file,
recompilation is quick as only the modified file is recompiled. After all, one
of the oft-touted virtues of Linux (and free software in general) is that
source is available. Why not take advantage of the fact?
The source archive for Xlockmore-4.02 can be obtained from
ftp.x.org or from
Sunsite.
SSC is expanding Matt Welsh's Linux Installation & Getting
Started by adding chapters about each of the major distributions. Each
chapter is being written by a different author in the Linux community.
Here's a sneak preview--the Red Hat chapter by Henry Pierce.--editor
The Red Hat distribution is an ever-growing and popular commercial
distribution from Red Hat Software, Inc. Even though
it is a "Commercial" distribution under the Official Red Hat Linux
label purchased directly from Red Hat Software Inc., it may be downloaded from
the Internet or purchased from third party CD-ROM vendors (see Appendix B)
as well.
Much of Red Hat's growing popularity is due to its Red Hat Package Management
Technology (RPM) which not only simplifies installation, but software
management as well. This in fact, is one of the goals of the Red Hat
distribution: to reduce the system administration burdens of obtaining, fixing
and installing new packages so that Linux may be used to get some real work
done. RPM provides software as discrete and logical packages. For example, the
Emacs editor binary executable file is bundled together in a single package
with the supporting files required for configuration of the editor and the
extension of basic functionality.
The version of Red Hat described here is version 4.0/4.1, released October
1996/December 1996. Installation of earlier installations of Red Hat do differ
in their installation procedures than the version described here. Installation
of later versions of Red Hat should be very similar to the information given
here. This document focuses on Intel based installation of Red Hat Linux.
However, many aspects of installing the Alpha and Sparc versions of Red Hat
are similar to Intel Systems which are out lined here.
The process of installing or upgrading Red Hat Linux requires backing up the
existing operating system, obtaining the Red Hat distribution, planning your
installation, preparing the hard disk, making the appropriate installation
diskettes, going through the installation program and, finally, rebooting your
system with the newly installed operating system. For those who currently have
Red Hat Linux 2.0 or higher installed, you may upgrade by following the same
process outlined here except you should choose "UPGRADE" instead of
"INSTALL" when prompted by the installation program.
There are only two ways of obtaining the Red Hat Linux Distribution:
on CD-ROM from Red Hat Software, Inc.\ or other 3rd party CD-ROM
distributor or via FTP from:
ftp://ftp.redhat.com/pub/redhat
or anyone of the frequently less busy Red Hat mirror sites. No matter
how Red Hat Linux is obtained, you should read the Red Hat Errata
which contains a list of known problems for the release you
install. You can obtain the current errata via:
http://www.redhat.com/errata
or by send email to errata@redhat.com. If you obtained Red Hat Linux
from a 3rd party CD-ROM distributor (such as InfoMagic, Inc.) they
often delay releasing their CD-ROM kit for 2 weeks to a month+ after a
major new release of Linux so they can include the inevitable bug
fixes and updates that follow on the CD-ROM an saving the trouble of
downloading them.
Planning Your Installation
Planning an installation of Linux cannot be understated. The success or
failure of installing or upgrading Linux is directly related to how well you
know your hardware and understand how Linux should be installed on the target
computer. This section outlines basic installation planning and considers
common mistakes and oversights that prevent the successful installation of
Linux. This is also true for people upgrading Red Hat Linux version 2.0 or
higher to version 4.X. In either case, it cannot be understated that you
should back up you existing system before going further. In the rare
cases that something should go wrong when you have not backed up your
system that results in the loss of an existing operating system, your data is lost. So if it is worth saving, back up
your system before continuing. I now get off my soap box.
Before we begin, it is worth taking a moment to discuss Red Hat Package
Management (RPM) Technology as it is the core of installing and maintaining
Red Hat Linux and helps you simplify the planning of installing and provides
Red Hat Linux's ability to upgrade from an older version of Red Hat Linux to a
current one.
Traditionally, software under Linux and Unix system has been
distributed as a series of RPM, in contrast, is designed to manage software packages by defining
how a package is built and collecting information about the package
and its installation process the during package's build process. This
allows RPM to create an organized packet of data in the header of a
There are many more complicated things RPM can do such as querying a
package to find out if it is installed, what version the package is,
or query an uninstalled package for information. In essence, it does
almost everything a package management tool should do. And Red Hat has
GPL'd this innovative system.
Anatomy of An RPM Package
Essentially, RPM works by maintaining a central database of installed
packages, the packages files and its version. A properly built
From the discussion above, you should have the sense that RPM is a powerful
tool, so powerful in fact, that Red Hat Linux is one of the few Linux and Unix
distributions that can truly claim to upgrade from an old release to a current
release. If you are planning to upgrade, you should know that only upgrades
from version 2.0 of Red Hat Linux and onward are supported due to major
changes in Linux's binary format. Otherwise, upgrades can be performed from
the same methods of installation: CD-ROM, NFS, FTP and a Hard Drive. As of
Red Hat Linux v4.0, the upgrade option is incorporated into the Boot Diskette
instead of being a program. For example, if you upgraded in the past from v2.1
to v3.0.3 and now want to upgrade to version 4.0, you will need to create the
Boot Diskette (instead of looking for an upgrade script) just like those
installing Red Hat 4.X from scratch. However, it will not reformat you
partitions nor delete your configuration files.
Given the scope and variety of hardware, it is not surprising many people
become confused. However, taking a little time to collect the following
information will save much frustration and the time frustration costs when
things don't install or work correctly:
Again, taking the time to list the above information before going further will
save you time and frustration and make the installation both easier and
smoother. If your system didn't come with literature detailing the above
parameters for your hardware, you should consult with your system vendor or
the manufacturer of the equipment. Other useful information to have if you are
going to be on a network are the TCP/IP networking settings for your system
(check with your system administrator for these if you don't already know
them).
Red Hat Linux may be installed or upgraded via CD-ROM, FTP, NFS or from an
existing Hard Drive partition. Installation nor Upgrading is not supported
from floppy diskettes containing Red Hat packages. Which supported method
chosen depends on your needs, available equipment, availability of Red Hat
Linux and time. For example, if you are a network administrator that needs to
update or install 16 Linux boxes over the weekend, an NFS install is generally
the most prudent way. If you have a Red Hat CD-ROM for your personal machine,
then a CD-ROM install is order or Hard Drive install if your CD-ROM drive
isn't supported. If you don't have the CD-ROM and simply want to try Red Hat
out and have a couple of hours to spare, then an FTP/Hard Drive install is a
reasonable choice with a 28.8 speed modem or faster connection to the
Internet. No matter which method you choose, the installation of Red Hat is
similar in all cases. To begin, everyone needs to have the following files
available and then create the Installation Floppy Kit described below to
install Red Hat.
To create the Installation Floppy Kit, you need to obtain the following:
A note about creating the Boot and Supplemental Diskettes: If you are
re-formating existing diskettes, DO NOT use One blank DOS formatted floppy is needed to create the Boot Diskette
and one blank DOS formatted diskette is needed for the Supplemental
Diskette. This diskette set is used for both installing or upgrading
Red Hat Linux. Starting with Red Hat 4.0, a "one boot diskette fits
all" strategy is employed to install or upgrade Red Hat Linux from
the CD-ROM, FTP, NFS or Hard Drive medium. Other distributions (and
older RHS distributions require you to match a boot image to your
hardware, RHS v4.0 and higher do not). The Boot Diskette is made from
the file "boot.img" and is located in the The Boot Diskette image contains the bootable kernel and the module support
for most combinations of hardware and the Supplemental Diskette contains
additional tools for non CD-ROM installs. You should make the Supplemental
Diskette even if you are installing from CD-ROM because the Boot and
Supplemental Diskette can be used as an emergency boot system if something
should go wrong with the install or with your system after it is installed and
allow to examine the system.
NOTE: some will notice the size of the boot.img and supp.img being 1.47MB
which is larger than 1.44MB. Remember that the unformatted capacity of a
1.44MB is really 1.47MB and that boot.img and supp.img are exact byte for byte
images of a floppy diskette. They will fit using one of the tools below:
The utility Once rawrite has been copied to a system directory (such as
Once rawrite is done creating the Boot Diskette, remove the diskette from the
floppy drive and label it "Red Hat Boot Diskette". Remember, Red Hat
Linux 4.X uses a "one boot disk fits all" strategy so you don't have
to worry about matching a boot image to your hardware as earlier distributions
of Red Hat required.
To create the Supplemental Diskette, follow the instructions above but
substitute "supp.img" for "boot.img". Remember to label
this diskette "Red Hat Supplemental Diskette".
If you are creating the Boot and Supplemental Diskettes from and
existing Linux or Unix box, make sure it has a 1.44-3.5" floppy
available and you know how your system refers to the floppy device. If
you don't know how the system accesses the floppy device, ask you
system administrator. For Linux, Floppy Drive A: is called /dev/fd0
and Floppy Drive B: is called /dev/fd1. To create the diskettes under
Linux, `cd` to the system directory containing the boot.img and
supp.img image files, insert a blank formatted diskette and type the
following enter If you are installing Linux to a machine that has an existing operating
system, make sure you create an emergency start diskette with useful
diagnostic and recovery tools. Exactly how you want to create such a diskette
various from operating system to operating system. However, MS-DOS 6.X and
Windows 95 will be covered here and should give you some ideas for other
operating systems.
Windows 95 users should press "Start---Settings---Control---Panel---
Add/Remove Software" and select the "Startup Disk"
tab. Insert a blank, DOS formatted disk and press "Create
Disk". When Windows 95 is done, you will have a boot diskette for
Windows 95 containing use tools such as FDISK.EXE, SCANDISK.EXE and
DEFRAG.EXE. Once the diskette is created, you need to copy
MS-DOS 6.X users need to place a blank MS-DOS formatted diskette into floppy
drive A: and do the following to create their emergency boot diskette:
Once you are done creating the diskette, remove it from the floppy drive and
label it "MS-DOS Emergency Boot disk and Partition Table Back Up".
Once you have created the Installation Floppy Kit, you should ensure
your installation method is properly setup for using the Red Hat
installation diskettes. For CD-ROM, NFS, FTP and Hard Drive
installation methods, the medium must have the directory
CD-ROMs will, of course have additional directories but the key
directories needed for the installation are For NFS installs, you will either need a Red Hat CD-ROM on a machine
(such as an existing Linux box) that can support and export an
ISO-9660 file system with Rockridge Extensions or you need to mirror
one of the Red Hat distribution with the directory tree organized as
indicated above. And of course the proper files in each directory. The
directory Hard Drive installs need to have the TIP: NFS and Hard Drive installs can provide more flexibility in the packages
available to install. NFS and Hard Drive installs/upgrades implied that you
can be selective about which packages are placed in the RPMS directory. For
example, if you only want a text based system, then the X-based packages may
be excluded. Also, if there are updates for the Red Hat system you wish to
install, they may be placed in the RPMS directory in place of the
distributions original packages. The only caveat for customizing the available
packages for installing or upgrading Red Hat Linux is that package
dependencies are meet. That is, if package A needs package B to be installed,
both packages must be present to meet the interdependencies. This may,
however, take a little experimenting to ensure all package dependencies are
met. For more information, please see "Customizing
Your NFS or Hard Drive Installation" below.
For FTP installs over the Internet, all you need is the IP address of your
nearest FTP server and the root directory path for the Red Hat Linux system
you wish to install. If you don't know the nearest FTP site, consult with your
system administrator or your ISP. If you are intending to do an FTP install
over a low band width connection (defined as anything slow than a 128K ISDN
link), it is highly recommend that you FTP the file files to a hard drive with
an existing DOS partition and then do the hard
drive install install described in this chapter. The total size of the
binary packages available in the One of the interesting things you can do with Red Hat Linux is customize the
install process. However, this is not for the faint of heart. Only those
already familiar with Red Linux or Linux in general should attempt customizing
the install. As of Red Hat v4.X, the Customizing the packages to install is an advantage and possible for the
following types of installs: FTP, NFS and Hard Drive methods. CD-ROM cannot
be written to (but you can copy the files to the hard drive and do a hard
drive install with the customized package list). FTP and NFS installs can only
be designed if you have administrator access to the server(s) on your network
or your system administrator is willing to work with you. The following
installation situations make customizing the installation desirable: Obtaining
Red Hat Linux via FTP over a low band width connection or designing a suite of
software to be used by all installation of a network of Red Hat Linux boxes.
To customize the installation, you must obtain the The Red Hat installation program uses the file That is a tag to identify the category number, the category, a list of the
package names in the category and the tag "end" to mark the end of
the category.
Without exception, everyone needs the all of the software packages listed in
the Base section of the file. The other sections, though, generally can
be customized or eliminated to suit a particular need. For example, there are
three types of Networked Stations: "plain", Management, and
Dialup. An examination of these sections shows that many of the software
packages are listed in all three categories, but some software packages are
specific to the category. If you are creating a Dialup Networked Station,
then you can safely eliminate the "Plain" and "Management"
sections and any software unique to those categories. Conversely, if you only
need basic networking capability for a networked work stations, the other
sections can be eliminated from the file as well as the unique software to
each of those sections. All you need do is make sure you have the all the
software packages listed in that category. If you have some local custom
packages (those not provided by Red Hat Software), you should add them to an
existing category that is appropriate rather than creating a new category.
Because the list of packages in each category only contains the name
of the package, i.e., not the entire
The "-q" puts RPM in query mode, the "-p" tells RPM to
query an uninstalled package and the "-R" tells RPM to list the
target package's dependencies required. In this example, we see libc.so.5 and
libtermcap.so.2 are required. Since libc and termcap are part of the base of
required software (as is bash really), you must insure the libc and libtermcap
packages (the dependency packages) are present to be able to install bash (the
target). Overall, as long as you get the entire base packages
installed, you will be able to boot the system when the Installation Program
completes. This means you can add additional packages to Red Hat as required
even if the Installation Program reports a package failed to install because
dependencies were not met.
The following table describes the categories of software are found in
It is difficult to determine exactly what any one installation will
require. However, someone installing via FTP should get the
Base system and the Dialup Networked Station and install
these. Then additional software can be obtained and added as the need
arises. Of course if you want to do C programming, you should get the
relevant packages and edit the comps file appropriate.
One last caveat: If you encounter a file during the install that requires
another package you don't have available, or you make a mistake in the comps
file, you can generally finish the install and have a bootable working system.
You can correct the problem by manually adding the failed packages and their
dependencies later. Overall, get the entire Base system and a Networked Station
packages installed and you can add anything you need or want later.
Before continuing, if you have an existing operating system, and have
not yet backed up your data, you must back it up now. While most of
the time installing Linux will not result in the loss of data, the
possibility exists, and the only way to guarantee a recovery in such a
catastrophic event is to back up your data.
At this point with the information collected above and having decided on an
installation method above, preparing your system should offer no obstacles.
Essentially, you need to make sure you have free and unpartitioned space on
one the system's hard drives. (NOTE: there is a file system type known as
UMSDOS that some distributions use as an optional way to install Linux onto an
existing DOS file system; Red Hat Linux does not support this type of
installation.) If you are installing on a system that will only have Linux and
does not currently have an operating system installed, then you are set to
partition your hard drive and can go to the next section.
If you have an existing operating system, such as DOS/Windows 3.1, Windows 95,
OS/2 or another operating system, then things are a bit more complex. The
following should help determine what you need to do to free hard drive space:
NOTE: Microsoft has introduced a new 32-bit FAT system with recent
Windows 95 releases. This 32-bit FAT system cannot be shrunk by the
current version of FIPS.EXE. In Windows 95, if you check under My
Computer | Control Panel | System and your Windows 95
kernel version ends in a "B", Windows 95 is likely to be using a
32-bit FAT.
Linux has its own version of the program One way of installing Linux is to use two partitions---one for the
operating system and one for the swap file in the free space on your
hard disk. However, this is not an ideal way for Linux to be
installed. While some hardware configurations may only allow this type
of organization, the recommend method is to use a minimum four partitions
for Linux: One for A PC can have either have a maximum of four primary partitions or have three
primary partitions and 1 extended which can contain many "logical"
drives. One model in which to understand this are Russian Stacking
Dolls. Basically, Russian Stacking Dolls are containers within
containers but each container is a discrete doll. A partition is a
mechanism describing a container within the master container of the
hard drive that an operating system does not leave the confines of. A
normal PC hard drive can have up to four primary containers (Primary
Partitions) or three primary containers and one extended container (Extended
Partition) that contains Logical containers (Logical
Drives/Partitions). This means you can have one primary partition for
DOS/Windows, one primary partition for the root file system, one primary
partition for a swap partition, and one Extended partition containing
logical drives for Overall, IBM designers didn't think that a PC would ever have 1 GIG drives 15
years ago when the PC was originally designed. As a result, a PC BIOS is
limited to a 10-bit address for describing the initial geometry of a hard
drive. This happens to correspond to one of the values used in calculating the
location of a piece of data on a hard disk known as cylinders. A 10-bit number
is sufficient to describe the numbers 0 through 1023 in decimal notation. A
drive with 1024 cylinders, 16 heads and 63 sectors per track, is approximately
504MB. This is important for 2 primary reasons: Most boot loaders have to
depend on BIOS to get a drives initial geometry for calculating the beginning
of a partition and the average drive size on the market these days is 1.2 GIG
which contain 2,000+ cylinders. Luckily, most newer system (usually those with
a BIOS designed in 1994 or later) have a BIOS that supports Logical Block
Addressing (LBA). LBA mode is a means of supporting Large Hard Drives by 1/2
or 1/4 the number of cylinders and doubling (or quadrupling) the number of
heads. This allows for the proper calculation of drive geometry while working
within the constraints of BIOS. So a drive with 2048 cylinders, 16 heads and
63 sectors per tract will, under LBA mode, have 1024 cylinders, 32 heads, and
63 sectors per tract. Now, we can potentially use any primary partition as a
boot partition.
Now, with all this theory and practical advice, it is time to provide some
example of how this can be put together; the first example is an 850MB drive
with LBA mode enabled which might be divided:
This table might be useful for a machine used by a single person. There a
couple of things to note here. First, the labeling of partitions by Linux. The
By now, an installation method has been chosen and a view of what partitioning
for Linux has been discussed. But how much space do I really need? The answer
is: "It depends." To make a decision on how much space is needed,
This a the goal(s) of why you are installing Linux must be reviewed because it
has a direct bearing on the space needed to meet these goal(s). If you install
everything, you will need about 550MB for all the binary packages and
supporting files. This does not include swap space or space for your own
files. When these are factored in, a minimum of 650MB or more is needed. If
your goal is more modest such as having a text only system with the C
compiler, the kernel source tree, EMACS, basic Internet dialup support, then
125 to 150MB of hard drive space is sufficient. If your plans are more
demanding such as having a web development platform and X then 450MB or
so described in the model above should be enough. If you are planning to start
and ISP or commercial web site, then 2 or more GIGs of hard drive space may be
needed depending on the scope of services being offered. The overall rule of
thumb is having to much real estate is a good thing, not having enough is bad.
To help you decide how much space is enough, here are some basic
formulas/values for different needs:
Many people installing Linux have one hard drive with a single DOS or
Windows 95 partition already using the entire hard drive, or they may
have two drives with 1 DOS or Windows 95 partition per drive. FIPS is
a utility that can non-destructively shrink a 16-bit DOS FAT in use by
DOS 3.X or higher and many implementations of Windows 95. (NOTE: if
you are using revision "B" of the Windows 95 kernel, you may be
using FAT32 which FIPS currently cannot shrink.) If you meet the
requirements above, then you can shrink an existing primary partition
on any drive. NOTE: FIPS cannot shrink logical drives or extended
partitions. If you have Red Hat on CD-ROM, the utility should be in
the A few caveats about using FIPS: As a reminder, you should back up your
existing data before using it. While it is rare for FIPS to damage a
partition, it can happen, and backing up your data is the only way to recover
from such a catastrophe. FIPS can only be used on primary DOS 16-bit FAT
partitions. It cannot be used on any other types of partitions, nor can FIPS
be used on Extended partitions or Logical drives. It can only split primary
partitions. Before running FIPS, you must run SCANDISK to make sure any
problems with your partition are fixed. Then you must run DEFRAG to place all
the used space at the beginning of the drive and all the free space at the end
of the drive. FIPS will split an existing primary partition into to two
primary DOS 16-bit FAT partitions: One containing your original installation
of DOS/Windows 95, and one empty, unformatted DOS 16-bit DAT partition that
needs to be deleted using the DOS or Windows 95 fdisk program. The
following steps outline how to use FIPS.EXE:
With the appropriate things done in this section for installing Linux,
you are now ready to Install Red Hat Linux!
By now, you should have created an Installation Floppy Kit, Prepared
Your Hard Drive, and Have your Installation Media ready. for the
install. The details of the installation follow, however, you first
begin by booting your system and configuring the install program to
install from your selected medium. Once this is done, the installation
proceeds with the same steps for each everyone one after that. At this
point, you need to begin by booting your computer with the diskette
labeled "Boot Diskette".
As the boot diskette starts up, the kernel will attempt to detect any
hardware which the boot diskette has drivers compiled directly in to
it. Once booting is complete, a message asking if you have a color
screen appears (if you do, select OK). Next comes the Red Hat
Introduction Screen welcoming you to Red Hat Linux. Choose OK to
continue. The next questions asks if you need PCMCIA support which you
need to say yes to if you are installing to a laptop; say yes and
insert the Supplemental Diskette when prompted. Once PCMCIA support is
enabled (if needed), you will be presented with a screen asking what
type of installation method you will be using. Follow the
instructions for the installation method you've chosen described in the following sections.
If installing from CD-ROM, you should choose "Local CD-ROM" by
highlighting it from the list of installation types. Once you choose
"Local CD-ROM" and click "OK", you will be asked if you have a
SCSI, IDE/ATAPI or Proprietary CD-ROM that you wish to install
from. This is where some of the hardware research pays off: if you
have a recently made 4X or faster CD-ROM drive that was bundled with a
Sound Blaster or other sound card, you most likely have an IDE/ATAPI
type drive. This is one of the most confusing issues facing you.
If you choose SCSI, you will be asked what kind of SCSI card and be presented
a list. Scroll down the list until you find your SCSI card. Once you have
choose it, you will be asked if you wish to AUTOPROBE for it or SPECIFY
OPTIONS. Most people should choose "AUTOPROBE" which will cause the
setup to scan for your SCSI card and enable the SCSI support for you card when
found
Once the Installation Program has successfully located the Red Hat CD-ROM, you
should proceed to "Walking Through the Rest of the Installation."
If you are installing from a hard drive, then highlight this option
and choose "OK". If you have not already choose PCMCIA support, you
be prompted to insert the Supplemental Diskette.
If you are installing via NFS, then highlight this option and choose
"OK". You will next be asked to choose which Ethernet card you have
installed on the target machine so the Installation Program may load
the correct Ethernet driver. Highlight the appropriate card from the
list and then select "OK" allowing the Installation Program to
AUTOPROBE for you card. However, if you machine hangs, you will need
to do Once your card has been successfully found, you will be prompted for
TCP/IP information about your machine and the NFS server with the
Linux installation. First, you will be asked to provide the target
machines IP Address, Netmask, Default Gateway, and Primary
Name Server. For example:
Once you press OK, you will prompted for the target machines
Domainname and Hostname. For example, if you domain name is
infomagic.com and hostname is vador, enter:
An FTP install is very similar to the NFS install outlined above. You
will be prompted for the Ethernet card and your machines TCP/IP
information. However, you will be asked for the FTP site name
and Red Hat directory on the Red Hat mirror site. instead of NFS
server information. There is one caveat about performing an FTP
install: find the closest and least busy FTP site to your location.
If you don't know how to do this, check with your network
administrator.
TIP: If your hardware isn't detected, you may need to provide an
override for the hardware to be enabled it properly. You may also want
to check:
http://www.redhat.com/pub/redhat/updates/images
This rather mysterious prompt is Linux's fdisk's command prompt. If
you press `m`, you will get a list of commands with a short definition
of what each does. However, the most useful one to start with is
"p". This will print your existing partition on the screen. If you
have existing partition(s) on the drive they will be displayed. Make
sure you can create at least one 25-50MB partition that starts before
cylinder 1024 and ends on or before cylinder 1023 as this type of
locations is required by LILO to be able to boot the root partition
which will in turn allow the kernel to take over you system which is
not restricted in the way LILO is. Once the kernel boots your system,
it queries the hardware directory and ignore BIOS.
To create a primary root partition of 50MB according to our example
above, enter "n". First, you will be asked for a partition number
between one and four. Our example in Planning to Partition the Hard
Drive suggests two. You will be asked if the partition is to be a
primary or extended, enter `p` primary. Next you are asked to enter
the beginning cylinder which should be the first available cylinder
from the range given. After you hit enter, you will be asked for the
ending cylinder. Since we want to make this partition 50MB, you can
enter +50M and fdisk will calculate the nearest ending cylinder for a
space of about 50MB. Once you have done this, enter the "p" command
so you can make sure the new partition ends on or before cylinder
1023. If the new partition doesn't, use the "d" command to delete
partition two and try again except enter +40MB for the new primary
partition and check again with the "p" command. Keep doing this until
you get a root partition below cylinder 1024. Overall, if you cannot
create a root partition of at least +25M below cylinder 1024, then you
will either need to free more space below cylinder 1024 or not use
LILO.
Next, according to our example, you will want to create a swap
partition that is 2 x physical ram installed. Creating a swap
partition requires two steps, first using the "n" command to create a
primary partition (three in the example). Following the instructions
above, except enter the value of +(2 x physical RAM) MB. For the swap and
other partitions, we don't care what there beginning and ending
cylinders are because they are not crucial for LILO to work
correctly---only the root partition is. Once you have created the
Linux native partition to be used as the swap partition, you need to
use the "t" command to change the partition ID to type "82" when
prompted. This changes the partition ID so Linux well recognize it as
a swap partition. When you have successfully done this, the "p"
command will report that you have a native Linux partition and a Linux
swap partition.
Now, since we need two more partition, but the hard drive in a PC can
only support four primary partitions and three primary partitions have been
used, we need to create an Extended partition that occupies the rest
of the drive that will allow the creation of Logical drive with end
the extended partition. This time, to create the Extended partition
with the "n" command, enter four for the partition number and choose
"e" when prompted to create an Extended partition. When asked for the
beginning cylinder, use the first one available and for the last
cylinder, enter the last available cylinder. You are now ready to
create Logical drives for To create a logical drive of 40MB to be used as Once you have completed this, you will be asked for the starting
cylinder which should be the first available cylinder. For the ending
cylinder, enter +40M for the size as the size was entered above. For
the Once the installation procedure is completed, you are ready to reboot your
system and use Linux!
Now that you have installed Linux and are booting your system for the
first time, there are some useful things to know about using your
system such Understanding the LILO prompt, Logging In for the First
Time and Using RPM.
If you have installed LILO to manage one or more operating systems,
the following useful things should be known:
When you power-on or reboot the system you get the "LILO" prompt
which you have hopefully configured for a 30 second or so delay before
it boots the system. When LILO appears on the screen, if you do
nothing, the default operating system will boot at the prescribed time
out period. However, from LILO, you can control several aspects of how
Linux boots, or tell LILO to boot an alternative operating system. If
you wish to override the default behavior of LILO, pressing the
This tells use that "dos" is the default operating system that will
boot if nothing is typed, or to boot Linux, type "linux" (without
the quotes). However LILO lets you pass overrides to the Linux kernel
which will override the kernels default behavior. For example, you may
have been experimenting with the start-up configuration files and done
something that prevents the system from coming up properly, so you
want to boot the system up to the point (but not after which) it reads
the configuration files. The override for this is "single":
Now that you are faced with the "login:" prompt for the first time
you may be wondering how to get into the system. At this point on a
newly installed system, there is only one account to login to which is
the administrative account "root". This account is used to manage
your system and doing such things as configuring your system, adding
and removing users, add/removing software, etc. To login into the
account, type "root" (without the quotes) at the login: prompt and
hit enter. You will then be prompted for the password you entered
during setup. Enter that password at the password: prompt. The system
prompt One of the first things you should do on a newly installed system is
to create a regular user account for yourself and plan on using the
root account only for administrative functions. Why is this important?
Because if you make a critical error in manipulating files you are
working on, you can damage the system. Another reason is that programs
run from the root account have unlimited access to the system
resources. If a poorly written program is run from the root account, it
may do unexpected things to the system (because a program run as root
has root access, a program run as a user has restricted resource
access) which will also damage it. To create a user account, you will
want to use the The new account is now be created and is ready to use. Other things
that may need to be done as root are configuring X Window System,
configuring dialup services, and configuring printer services. These
topics are covered elsewhere.
One concept under Linux for accessing devices that confuses new users
is that things like CD-ROM disks and floppy diskettes are not
automatically made available when inserted in the drive. Linux
abstracts a device to be file (although in the case a special type of
file), And much like a word processor, you have to tell the system
that you want to open a file or close a file. The command used to open
(make a device available) a device is Once you have created the directory, you can access the CD-ROM by typing:
The break down of the command line above is this: the "-t" switch
tells the mount command the next argument is a file system type, in
this case "iso9660" is the format on most computer CD-ROM
diskettes. The "-r" is a read-only flag since the CD-ROM is
read-only. The next argument,
There are other drive types as well, but these are the most
common. Some literature refers to Floppy drives are assessed in a similar manner:
Will make a floppy formatted under DOS in drive "a" available under
the directory /mnt/floppy. If you want to access the floppy diskette in the b
drive, substitute /dev/fd1 for /dev/fd0.
When you are finished with a device such as a CD-ROM or floppy diskette, it is
extremely important that you "close" the file before removing it
from the system. This needs to be done for a variety of reasons, but if you
don't and try to remove it you can make the system unstable and floppies may
get erased. To release a device from the file system, type:
For more information on either of these commands, please see the man pages
(e.g., by entering It is extremely important that the power is not simply shut off while Linux is
running. You can damage or even make the system un-bootable by doing so. The
proper way to shutdown Linux is to log in as root and type:
Mr. Fiction isn't completely convinced about Linux; perhaps
he never will be. Nevertheless, he dutifully helps me when
I'm trying to bring up Linux on an old Compaq 386 with the
weirdest memory chips, or when we need to build the kernel
yet again, because I've decided that I'm ready to trust
ext2fs file system compression or some such whim.
This time, Mr. Fiction was baiting me. "Alright, Brian. How
can Linux help me here? I've got a client who is using
SQL Server on Windows NT for her company-wide databases. She'd
really like to publish this data on her Intranet using HTML
and CGI. While she's really happy with Microsoft for a database
server platform, she's not convinced that it's good as a
web server. We're looking into Unix-based solutions, and we
really need a platform that allows us to write CGI script
that can connect to the database server. But since Linux
doesn't have connectivity to..."
That's when I had to stop him; Linux can
connect to Sybase SQL Server. What's more, it
can also connect to Microsoft SQL Server. Some
time ago, Sybase released an a.out version of their
Client-Library (CT-Lib) for Linux. Greg Thain (thain@ntdev1.sunquest.com)
has converted the
libraries to ELF. As a result, anyone using an elf-based
Linux later than 2.0 should be able to link applications against these
libraries. There's a nice section on this issue that's available
in the Sybase FAQ, at http://reality.sgi.com/pablo/Sybase_FAQ/Q9.17.html,
and the libraries themselves can be downloaded from:
In order to make use of these examples, you need to have
been assigned a user id and password on the SQL Server to
which you will connect.
You should also know the hostname of the server,
and most importantly, the port on which the server listens.
If you installed the server yourself, you will know all of
this. Otherwise, you will need to get this information from
your sysadmin or dba.
The first thing to tackle is the installation and
configuration of the Client-Library distribution. The
The second thing you can do to help applications find the
Sybase directory is to create an environment variable called
$SYBASE. This should simply include the name of the
Client-Library home directory:
Here's an interfaces file that includes entries for both a
Sybase SQL Server (running on Solaris) and a Microsoft SQL
Server, running on Windows NT (comments begin with #). Note
that the entries ARTEMIS and
NTSRV refer to the same server:
SQSH can be compiled on Linux; this should be simple for anyone
who is familiar with compiling C programs, such as the Linux kernel,
Perl, or other tools you may have installed from source. The
first thing to do is to extract the SQSH archive, preferable
in some place like
There are two files in the source directory that you must
read; README and INSTALL. If you'd like to compile SQSH with
bash-style command history editing, you'll need to get your
hands on the GNU Readline library, unless it's already
installed on your system. I believe that it's no longer
packaged as a separate library, and is now part of the bash
distribution, available at:
It's probably best to use a Perl that has been installed
from source. In the past, I have had trouble with binary
distributions, and so, I always install the Perl source code
and build it myself. You should obtain and extract the
following modules from CPAN (Comprehensive Perl Archive
Network):
Installing Sybperl is a little more involved.
If you don't want to build Sybperl yourself, you can
download a binary version from:
Here's my CONFIG file:
The next file that you need to enter is the PWD file. This
contains three configuration options; UID (user id), PWD
(password), and SRV (server name). It is used to run the
test, after the new perl binary is built. Here's my PWD
file:
Now that you've set up the configuration files, you should
type 'perl Makefile.PL' followed by 'make'. Disregard any
warning about -ltcl not being found.
After this is done, you should type 'make test', which will build the new
Perl binary and test it. All of the tests may not succeed,
especially if you are testing against Microsoft SQL Server
(the cursor test will fail).
When you are ready to install Sybperl libraries, you can
type 'make install'.
You should be aware that the new binary will be
statically linked to the Client-Library, and will be
slightly bigger. If this offends you, you can rename the new
perl to something like sybperl and install it in the
location of your choice. The new perl binary is
not installed by default, so you can
install it wherever you want. You will not be able to use
the Sybperl libraries from your other version of Perl; you
will have to use the new binary you created.
For simplicity's sake, let's assume that you are going to
rename the new binary to sybperl, and move to
Here's a sample Perl program that uses CGI and Sybase::CTlib to
give the users the ability to interactively query the authors
table that is included with the pubs sample database:
And here's an example of the program's output:
I hope these ramblings have been enjoyable for you; I
think Mr. Fiction's head is spinning, but it's all for the
best. We've had some of the best doctors in the world look
at it, and while no one can agree on exactly
when it will stop spinning, they all agree
that it looks much better that way.
Brian Jepson, bjepson@ids.net
Hey, c'mon in!
Thanks for dropping by! How y'all been doing?
So... everyone survive the semester?! I just finished taking my last final a
day or so ago AND managed to find work (with the folks in Biomedical
Informatics at Vanderbilt Univ. Medical Center :-) within 24 hours of
finishing up. PHEW!! Nice to be done.
Anyway, I'm going to apologize for the potentially "dry" topics in
this month's WM. I've not been doing much besides programming, cramming, and
making occasional trips to the 'fridge, restroom, and bedroom (pretty much in
that order...). I ended up doing a fair amount of programming for a couple
classes and got VERY acquainted with a number of the programming tools available
under Linux -- VIM, ctags, xxgdb, ddd, and so forth. Since this is what I've
been doing of late, I thought that this might be an appropriate topic. The
proviso is that you understand that you take this strictly as a novice's
introduction to a couple of these tools.
How's that for being wishywashy... :-)
Anyway, I've found a few useful things along the way and thought someone might
enjoy my sharing them.
Also, I want to continue to thank all of you who've taken the time to write
and offer comments and suggestions. Believe me, I don't claim extensive
knowledge or expertise in most of the things I write about -- these are mostly
discoveries and ideas that I've hit upon and am sharing in the hopes that they
might be helpful. I welcome corrections, clarifications, suggestions, and
enhancements! Several of you wrote in with regards to wallpapering using
XV which I'll be sharing below.
Well, thanks again for stopping by! Hope you enjoy :-)
John M. Fisk
My sincerest thanks to Brent Olson, Peter Haas, and Bill Lash for
taking the time to write and offer these suggestions. I tried tinkering
around with a few of these suggestions and they work like a champ! Here they
are:
Date: Wed, 02 Apr 1997 09:24:59 -0800
You've probably already been told this, but in the LG article relating
to reducing the number of colours used in the background, there is no
need to convert the picture first. It can be done on the fly:
Works great on my lousy 8-bit NCD display at work.
Brent Olson
Date: Tue, 08 Apr 1997 08:42:01 +0200 (MET DST)
There are another two interesting options of xv:
An example out of my .fvwm2rc95:
Regards, Peter
From lash@tellabs.com Thu Apr 24 21:20:39 1997
John,
I read your article on wallpapering with XV. You suggest choosing
images with a limited number of colors. You go on to suggest several
options, but you missed a simple solution. You can tell XV how
many colors to use in displaying the picture using the -ncols option.
At work, I usually run with a background of 100 colors on an 8-bit
pseudocolor display with the following command line:
Bill Lash
Again, guys, thanks for writing. Happy wallpapering!
John
Well, as I mentioned above, I ended up spending a good deal of time
programming this semester. Our software engineering team designed and coded a
simple FORTRAN 77 spell checker in C++. Thing was, the analysis and design
phase consumed 11 of the 14 weeks of the semester AND it was done using
Structured Analysis. Problem was, we had decided to code this thing in C++
and so ended up almost completely redesigning it using OO Analysis and Design
during the last couple weeks (when we were supposed to be doing nothing
but coding :-).
Anyway, this meant a LOT of late nights -- integrating everyone's code got a
bit hairy, since none of us had much experience with team coding. I was
mighty thankful for the development tools under Linux. I spent the better
part of 13 hours one Saturday debugging our first effort at integrating the
code -- chasing down Segmentation Faults and infinite loops :-)
Ahhh... the stuff of programming... :-)
Along the way I learned a few interesting and nifty things about the VIM
editor, which has been my 'ol workhorse editor for the past couple years now.
I wanted to give this thing another plug as I think it's one of the best
things since sliced bread. I'll admit that the emacsen, including the
venerable XEmacs, are a LOT more powerful and full featured. But,
having developed the finger memory for the "one-key-vi-commands"
I've found that I can get a lot of work done fast. I'd like to 'tip the hat
at this point to Jesper Pedersen and Larry Ayers both of whom have
written very nice articles on emacs and XEmacs in past issues of the LG and
the Linux Journal. I'd encourage anyone interested in these to have a look at
these articles. I'll also be mentioning XEmacs below and give you a screen
shot of the latest 19.15 iteration.
Anyway, here's a few (hopefully) interesting notes and ideas for using the VIM
editor!
I recently downloaded and compiled the latest beta version of VIM which is
version 5.0e. If you have the Motif development libraries you can compile VIM
with a Motif interface -- gvim. This rascal is pretty good sized and not
exactly fleet of foot. It's a bit slow getting out of the gate on startup and
so it's probably prudent to heed the Makefile suggestions and compile separate
versions of VIM both with and without X support. I tried starting versions of
vim (at the console) compiled with and without X support and the extra X
baggage definitely slows things down.
A bit later on in this article I've provided several screen dumps of gvim as
well as a couple other editors and the xxgdb and ddd debuggers. If you're the
impatient or curious type, please feel free to jump ahead and have a look.
Also, I've included a couple links for additional information.
Actually, VIM has provided a GUI since around version 4.0. I've been using
this for some time now and find that it adds a several enhancements over vim
at the console:
(...this is like the guy hawking the $2.99 Ginzu knives, "they slice,
they dice, here... I can cut through a cinder block wall, this lamp post, a
street sign, AND the hood of this guy's car and never loose an edge! But
that's not all... if you act right now...")
You get the point.
What I was going to say was that vim also provides syntax highlighting for
shell scripts (VERY COOL!), makefiles, and the VIM help files (which you'll
see here in just a bit). All in all, this is pretty nice. I've been
tinkering around with this a bit and am really starting to like it. Be aware
that the highlighting isn't quite as "intelligent" as with something
like XEmacs -- it doesn't provide the same degree of sophistication. Still,
it's very good and, being an order of magnitude smaller and a good deal more
nimble, it's well worth trying.
VIM installed the support files for syntax highlighting (at least on my
system) under /usr/local/share/vim/syntax. There are individual files for the
various languages and file types as well as the syntax.vim file that does a
lot of the basic coordination. You can tinker around with these to get the
"look-n-feel" that you want. Keep in mind that to get automatic
syntax highlighting you'll need to add something like this to your ~/.vimrc or
~/.gvimrc file:
I have to admit that I wrestled with this for longer than I should have trying
to figure out how this was done. Hopefully, this will save you some trouble
:-)
Again, I've included screen dumps below so that you can see what this looks
like. In addition, the VIM home page has a couple nice screen shots that you might
want to have a look at. I should add that syntax highlighting is
individually configurable for the console and the X version. Now, before you
go dashing off and "rushing in where angels fear to tread..."
you will probably want to have a look at the help files or documentation -- it
gives some basic guidelines for customizing this stuff.
And speaking of which...
And what's more, all of this is provided on-line. In command mode you simply
type in:
"...use the Source, Luke"
The help system is set up in a hypertext fashion. If you've enabled automatic
syntax highlighting then even the help system is colorized. To follow a link
you can either hit the letter "g" and then single click with the
mouse on a topic, or you can move the cursor to that topic and hit
"Ctrl-]" (hold down the control key and hit the left square bracket
key -- "]"). To get back up to where you started, hit
"Ctrl-t".
It's that simple :-)
IMHO, this is one of the most laudable features of VIM. The documentation is
generally well written and reasonable understandable. It is VERY thorough
and, since it's available from within the editor, provides a high level of
usability. It also provides a "Tips" section as well as numerous
"How Do I...?" sections. It's Must Reading...
To be honest, I've found that this works a LOT better at the console than
under gvim, although the exact reason eludes me. Under gvim, I get the
following error:
My suspicion is that it has to do with the termcap stuff built into the
editor. Forward movement down the manual page (hitting the space bar) is
reasonable smooth, but backward movement is very jerky and screen redraws are
incomplete. Still, if you can live with that you'll find this VERY
convenient.
Basically what tags allow you to do is find that point at which a function or
variable is declared. For example, suppose you ran across the following
snippet of code:
This is seriously cool!
When you're ready to move back to your original location, hit
"Ctrl-t" (which moves you back up the tag stack). I've been using
Exuberant Ctags, version 1.5, by Darren Hiebert for the past little bit
now and really like this a lot. As the name implies, it does a pretty
thorough job of scouring your source files for all sorts of useful stuff --
function declarations, typedefs, enum's, variable declarations, macro
definitions, enum/struct/union tags, external function prototypes, and so
forth. It continues on in the time honored tradition of providing a bazillion
options, but not to fear: it's default behavior is sane and savvy and
provides a very nice OOBE*.
*(Out Of Box Experience)
You should be able to find Darren's Exuberant Ctags (ctags-1.5.tar.gz was the
most recent version on sunsite and its mirrors at the time of writing) at any
sunsite mirror. I happened across it in the Incoming directory. You'll
probably find is somewhere under the /devel subdirectory now. If you get
stuck and really can't find it, drop me a note and I'll see what I can do to
help. This one is definitely worth having.
Oh, BTW, using ctags is child's play: simple give it the list of files that
you want it to search through and it'll create a "tags" file in your
current directory. Usually, this is something like:
To pop up a second (or third, or fourth...) window with a specific file,
simply use something like:
Resizing the windows is nicely handled using the mouse: simply click
anywhere on the dividing bar between the two windows and drag the bar to
whatever size you want. This is really handy if you are using one file as an
occasional reference but want to edit in a full window. You can resize the
reference file down to a single line when it's not needed.
Again, there's a lot more information in the online help about using multiple
windows.
Ready...? (look furtively around with squinty, shifty gaze...)
(... the clock ticks loudly in the other room, somewhere in the distance a dog
barks, the room falls into a stifling hush...)
He clears his throat loudly and in a harsh whisper exclaims...
"The "%" sign expands to the current buffer's filename!"
Phew! Glad that's over... :-)
Yup, with this little tidbit you can do all sorts of cool and groovy things.
Like what you ask...? (you knew this was coming, didn't you... :-)
So what's going on...? Well, the first line writes the current buffer to
file, the real good stuff happens on the second line in which you use the
RCS ci to checkin and lock the current file. And finally, since
the checkin process may have altered the file if you've included
"Header", "Id", "Log", etc.,
reloads the file with the new RCS information (if any).
Now, for all you VIM jockeys out there, the handy thing to do is use
"map" to bind this sequence to a single keystroke. I've bound
this to Alt-r and it makes the whole operation smooth and painless.
Seriously, this is a very convenient means of getting a hard copy of your
current file. The one caveat to remember is that you'll probably want to
commit the contents of your current editing buffer to file before
you try to print it.
I've been using the apsfilter program for last year or so and
absolutely love it. It is a series of shell scripts that automate the
process of printing. Basically, it uses the file command to
determine the type of file to print and then invokes lpr with the
appropriate print filter. As a backend, it uses the a2ps program
to format ASCII into Postscript and then uses Ghostscript to do the actual
printing. Now, using something like:
Also, I've played with the a2ps program itself and found all sorts of cool
and nifty options -- single page/double page printing, headers, boundary
boxes, setting font sizes, and so forth. I particularly like being able
to set the font size and header information. And, as always, IHABO*.
*(It Has A Bazillion Options)
You get the picture. Basically, any command that takes the form
Note that there are a couple other handy little items you might be interested
in. If you want to include the contents of a file in the current buffer, OR
if you want to capture the output of a command into the current buffer (for
example, a directory listing), then use:
The first command would insert the contents of the a2ps.README file in the
current buffer wherever the cursor was located; the second command would
insert the output of an ls listing for the /usr/local/lib/sound/
directory. That is, you can use this second form for any command that
prints its output to standard out.
This discussion leads directly into the question of spell checking the
current buffer. And the answer that I've got is that I haven't found
an easy or convenient way to do this. I ran across a key mapping definition a
while ago that basically copied the current file to the /tmp directory, ran
ispell on this file, and then copied this file back over the original. It
worked, but it was clunky. I've also tried, with some modest success, to do
something like:
Ideas anyone?
I've found that gvim, in particular, provides excellent support for make.
Basically, once you have a working makefile, simply invoke it using:
Phew! How's everyone doing...? Still hanging in there? I'm almost done here
so stay tuned. :-)
There are LOTS of other rather nifty features that vim/gvim provides.
The adventurous will find all sorts of goodies to experiment with in the
online documentation. Let me call your attention to just a few more and we'll
wrap this up and have a look at some screen shots!
Unlimited Undo
The way vim is (generally) configured, it keeps track of ALL the editing
changes you've made to a file. So, after an hour's worth of editing, should
you decide that War And Peace really didn't need a another chapter,
then you can back out of all your changes by repeatedly hitting the
"u" key. This reverses the changes you've made to the file in a
sequential fashion. Now for a major back out, you'd have done well to check
the original file in under RCS and then retrieve this version if you decide
not to keep your current changes. Still, you can back all the way out if you
don't mind hitting "u" for a while... :-)
Compressed File Support
One of the other nice things introduced into vim around version 4.0 was
support for editing compressed files. Essentially, what this involves is
transparent uncompressing of the file upon the start of editing and
recompressing the file when vim terminates. This is quite helpful as it
allows you to save a LOT of space if you work with a large number of text
files that can be compressed. You may also be aware of the fact that the
pager "less" has this support built in and so do most all of the
"emacsen".
The support for this is configured in using an entry in your ~/.vimrc or
~/.gvimrc. I use the stock vimrc example that comes with the distribution:
I still haven't completely gotten the hang of the autocmd stuff -- I suspect
that there's all sorts of wild and fun things that you can do with this.
Ahhh... places to go and things to do...!
Auto-Fill and Auto-Comment Continuation
Here's yet another nifty little feature that makes life fuller and
richer... :-)
You can set a text width variable in your ~/.gvimrc file that will do
auto-fill (or auto-wrapping) at that line length. Currently, I have this set
to 78 so that whenever the line exceeds 78 characters the line is
automagically continued on the next line. This is a Very Nice Thing when
typing text, although it can be a bit of a nuisance (and can be shut off) when
programming.
However...
There's an additional benefit to using this auto-fill thingie... if you're
inserting a comment in C, C++, a shell script, whatever..., all you have to do
is start the first line with a comment character ("/*",
"//", "#") and then start typing. If the comment extends
to the text width column, it automatically continues this on the next line AND
adds the appropriate comment character!
Very Slick! :-)
Choices, Choices...!
Well, the recurrent theme of the day is "choices!". VIM comes with
more options than you can shake a stick at. I'd encourage you to have a look
at the online docs for a description of these. Not all of them will be useful
to you but there are a LOT of interesting things that you can configure. My
own favorite ones include:
One thing to call you attention to: the shift width stuff is something that
you might not have tried yet or come across. Suppose that you've coded some
horrendous switch statement and then realize that you need to add a while loop
before it. You code in the while loop stuff and then go back and arduously
re-indent everything in between.
There's an easier way... :-)
Simply highlight the lines that you want to indent, either indent in or indent
back out, using the mouse or ":v" (for keyboard highlighting) and
then hit the ">" key to indent the lines in farther or the
"<" key to indent back out. Now, the nice thing is that you can
set the amount of indentation using the "sw" (shiftwidth) variable.
Also, keep in mind that while you normally set options in the ~/.vimrc or
~/.gvimrc configuration files, there's nothing to prevent your changing these
options on the fly, and in different parts of your file. It's pretty common
to turn off autoindentation when you're doing cutting and pasting. To turn
autoindenting off, simply type in:
Two other options that I particularly like are the ruler and the showmatch
options. The ruler option puts a row,column indicator in the status line at
the bottom of the file. Although the documentation mentions that this can
slow performance a bit, I've found that it works with no noticeable delay
whatsoever.
The other option is showmatch, which highlights the matching brace, bracket,
or parenthesis as you type. Be aware that it sounds a warning beep if you
insert a right brace/bracket/parenthesis without its opening mate. This can
be a little annoying, but the time it saves you a syntax error, you'll be glad
for it. I did a little bit of LISP programming this Spring in our Theory of
Programming Languages course and was mighty happy to use this!
Here's the skinny...
What I did was create a number of screen dumps of gvim in action -- editing a
*.cc file (show off the syntax highlighting stuff...), using the online help
system (also shows the multi-window look), and displaying a manual page from
within gvim ("Look ma! No hands...!"). I used the venerable
ImageMagick to make the thumbnail prints after using a combination of
xv, xwpick, and xwd to make the actual screen dumps and crop the pics.
Also, for the comparison shoppers out there, I've included similar screen
dumps of XEmacs, GNU Emacs, NEdit, and XCoral -- other very nice and
feature-rich editors that some of you will be familiar with. All of these
provide syntax-highlighting and a set of extended features.
Finally, I've included a couple shots of the xxgdb and the DDD
debuggers. I've been using both quite a bit lately and found that they are
absolutely indispensable for tracking down mischievous bugs. I've included a
couple URL's below as well, but let's start with the Family Photo Album:
All of these are approximately 20k.
All of these are approximately 20-25k
All of these are approximately 20-25k
Let me make just a couple comments about the debuggers.
First, I've found both of these to be very usable and helpful in terms of
making debugging easier. They are both front ends to the GNU GDB debugger (and
DDD can be used with a variety of other debuggers as well). The xxgdb
debugger is the simpler of the two and probably is a good place to start
learning and tinkering if you've not used a graphical debugger before.
I ended up having to do a bit of tinkering with the resource settings for
xxgdb. I'm currently using Fvwm95 with a screen resolution of 1024x768 and
8-bit color. To get all the windows comfortably in 1024x768 I messed around
with the geometry resources. Also, the file selection box was completely
whacked out -- I did a bit of adjustment to this to provide for a more sane
display. If you're interested, here's the XDbx resource file I'm currently
using:
Also, the DDD debugger shown above is the most current public release --
version 2.1 which just recently showed up in the Incoming directory at
sunsite. I don't know if it'll still be there, but you have have a try. If
you don't find it there, try the /pub/Linux/devel/debuggers subdirectory and
see if it hasn't been moved there.
Keep in mind that you probably should be using one of the sunsite
mirrors. If there's one near you, then use it! :-) There should be dynamic
and static binaries available as well as the source code. In addition,
there's an absolutely HUGE postscript manual page with lots of nifty pictures
included in the /doc subdirectory in the source file.
I've not had a chance to use the new DDD debugger as much as xxgdb, but what
I've tried I'm been VERY impressed with. You'll see from the screen shots
above that it has a much improved GUI as compared to xxgdb. Also, a number of
new features have been added since the previous 1.4 release. One feature that
I really like is setting a breakpoint, running the program, and then, by
positioning the mouse pointer over a variable or data structure, getting a
pop up balloon with the current value of that data structure.
This is huge. It rocks!
I really don't have time to talk about this, so you'll have to do a bit of
exploring on your own! Also, note that the folks working on DDD are
encouraging the Motif-havenot's to either use the static binaries or give the
LessTif libraries a try. Apparently, there have been some successes
using this toolkit already. I'm sorry that I don't have the URL for LessTif,
but a Yahoo, Alta Visa, etc., search should turn up what you need.
And lastly (and this really is the last... :-), here's some URL's for the
editors listed above:
The first two links should put you at the VIM and XEmacs home pages which
provide a wealth of helpful information about each of these excellent editors.
The last two I apologetically provide as approximate FTP links. The first
will drop you into ftp.x.org in its /contrib subdirectory. You should be able
to find the latest version of XCoral there, probably under the /editors
subdir. The version shown above is version 2.5; the latest version of xcoral
is 3.0, which I've not had a chance to compile or tinker with. The last link
will put you at sunsite in the /X11/xapps subdirectory. Have a look in the
/editors subdir for the latest source or binaries for NEdit.
Phew! That was a tour de force! Glad you hung in there!
I'd be happy to try to field questions about this stuff or hear back from
anyone with comments or suggestions about any of these excellent programs.
Hope you enjoyed!
John
Well, I apologize again for the brevity of this month's column. I'd hoped to
do a bit more writing on a couple different things, particularly one of the
topics that's near and dear to my heart: shell scripting. I'm absolutely
convinced that learning even basic shell scripting will forever sour you to
DOS and will make you think twice even about the Windows stuff. Shell
programming opens up a tremendous world of possibilities and, probably most
importantly, it puts you in control of your system. It let's you do
all sorts of cool and groovy things that would be difficult or impossible
under a DOS/Win system.
As a quick example, I'd recently had an occasion in which I needed to format a
stack of 30-40 floppies (I was planning to do an afio backup of the XEmacs
distribution I'd spent several hours downloading) and decided to use
superformat to do this. Now superformat is a great little program that
has the typical bazillion options. Since I needed only a few of these options
for my particular system, I whipped together a shell script to help automate
this process. It's no marvel of programming genius, but here it is:
Why bring this up?
Well, I think this points to one of the larger issues with using and running
Linux: the sense of control. Thing is, under a Linux system, you have
an impressive arsenal of powerful and mature tools at your disposal that allow
you to do things with you system. You can make it do what you need and
want it to do.
Don't get me wrong, I enjoy many of the features of the OS/2, Win95, and MacOS
OS's and I hope that the day will come when office suites and productivity
tools of the highest caliber exist for Linux as they do under these other
OS's. The thing that sets Linux apart is the freely available set of powerful
tools that provide an unparalleled measure of freedom and control over your
system.
Think about it...
Shell scripting, Perl, Tcl/Tk, the entire range of GNU development tools and
libraries, and a suite of immensely powerful utilities and programs.
That's impressive.
Anyway, I'm preaching to the choir... :-)
Also, this is something of "old news", but I wanted to thank the
folks at RedHat Software, Inc., the LUG at North Carolina State
University, and the myriad participants in this year's Linux Expo
'97. It was a blast!
A bunch of us from MTSU headed East and managed to get to most of the two day
affair. All in all, with the minor exception of some parking problems, the
whole affair when smoothly and was VERY professionally done. The talks were
delightful, the facilities very nice, and there were lots of great displays
and vendor booths to visit and check out the latest Linux offerings. The book
tent out front cleaned out more than one person's wallet, sending them home
laden down with all sorts of goodies.
All in all, it was a great trip.
For anyone who went, I was, in fact, the annoying short nerdy looking fella in
the front row with the camera. Sorry... :-)
But, I just got the prints back and have sent a stack of them off to
Michael K. Johnson at RedHat. Since I don't have a scanner or my own
web site, I figured the Right Thing To Do would be to send the doubles to the
guys at RedHat and let them put up anything they thought worthwhile. If
you're interested in seeing who some of the various Linux folks are, drop
Michael a note and I'm sure that he'll help out.
Well, guess it's time to wrap this up. I had a great year this year at MTSU
and am looking forward to finishing up school here one of these years :-).
I'm also looking forward to having a summer of nothing more than Monday
through Friday, 9:00 - 5:00. I don't know about you, but I've always got a
long list of projects that I want to work on. I'm really looking forward to
this. I've finally started learning emacs -- actually, I've just
gotten the most recent public release of XEmacs and have been having
all sorts of fun trying to figure this one out. My wife and I will be leaving
tomorrow for a couple weeks in Africa -- actually, Zimbabwe and Zambia. Her
parents are finishing up work there and will be returning this Fall. After a
busy year for both of us, we're excited about a vacation and the chance to see
them again. I should be back by the time this month's LG "hits the
stands", although if you wrote during much of May, be aware that I'm
definitely going to have a mail black-out! :-)
So... trust y'all are doing well. Congrats to all of this year's grads!
Take care, Happy Linux'ing, and Best Wishes,
John M. Fisk
Thanks to all our authors, not just the ones above, but also those who wrote
giving us their tips and tricks and making suggestions. Thanks also to our
new mirror sites.
These days my mind seems to be fully occupied with Linux Journal. As
a result, I've been thinking I need a vacation. And, in fact, I do. I had
been planning to take off a week in June to visit my grandchildren in San
Diego, California, but just learned that their current school district is
year round -- no summers off. Somehow this seems anti-kid, anti-freedom
and just plain hideous. I remember the summers off from school as a time
for having fun, being free of assignments and tests -- a time to
sit in the top of a tree in our backyard reading fiction, while the tree gently
swayed in the breeze (I was fairly high up). It was great. I wouldn't want
to ever give up those summers of freedom. I wish I still had them. Ah well,
no use pining for "the good ol' days". The grandkids will get some time off
from school in August, and I will just have to put off the vacation until
then.
Have fun!
Marjorie L. Richardson
Linux Gazette Issue 18, June 1997, http://www.ssc.com/lg/
And then there's the hardware:
"...a user-level program which uses
certain special features of the Linux kernel and the 80386 processor
to run MS-DOS in what we in the biz call a DOS box. The DOS box, a
combination of hardware and software trickery, has these capabilities:
The hardware component of the DOS box is the 80386's virtual-8086
mode, the real mode capability described above. The software component
is dosemu."
Copyright © 1997, Dave Phillips
Published in Issue 18 of the Linux Gazette, June 1997
"Linux Gazette...making Linux just a little more fun!"
Set your browser to the width of the line below for best viewing.
© 1997 by
mjh

muse:
![]() elcome
to the Graphics Muse! Why a "muse"?
Well, except for the sisters aspect, the above definitions are
pretty much the way I'd describe my own interest in computer graphics:
it keeps me deep in thought and it is a daily source of inspiration.
elcome
to the Graphics Muse! Why a "muse"?
Well, except for the sisters aspect, the above definitions are
pretty much the way I'd describe my own interest in computer graphics:
it keeps me deep in thought and it is a daily source of inspiration.
![]()
![]() his
column is dedicated to the use, creation, distribution, and discussion of
computer graphics tools for Linux systems.
This month I'll finally get around to the article on HF-Lab, John
Beale's wonderful tool for creating 3D Heightfields. I've been meaning
to do this for the past few months. I made sure I made time for it this
month.
his
column is dedicated to the use, creation, distribution, and discussion of
computer graphics tools for Linux systems.
This month I'll finally get around to the article on HF-Lab, John
Beale's wonderful tool for creating 3D Heightfields. I've been meaning
to do this for the past few months. I made sure I made time for it this
month.
The other article from me this month is a quick update on the 3D modellers
that are available for Linux. I didn't really do a comparative review,
its more of a "this is whats available, and this is where to find them".
A full comparative review is beyond the scope of this column. Perhaps
I'll do one for the Linux Journal sometime in the future.
I had planned to do a preview of the Gimp 1.0 release which is coming
out very soon. However, I'll be doing a full article on the Gimp for
the November graphics issue of the Linux Journal and decided to postpone
the introduction I had planned for the Muse.
At the same time I had decided to postpone my preview,
Larry Ayers contacted me
to see if I was still doing my Gimp article for the Muse.
He had planned on doing one on the latest version but didn't want
to clash with my article. I told him to feel free and do his
since I wasn't doing one too. He has graciously offered to place
the preview here in the Muse and it appears under the "More Musings..."
section.

Disclaimer:
Before I get too far into this I should note that any of the news items I
post in this section are just that - news. Either I happened to run
across
them via some mailing list I was on, via some Usenet newsgroup, or via
email from someone. I'm not necessarily endorsing these products (some of
which may be commercial), I'm just letting you know I'd heard about
them in the past month.

Zgv v2.8
Zgv is a graphic file viewer for VGA and SVGA displays
which supports most popular formats. (It uses svgalib.)
It provides a graphic-mode file selector to select
file(s) to view, and allows panning and fit-to-screen
methods of viewing, slideshows, scaling, etc.
Zgv can be found either in
sunsite.unc.edu:/pub/Linux/Incoming or
sunsite.unc.edu/pub/Linux/apps/graphics/viewers.
The files of interest
are zgv2.8-src.tar.gz and zgv2.8-bin.tar.gz.
Attention: OpenGL and Direct3D programmers
Mark Kilgard, author of OpenGL Programming for the X Window
System, posted the following announcement on the
comp.graphics.api.opengl newsgroup. I thought it might
be of interest to at least a few of my readers.
http://reality.sgi.com/mjk_asd/
tips/TexFont/TexFont.html
Epson PhotoPC and PhotoPC 500 digital cameras
Epson PhotoPC and PhotoPC 500 are digital still cameras. They are
shipped with Windows and Mac based software to download the pictures
and control the camera parameters over a serial port.
ImageMagick V3.8.5
Alexander Zimmerman has released a new version of ImageMagick.
The announcment, posted to comp.os.linux.announce, reads
as follows:
I just uploaded to sunsite.unc.edu
ImageMagick-3.8.5-elf.tgz
ImageMagick supports also the Drag-and-Drop protocol form the OffiX
package and many of the more popular image formats including JPEG,
MPEG, PNG, TIFF, Photo CD, etc.
Primary-site:
ftp.wizards.dupont.com /pub/ImageMagick/linux
986k ImageMagick-i486-linux-ELF.tar.gz
884k PlugIn-i486-linux-ELF.tar.gz
Alternate-site:
sunsite.unc.edu /pub/Linux/apps/graphics/viewers/X
986k ImageMagick-3.8.5-elf.tgz
1k ImageMagick-3.8.5-elf.lsm
sunsite.unc.edu /pub/Linux/libs/graphics
884k libIMPlugIn-1.1-elf.tgz
1k libIMPlugIn-1.1-elf.lsm
Alternate-site:
ftp.forwiss.uni-passau.de /pub/linux/local/ImageMagick
986k ImageMagick-3.8.5-elf.tgz
1k ImageMagick-3.8.5-elf.lsm
884k libIMPlugIn-1.1-elf.tgz
1k libIMPlugIn-1.1-elf.lsm
VARKON Version 1.15A
VARKON is a high level development tool for
parametric CAD and engineering applications
developed by Microform, Sweden.
1.15A includes new parametric functions for
creation and editing of sculptured surfaces
and rendering based on OpenGL.
http://www.microform.se
Shared library version of xv 3.10a
xv-3.10a-shared is the familiar image viewer program with all current
patches modified to use the shared libraries provided by libgr.
t1lib-0.2-beta -
A Library for generating Bitmaps from Adobe Type 1 Fonts
t1lib is a library for generating character- and string-glyphs from
Adobe Type 1 fonts under UNIX. t1lib uses most of the code of the X11
rasterizer donated by IBM to the X11-project. But some disadvantages
of the rasterizer being included in X11 have been eliminated. Here are
the main features:
Author: Rainer Menzner
(
rmz@neuroinformatik.ruhr-uni-bochum.de)
ftp://ftp.neuroinformatik.ruhr-uni-bochum.de/
pub/software/t1lib/t1lib-0.2-beta.tar.gz
http://www.neuroinformatik.ruhr-uni-bochum.de/
ini/PEOPLE/rmz/t1lib.html
Freetype Project - The Free TrueType Font Engine
The FreeType library is a free and portable TrueType font rendering
engine. This package, known as 'Alpha Release 4' or 'AR4', contains the
engine's source code and documentation.
Alpha Release 4
Also, some design changes have been made to allow the support of the
following features, though they're not completely implemented yet:
Source is provided in two programming languages: C and Pascal, with some
common documentation and several test programs.
The Pascal source code has been successfully compiled and run with Borland
Pascal 7 and fPrint's Virtual Pascal on DOS and OS/2 respectively.
The C source code has been successfully compiled and run on various
platforms including DOS, OS/2, Amiga, Linux and several other variants of
UNIX. It is written in ANSI C and should be very easily ported to any
platform.
Though development of the library is mainly performed on OS/2 and Linux,
the
library does not contain system-specific code.
However, this package contains some graphics drivers used by the test
programs for display purposes on DOS, OS/2, Amiga and X11.
http://www.physiol.med.tu-muenchen.de/~robert/freetype.html
The home site of the FreeType project is
ftp://ftp.physiol.med.tu-muenchen.de/pub/freetype
There is also a mailing list:
freetype@lists.tu-muenchen.de
Send the usual subscription commands to:
majordomo@lists.tu-muenchen.de
Copyright 1996
David Turner
Copyright 1997
Robert Wilhelm <robert@physiol.med.tu-muenchen.de>
Werner Lemberg <a7971428@unet.univie.ac.at>
![]()
![]()
Did You Know?
...the Portal web site for xanim has closed down.
The new primary sites are:
http://xanim.va.pubnix.com/home.html
http://smurfland.cit.buffalo.edu/xanim/home.html
http://www.tm.informatik.uni-frankfurt.de/xanim/
The latest revision of xanim is 2.70.6.4.
I'm currently working on an application to do image processing and
Computer Vision tasks.
In the stage of development, I would like to know what the
community expects from such a product, so if you would like the status
of the work, please come and visit:
http://www-vision.deis.unibo.it/~cverond/cvw
Expecially the "sample" section, where you can see some of the
application's functionality at work, and leave me a feedback.
Thanks for your help. Cristiano Verondini
cverondini@deis.unibo.it|
For the ultimate in realism use dem2pov by Bill Kirby, also
available at John Beale's web site
to convert DEM files to TGA heightfields. You can get
DEM files trough my DEM mapping project at
http://www.sn.no/~svalstad/hf/dem.html
or directly from
ftp://edcftp.cr.usgs.gov/pub/data/DEM/250/
As for your next question about what the pixel values of
heightfields mean, there are three different situations:
From
Stig M. Valstad via the IRTC-L mailing list
svalstad@sn.no
http://www.sn.no/~svalstad
http://axem2.simplenet.com/heading.htm
http://reality.sgi.com/mjk_asd/tiff_and_opengl.html
Thomas Burge from Apple who has both the NT and Apple versions of
AMAPI explained to me what the situation is - AMAPI only exports
RIB entity files; you need to add a fair chunk of data before
a RIB WorldBegin statement to get the camera in the right place and
facing the right way. As it were, no lights were enabled and my camera
was positioned underneath the object, facing down! There is also a
Z-axis negation problem in AMAPI, which this gentleman pointed out to me
and gave me to the RIB instructions to compensate for it.
http://reality.sgi.com/mjk_asd/opengl-links.html
From Mark Kilgard
![]()
![]()

3D Modellers Update
Recently there has been a minor explosion of 3D modellers. Most of the
modellers I found the first time out are still around although
some are either no longer being developed or the developers have
not released a new version in some time. Since I haven't really
covered the range of modellers in this column since I started back
in November 1996, I decided it was time I provided a brief overview
of whats available and where to get them.
The first thing to do is give a listing of what tools are
available. The following is the list of modellers I currently
know about, in no particular order:
There are
also a couple of others that I'm not sure how to classify, but the
modelling capabilities are not as obvious so I'll deal with them in
a future update (especially if the contact me with details on their
products).
All of these use graphical, point-and-click style interfaces. There
are other modellers that use programming languages but no graphical
interface, such as POV-Ray, Megahedron and BMRT (via its RenderMan
support). Those tools not covered by this discussion.
The list of modellers can be broken into three categories: stable,
under development, and commercial. The stable category
includes AC3D, SCED/SCEDA, and Midnight Modeller. Commercial
modellers are the AMAPI and Megahedron packages, and Bentley
Microstation. The latter is actually free for
non-commercial unsupported use, or $500 with support. Below are
short descriptions of the packages, their current or best known status and
contact information. The packages in the table are listed
alphabetically.
Product and description
Imports
Exports
Availability
Contact
3DOM -
Very early development. I haven't tried this one yet.
Unknown
Unknown
Freeware
http://www.cs.kuleuven.ac.be/cwis/research/graphics/3DOM/
AC3D -
OpenGL based vertex modeller with multiple, editable views plus
a 3D view. Includes ability to move, rotate, resize, position,
and extrude objects.
Objects can be named and hidden. Includes support for 2D
(line (both poly and polylines) , circle, rectangle, ellipse,
and disk) and 3D (box, sphere, cylinder and mesh). Fairly nice
3D graphical interface that looks like Motif but doesn't
require Motif libraries.
Imports DXF, Lightwave, Triangle, vector formatted object files.
Generates RenderMan, POV-Ray 2.2, VRML, Massive, DVS, Dive and
Triangle formatted object files.
Shareware
http://www.comp.lancs.ac.uk/
computing/users/andy/ac3dlinux.html
Aero - The following is taken from the documentation
that accompanies the package:
AERO is a tool for editing and simulating scenes with rigid body
systems. You can use the built-in 4-view editor to create a virtual
scene consisting of spheres, cuboids, cylinders, planes and fix
points. You can link these objects with rods, springs, dampers and
bolt joints and you can connect forces to the objects. Then you can
begin the simulation and everything starts moving according to the
laws of physics (gravitation, friction, collisions). The simulation
can be viewed as animated wire frame graphics. In addition you can
use POV-Ray to render photo-realistic animation sequences.
This package requires the FSF Widget library, which I don't
have. The last time I tried to compile that library it didn't
work for me, but maybe the build process works better now.
Anyway, I haven't seen this modeller in action.
Proprietary ASCII text format
POV-Ray
http://www.informatik.uni-stuttgart.de/ipvr/bv/aero/
ftp://ftp.informatik.uni-stuttgart.de/pub/AERO
AMAPI -
Fairly sophisticated, including support for NURBS and a
macro language. Interface is quit unique for X applications,
probably based on OpenGL.
The version available from Sunsite doesn't
work quite right on my system. Some windows don't get drawn
unless a refresh is forced and the method for doing a refresh
is kind of trial-and-error. The trial version of 2.11 has
the same problem. Perhaps this is a problem with the OpenGL
they use, although a check with ldd doesn't show any
dependencies on OpenGL. I wish this worked. I really like
the interface.
DXF, 3DS R3 and R4, IGES, Illustrator, Text,
has its own proprietary format
DXF, CADRender, Text, AMAPI, 3DS R3 and R4, Ray Dream Designer,
Lightwave, 3DGF, Truespace V2.0, Caliray, POV 3.0, IGES,
Explore, VRML, STL, Illustrator, RIB
Shareware - $25US, $99US will get you a 200 page printed
manual. Personal use copies for Linux are free for a year,
but commercial, government, and institutional users must
register their copies.
http://www.informatik.uni-stuttgart.de/ipvr/bv/aero/
ftp://ftp.informatik.uni-stuttgart.de/pub/AERO
Leo3D -
The following is taken from the README file in the Leo3D
distribution:
Leo 3D is a real time 3D modelling application which enables you
to create realistic 3D scenes using different rendering
applications (such as Povray or BMRT for example). It also
exports VRML files.
This modeller has a very cool interface based on OpenGL, GLUT, TCL
and Tix. I had problems with it when trying to load
files, but just creating and shading a few objects was quite easy
and rather fun, actually. This modeller certainly has some of the
most potential of the non-commercial modellers that I've seen.
However, it still has some work to do to fix a few obvious bugs.
DXF
POV-Ray, RenderMan, VRML 1.0, JPEG
Shareware - $25US
ftp://s2k-ftp.cs.berkeley.edu/pub/personal/mallekai/leo3d.html
(Yes, thats an ftp site with an HTML page.)
Bentley Microstation 95 and MasterPiece -
Commercial computer-aided design product
for drafting, design, visualization, analysis, database
management, and modeling
with a long history on MS, Mac and other
Unix platforms. Includes programming support with a BASIC
language and linkages to various commericial databases
such as Oracle and Informix.
The product seems quite sophisticated based
on their web pages, but I've never seen it in action. I have
seen a number of texts at local bookstores relating to the
MS products, so I have a feeling the Linux ports should be
quite interesting. Bentley's product line is quite large.
This looks like the place to go for a
commercial modeller, although I'm not certain if they'll
sell their educational products to the general public or not.
If anyone finds out please let me know. Note that the Linux
ports have not been released (to my knowledge - I'm going by
whats on the web pages).
DXF, DWG and IGES
Unknown
Commercial, primarily targeted at educational markets, however
they appear open to public distributions and ports of their
other packages if enough interest is shown by the Linux
community.
http://www.bentley.com/ema/academic/aclinux.htm
http://www.bentley.com/ema/academic/academic.htm
Midnight Modeller -
A direct port of the DOS version to Linux. The X interface
looks and acts just like the DOS version. On an 8 bit
display the colors are horrid, but its not so bad on 24 bit
displays. It seems to have a problem seeing all the
directories in the current directory when trying to open files.
DXF, Raw
DXF, Raw
Freeware
ftp://ftp.infomagic.com/pub/mirrors/.mirror1/
sunsite/apps/graphics/rays/pov/
mnm-linux-pl2.static.ELF.gz
ftp://ftp.infomagic.com/pub/mirrors/.mirror1/
sunsite/apps/graphics/rays/pov/
mnm-linux-pl2.static.ELF.gz
Author: Michael Lamertz
<mlamertz@odars.de>
MindsEye
A new modeller in very early development which is based
on both OpenGL/MesaGL and QT. Is designed to allow
plug-ins. The project has a mailing list for developers
and other interested parties and appears to have more
detailed design specifications than most "community developed"
projects of this nature. Its been a while coming, but the
modeller is starting to take shape. Last I looked they
were beginning to work on adding autoconf to the build
environment, which is a very good thing to do early on
in a project, like this one is.
DXF, others planned
Unknown
GNU GPL
http://www.ptf.hro.nl/free-d/ - Web Site
ftp://ftp.cs.umn.edu/users/mein/mindseye/ - source code
SCED/SCEDA -
The following is taken from the README file in the
SCED distribution:
Sced is a program for creating 3d scenes, then exporting them
to a wide
variety of rendering programs. Programs supported are:
POVray, Rayshade, any VRML browser, anything that reads Pixar's RIB
format, and Radiance. Plus a couple of local formats, for me.
This is a very sophisticated modeller, but the Athena interface
makes it look less powerful than it is. I used this modeller
for many of the scenes I created when I first started into 3D
and still like its constraint system better than what is
available in AC3D (which doesn't really have constraints in
same sense, I don't think). SCED's biggest limitation is
its lack of support for importing various 3D formats.
Proprietary scene format and OFF (wireframe format)
POV 3.0, Radiance, RenderMan, VRML 1.0
Freeware (GPL'd)
http://http.cs.berkeley.edu/~schenney/sced/sced.html
ftp://ftp.cs.su.oz.au/stephen/sced
ftp://ftp.povray.org/pub/pov/modellers/sced
![]()
HF-Lab
Height fields are convenient tools for representing terrain
data that are supported directly by POV-Ray and through the
use of displacement maps or patch meshes in BMRT. With
POV-Ray and displacement maps in BMRT, a 2D image is used
to specify the height of a point based on the color and/or
intensity level for the point in the 2D image. The renderer
uses this image, mapped over a 3D surface, to create mountains,
valleys, plateaus and other geographic features. Creating
a representative 2D image is the trick to realistic landscapes.
HF-Lab,
an X based interactive tool written by
John Beale,
is an easy to use and extremely useful tool for creating these
2D images.
Once you have retrieved the source, built (instructions are
included and the build process is fairly straightforward, although
it could probably benefit from the use of imake or autoconf) and
installed it you're ready to go. HF-Lab is a command line oriented
tool that provides its own shell from which commands can be entered.
To start HF-Lab using BASH type
% hlx
% hlx
The first thing you notice is the
shell prompt. From the prompt you type in one or more
commands that manipulate the current height field (there can be more
than one, each of which occupies a place on the stack). We've
started by using the online help feature. Typing help by itself
brings up the list of available commands, categorized by type. Typing
help <command> (without the brackets, of course) gets you
help on a particular command. In
Figure 1 the help for the crater command is shown.
Now lets look at the available features. John writes in the
documentation that accompanies the source:
HF-Lab commands fall into several categories: those for generating
heightfields (HFs), combining or transforming them, and viewing them are
the
three most important. Then there are other 'housekeeping' commands to move
HFs around on the internal stack, load and save them on the disk, and set
various internal variables.
Generating HFs are done with one of gforge, random, constant,
and zero. The first of these, gforge, is the most
interesting as it will create fractal-based fields. Random
creates a field based on noise patterns (lots of spikes, perhaps
usable as grass blades up close in a rendered scene) while
constant and zero create level planes.
Zero is a just a special case of constant where the height
value is 0.
Each HF that is generated gets placed on the stack.
The stack is empty to start. Running one of the HF generation commands
will add a HF to top of the stack. By default there are 4 slots
in the stack that can be filled, but this number can be changed using
the set stacksize command. The HFs on the stack can be
popped, swapped, duplicated, and named and the whole stack can be
rotated. Also, rotation can be between the first 3 HFs on the stack.
The normal proces for creating
a HF usually includes the following steps:
Manipulating a HF can be done in several ways. First, there are a
set of commands to operate on a single HF, the One
HF-Operators. A few of the more interesting of these are the
pow, zedge, crater, fillbasin, and flow commands.
Zedge flattens the edges of the HF (remember that a HF is
really just a 3D representation of a 2D image, and those images
are rectangular). Crater adds circular craters to the HF
of various radii and depths. Fillbasin and
![]()
![]()
![]()
flow can be used together to etch out river valleys. There
are examples, erosion1.scr and
erosion2.jpg
in the distribution which show this.
There are two ways to view the images you create with HF-Lab
from within the application. One is to view
the 2D greyscale image that will be saved to file. Viewing the
2D image is done with the show command.
The other method is as an representative
rendering of the HF in 3D, so that you'll get a better idea
of what the final rendering will be with POV or BMRT. Viewing
the 3D images is done in a secondary shell (although it is
also possible to simply ask that shell to display the image
and return immediately to the command shell - this is probably
what you'll do once you've gotten more experienced with HF-Lab).
The view command enters the user into the 3D viewing
shell. From here you can set the level of detail to show,
the position of a lightsource or the cameras eye, lighten,
darken, tile and change the scale of the display.
To exit the secondary shell you simply type quit.
HF-Lab supports a number of different file formats for
reading and writing: PNG, GIF, POT, TGA, PGM, MAT, OCT, and RAW.
Most of these formats have special purposes, but for use with
POV-Ray and BMRT you should save files in TGA format. POV-Ray
can use this format directly, but for use with BMRT you will
need to convert the TGA image to TIFF format. Using TGA allows
you to save the image information without data loss and
conversion from TGA to TIFF is relatively easy using XV, NetPBM,
or ImageMagick.
Since creating a reasonably realistic HF can be a long session
of trial and error you may find it useful to use the builtin scripting
capability. John provides a very good set of sample scripts
along with the source. A quick glance at one of these,
erosion1.scr,
shows that multiple commands can be run at a time. This is also
possible from the HF> prompt, so you can try these
commands one at a time to see what effect each has. Once you have
a rough guess as the to process you need to create the scene you
want, you should place this in a script and then edit the script
to get the detail level desired.
HF-Lab creates its images through the use of lots of mathematical
tricks that are far beyond the scope of this column. I'd love
to say I understand all of them, but I only have a limited
understanding of fractals and their use in creating terrain maps
and I have no real understanding of Fast Fourier Transforms or
Inverse Fast Fourier Transforms. These latter two are methods
of filtering a HF in order to smooth or sharpen features. Filters
include a high pass filter (hpfilter), low pass filter
(lpfilter), band pass filter (bpfilter) and
band reject filter (brfilter). Although
I don't understand the math behind them, I was able to use
a High Pass Filter to take a simple gforge-created HF and turn
it into a very nice heightfield that simulates a
leathery surface. This HF was created
in only two steps:
So you can see how powerful this tool can be. Using height fields
in BMRT, or as bump maps in POV, can produce some very interesting
textures!
There are many other features of HF-Lab which I have not covered.
And in truth, I really didn't give much detail on the features I
did discuss. John gives much better descriptions of some of the
features in the README file that accompanies the source and I
highly recommend you read this file while you experiment with
HF-Lab for the first few times. He has gone to great lengths
to provide very useful online help and sample scripts. The
interface may not be point-and-click, but it certainly is not
difficult to learn.
When I first came across John Beale and HF-Lab I was quite
impressed with its ease of use for creating interesting landscapes.
I haven't really used it much since the early days of my 3D
rendering lifetime, but since writing this article I've rediscovered
how powerful this tool can be. Originally I viewed the tool only
as a tool for creating landscapes, ie as a tool for modelling
a world. Now I see how it can be used to create surface features
of all kinds that can be used as textures and not just models.
I think I'll be making more use of this tool in the future.

The following links are just starting points for finding more information
about computer graphics and multimedia in general for Linux systems. If
you have some application specific information for me, I'll add them to my
other pages or you can contact the maintainer of some other web site. I'll
consider adding other general references here, but application or site
specific information needs to go into one of the following general
references and not listed here.
Unix Graphics Utilities
Linux Multimedia Page
The IRTC-L discussion list
comp.graphics.rendering.raytracing
comp.graphics.rendering.renderman
comp.graphics.api.opengl
comp.os.linux.announce
Future Directions
Next month:
Let me know what you'd like to hear about!
Copyright © 1997, Michael J. Hammel
Published in Issue 18 of the Linux Gazette, June 1997
More...
![]()
© 1997 Michael J. Hammel
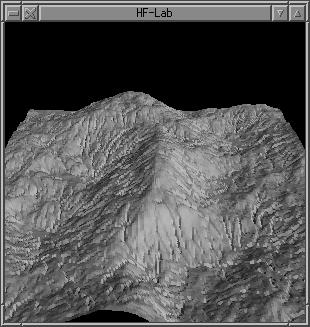
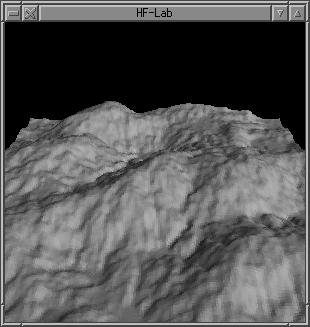
Figure 2: HF produced from erosion1.scr
Figure 3: HF produced from erosion2.scr
© 1997 by Michael J. Hammel
"Linux Gazette...making Linux just a little more fun!"

By Larry Ayers,
layers@vax2.rainis.net
Introduction
Structural Changes
Script Fu
Plug-Ins
Tutorials
News and Compendia
Copyright © 1997, Larry Ayers
Published in Issue 18 of the Linux Gazette, June 1997
"Linux Gazette...making Linux just a little more fun!"

An Interactive Image Generator
By Larry Ayers,
layers@vax2.rainis.net

Introduction
Bomb's Images
(cmap
(42 37 33) (31 23 25) (23 19 22) (20 20 24) [etc]


Compilation and/or Installation
Controlling the Display
Obtaining the Archive
Is There Any Real Use For Such Programs?
Copyright © 1997, Larry Ayers
Published in Issue 18 of the Linux Gazette, June 1997
"Linux Gazette...making Linux just a little more fun!"


by Larry Ayers
Origins
Usage and Performance
%-> lsattr libso312.so
--c---- 32 gzip9     libso312.so
Warning!
Copyright © 1997, Larry Ayers
Published in Issue 18 of the Linux Gazette, June 1997
"Linux Gazette...making Linux just a little more fun!"

By Larry Ayers,
layers@vax2.rainis.net
Evolution
OpenGL Modes
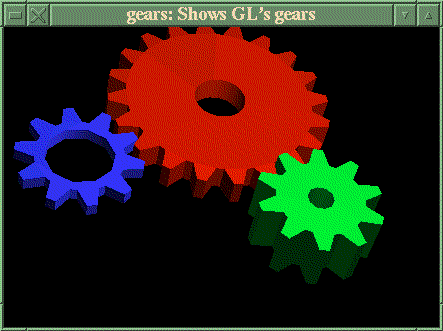

Mathematical Modes
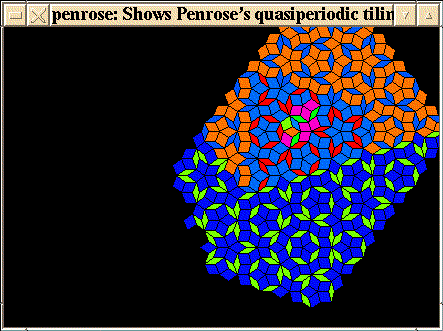
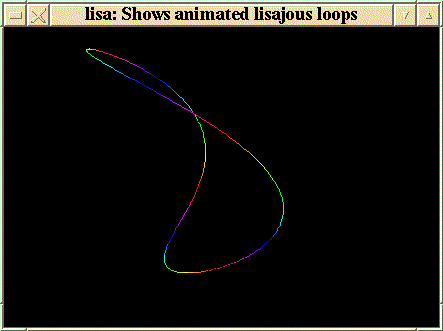
Configuration
Availability
Copyright © 1997, Larry Ayers
Published in Issue 18 of the Linux Gazette, June 1997
"Linux Gazette...making Linux just a little more fun!"
Red Hat Linux
By Henry Pierce,
hmp@boris.infomagic.com
Contents:
Getting Started With Red Hat
Obtaining Red Hat Linux
Planning Your Installation
What Is RPM Anyway?
package.tar package.tgz
package.tar.gz
or package.tar.Z
files. They often
required the system administrator who installs the packages to
configure the package for the target system, install the auxiliary and
documentation files separately, and setup any configuration files by
hand. And if the package requires another supporting package that
isn't installed, you won't know a package is missing until you try to
use the new package. And the more add-on packages installed, the
harder it is to keep track of them. Then if you want to remove or
upgrade such a package, you have to remember where all the files for
the package are, and remove then. And if you are upgrading a package,
and forgot a pesky configuration file, then the upgraded package may
not work correctly. In summary, the traditional method of
distributing software does provide centralized management system of
installing nor upgrading software packages which is crucial to easing
the administrative burdens of managing the system.
package.rpm
that can be added to an organized database that
describes where the package belongs, what supporting packages are
required, are the required packages installed and a means to determine
package dependency information. These are, in fact, describe the
design goals of RPM: the ability to upgrade an individual component or
the entire system without re-installing while preserving the
configuration files for the system/package; be able querying the RPM
database to find the location of files, packages or other relevant
package information; to perform package verification to make sure
packages are installed properly or can be installed at all; to keep
source packages "pristine" (provide the package author's
original source with second party patches separate) so that porting
issues can be tracked. Because RPM does this management for you, you
can install, upgrade, or remove a package with a single command line
in text mode or a few clicks of the mouse in the X Window Package
Management Tool. Simple examples of using RPM from the command line
are:
rpm --install package.rpm
--this will install package
rpm --upgrade package.rpm
--this will upgrade package
rpm --erase package
--this will remove/erase package
package.rpm
has all of the following characteristics: its
name will identify the package, the version of the package, the build
revision of the package, the architecture the package is intended for,
and of course the extension "rpm" to identify it as an rpm
based package.
Take, for example, bash-1.14.7-1.rpm
. The name,
itself, contains a lot of useful information: the package is "bash",
the Bourne Again Shell, it is version 1.14.7 and it is build 1 of the
current version for Red Hat, it was built for an Intel or compatible
386 or higher CPU, and of course, it is in "rpm" format. So, if you
see a package called bash-1.14.7-2.i386.rpm, you know it is a second
build of bash v1.14.7 and probably contains fixes for problems with
build 1 and obviously more current. And while the internal
organization of an *.rpm is beyond the scope of this discussion, a
properly built package contains an executable file, the configuration
files (if any), the documentation (at least man pages for the
package), any miscellaneous files directory related to the package,
and record of where the packages files should be installed and a
record of any required packages. Upon successful installation of a
\<package\>.rpm, information about the package is registered in
the RPM database. A more thorough discussion of RPM may be found in the
RPM-HOWTO available from:
http://www.redhat.com/support/docs/rpm/RPM-HOWTO/RPM-HOWTO.html
A Note About Upgrading Red Hat Linux
Know Your Hardware
Choosing Your Installation Method
Creating the Installation Floppy Kit
$\backslash$images
directory on a properly laid out Red Hat
CD-ROM. Obviously, this is required for all installation
methodologies.
$\backslash$images
directory on a properly laid out Red Hat
CD-ROM. This diskette is required if you are method of install is not
CD-ROM based or you need PCMCIA support for any devices such as a
CD-ROM on the laptop to install properly. This diskette can also be
used with the Boot Diskette for an emergency start disk for an
installed system.
$\backslash$DOS
directory on a properly laid out Red Hat
CD-ROM. This program is run from and existing DOS or Windows 95 system
to create usable diskettes from the boot.img and supp.img described
above If you have an existing Linux/Unix system, the dd
command can
be used instead. This is described later in the document.
C:$\backslash$FIPS
if you need to free space on your hard drive. This
utility can non-destructively shrink and existing DOS 16-bit FAT
(Please see Using FIPS for compatibility notes). This will achieve
will unpack into the program files FIPS.EXE and RESTORB.EXE which are
to be placed on the emergency boot disk made below. Your should also
read FIPS.DOC (part of the package fips11.zip) for information on
using FIPS not covered in this document.
Creating the Boot and Supplemental Diskettes
format /s A:
to
format the diskettes, just use format A:
. The diskette images
need the entire capacity of the diskette and /s
switch seems
to prevent the diskette images from being properly copied to the
floppies. For the emergency diskette below, you will of course want to
use the /s switch.
\images
directory on the Red Hat CD-ROM or can be downloaded from:
ftp://ftp.redhat.com/pub/redhat/current/i386/images/boot.img
or one of Red Hat's mirror sites. If you are installing to a laptop
with PCMCIA hardware, or from a Hard Drive, NFS or FTP you will need
to create the Supplemental Diskette made from the file "supp.img"
which is located in the \images
directory on the Red Hat CD-ROM
or can be downloaded from:
htp://ftp.redhat.com/pub/redhat/current/i386/images/boot.img
or one of Red Hat's mirror sites.
Using RAWRITE to Create the Boot and Supplemental Diskettes
RAWRITE.EXE
may be used from DOS, Windows 95 or OS/2
to create the Boot and Supplemental Diskettes. RAWRITE
can be
found in the \DOSUTILS
directory on the Red Hat CD-ROM
or it can be downloaded from:
ftp://ftp.redhat.com/pub/redhat/current/i386/dosutils/rawrite.ext
or one of Red Hat's mirror sites. Once you have obtained it, copy
RAWRITE.EXE
to C:\DOS
or C:\WINDOWS
directory (or other system directory in the command path) which will
place the RAWRITE
utility in your command path. From the CD-ROM
(presuming it is the D: drive or which ever drive and directory you
downloaded RAWRITE.EXE to on the system) to use RAWRITE
, copy it
to one of your system directories:
D:\DOSUTILS> copy RAWRITE.EXE C:\WINDOWS
C:\DOS
or C:\WINDOWS
, change to the images
directory on the CD-ROM or to the directory you copied boot.img and
supp.img to and do the following to create the Boot Diskette:
C:\> D:
D:\> cd \images
D:\images> rawrite
Enter disk image source file name: boot.img
Enter target diskette drive: a:
Please insert a formatted disk into drive A: and press -Enter-:
Using dd Under Linux or Unix
dd if=boot.img of=/dev/fd0
to make the Boot
Diskette. Once dd is done, remove the diskette from the floppy drive,
label it "Red Hat Boot Diskette" and set it aside. Then insert a
second formatted diskette and type dd if=supp.img
of=/dev/fd0
. Once dd is done, remove the diskette from the floppy
drive, label it "Red Hat Supplemental Diskette" and set it aside.
Creating an Emergency Boot Diskette
C:FIPS\RESTORB.EXE
(obtained and unpacked
above) to the Windows 95 Boot Diskette you made. When you are done,
remove the diskette and label it "Windows 95 Emergency Boot Diskette
and Partition Table Back Up".
C:\> format A:\
C:\> copy C:\DOS\FDISK.EXE A:\
C:\> copy C:\DOS\SCANDISK.EXE A:\
C:\> copy C:\DOS\DEFRAG.EXE A:\
C:\> copy C:\DOS\SYS.COM A:\
C:\> copy C:\FIPS\RESTORB.EXE A:\
Setting Up Your Installation Media
\RedHat
on the "top level" with the directories
\base
and \RPMS
underneath:
RedHat
   |----> \RPMS (contains binary the .rpm s to be installed)
   |----> \base (contains a base system and files to setting up the hard drive)
\RedHat
on
the top level of the CD-ROM with \base
and
\RPMS
underneath on third party CD-ROMs. Obviously,
Red Hat Software will ensure their Official Red Hat Linux CD-ROM
will have the proper directory structure. So, if you are installing
from CD-ROM, you may go to Preparing Your System for Installation. For
the other types of installs, read the section appropriate section for
your installation medium:
Setting Up for an NFS Installation
\RedHat
then needs to be exported to the
appropriate machines on the network that are to have Red Hat Linux
installed or upgraded. This machine must be on a Ethernet, you can
not do an NFS install via dialup link.
Setting Up For a Hard Drive Installation
\RedHat
directory
created relative to the root directory of the partition (it doesn't
matter which partition) that will contain the Red Hat distribution
obtained either from CD-ROM or an FTP site. For example, on the
primary DOS partition the path to \RedHat
should be
C:\RedHat
. On a DOS 16-bit FAT file system, it does not
matter that the package.rpm
names get truncated. All you need
to do is make sure \RedHat\base
contains the
base files from a CD-ROM or FTP site and
\RedHat\RPMS
contain all the
package.rpm
files from the CD-ROM or FTP site. The you can
install or upgrade from that partition. If you have an existing Linux
partition not needed for an installation or upgrade, you can set it up
as outlined here as well and use it.
FTP Installations
/RedHat/RPMS
directory is currently around
170MB which will take many hours to install. If anything goes wrong with the
installation such as the link goes down, you will have to start over again. If
you ftp the files first, setup your hard drive for installing Linux, it is
then less work and less flustering to recover from a failed install. You don't
even have to download all the files in /RedHat/RPMS
to successfully install a
minimal system that can grow with your needs. Please see Customizing
Your NFS or Hard Drive Installation for details.
Customizing Your NFS or Hard Drive Installation
/RedHat/RPMS
directory contains
approximately 170MB of rpm files. RPM does compress these packages and can
assume the package will need and average 2-3MB of hard drive space for every
1MB of package .rpm
available for installation. For example, if the
package .rpm
is 6MB in size, you will need between 12 to 18MB of free
space to install the package. If you know what software you want and don't
want, much of the software provided will not have value for the installation,
and for for low band width connects, it is not feasible to download the entire
tree. With this in mind, an installation can be customized to remove unwanted
software.
/base/comps
file which will
provide you with the list of packages the a full install would normally have.
Then then packages you actually want to install from /base/comps
need be
download. Then, the /base/comps
needs to be edited to reflect the packages you
obtained and are going to install. (NOTE: if you have local
package.rpms you can add them to the comps file as well).
Understanding the COMPS file
/RedHat/base/comps
(the file here is an example from RHS v4.0) to determine what packages are
available in the /RedHat/RPMS
directory for each category to be installed. The
file is organized by category and each category contains a list of packages
Red Hat believes are the minimum required for that section. NOTE: only the
package
part of a packages name
package-version-build.rpm
is listed in the file.
This means the comps file is generally usable from one version of Red Hat to
the next. A section in this file has the structure:
number category
package
...
end
package-name-version-build.rpm
, you can
substitute any updates Red Hat has made available in the updates
directory on:
ftp://ftp.redhat.com/pub/redhat/current/updates
or one of Red Hat's mirror sites for the original package found in the
distribution's original /RedHat/RPMS
directory. The means
installation program is relatively version insensitive. The only
caveats here are that package dependencies are met . When an rpm'd
package is built, RPM itself tries to determine what packages
must be installed for another package to work (the rpm developer also
has direct control of this as well---he can add dependencies that rpm
might not ordinarily detect). This is where a little experimentation,
or research may be needed. For example, one way to determine package
dependencies (if you have user access to your NFS server on an
existing Red Hat Linux Box) is to telnet or login into it or if you
have the CD-ROM, mount it and cd to the RedHat/RPMS
directory and
query the packages for its dependencies:
[root@happy RPMS] rpm -q -p -R bash-1.14.7-1.i386.rpm
libc.so.5
libtermcap.so.2
/base/compsin
of Red Hat v4.0:
RPM Category Required? Comments
BASE Yes Should not be customized.
C Development Highly Recommend Need the minimal system
to compile a kernel
Development Libs Highly Recommend Need the minimal system
to compile a kernel
C++ Development Optional C++ Development
Networked Workstation Recommend; Required & Whether you are on an Ethernet or
for other network software
going to dialup networking, you
need to install this package suite
You shouldn't customize this.
Anonymous FTP/Gopher Server Optional If your Linux box is going to
serve files via FTP or Gopher
Web Server Optional Useful for Web Developers for local
development, required if you serve
web pages.
Network Management Workstation Optional Has additional tools useful for
dialup as well as Ethernet network
Dialup Workstation Recommended Required if you are going to dialup
Game Machine Optional Need I say more? Fortunes are
required for humor :-)
Multimedia Machine Optional If you have supported hardware
X Window System Optional If you want to run X
X Multimedia Support Optional If you have supported hardware
TeX Document Formatting Optional Customize as needed
Emacs Recommend The One True Editing Environment
Emacs with X Recommend Requires X
DOS/Windows Connectivity Optional Huh?
Extra Documentation Required Man pages and should ALWAYS
be installed. Other packages optional.
Recommendations
Preparing Your System to Install
\dosutils
containing a copy of FIPS.EXE. Otherwise, the FIPS package can be
downloaded from:
ftp://ftp.redhat.com/pub/redhat/dos/fips11.zip
or one of Red Hat's mirror sites.
Planning to Partitioning The Hard Drive
fdisk
used to create native
Linux and swap partitions. However, the details of its use are described later
in this guide. However, discussion of the concepts on how to partition your
hard drive are important now so reasonable decisions can be made on how much
and how to make free space available on the target system.
/
(the "root" partition), one for /var
, one
for /home
and one for swap. Unlike logical DOS drives which are
assigned a drive letter, Linux partitions are "glued" together into
one virtual directory tree. This scheme takes advantage of how Linux
operates in the real world. Essentially, each file system reflects the
life time of a file: the files on the /
partition have the longest
"time to live" because they are infrequently updated and often last
as long as the operating system itself does on the hardware; The /home
partition represents medium file life times that can be measured in
weeks or days, such as user documents; /var
represents files with the
shortest life time (such as log files), measured in minutes or even
seconds. This type of setup also suggests a backup strategy: the root
file system only needs to be backed up when a new program is added or
configuration files are changed. The /home
partition can be put on
some sensible full/incremental back up schedule while /var never needs
to be backed up, with the exception of /var/spool/mail
. A more
through discussion of this can be found in Kristian Koehntopp's
Partition mini-HOWTO and Stein Gjoen's Multiple Disks Layout
mini-HOWTO.
/var
and one logical drive for /home
(as well as
other "optionally" defined partitions). However, Linux can and it is
often prudent to have more than the partitions outlined here. Due to
some design limitations in typical PCs BIOS, there are limitations on
how partitions can be setup and still be boot partitions.
Partition	File System Type	Use	Size
/dev/hda1	MS-DOS	DOS/Win95	400MB
/dev/hda2	Linux Native (ext2)	/	325MB
/dev/hda3	Linux Swap	Swap	32MB
/dev/hda4	Extended	N/A	93MB
/dev/hda5	Linux Native (ext2)	/var	40MB
/dev/hda6	Linux Native (ext2)	/home	53MB
/dev
is the Linux directory where "device files" are kept (this is
different than a device driver but it is related to device drivers) that Linux
uses to identify devices by user programs. The next part, hda
,
means "hard disk A" used to designate "Fixed Disk
1" as it is called under DOS. But it also means that the drive is an IDE
drive. SCSI drives would use sda
for "SCSI Disk A.
The whole line /dev/hda1
means the 1st partition on hard disk A.
As for the sizes that are being used here, they are a little arbitrary, but
fall under the following guidelines: A virtual decision was made to use half
of the drive for DOS or Windows 95 and roughly half for Linux. So, 400MB was
allocated for DOS and it is presumed that is enough for those needs. The /
root file system is 325MB which is enough for the base Linux system (usually
about 50MB), programming tools such as C, C++, perl, python and editors such
as vi and EMACS as well as the X Window System and some additional space for
extra useful packages you might find in the future. If you do not plan to run
X, you can subtract 150MB from this total. The swap partition is determined by
multiplying 2x physical ram installed on our virtual machine (which has 16MB of
core RAM installed). If you are tight on space or have less than 16MB of ram,
you should have at least a 16MB swap partition. However, you must have a swap
partition defined. 40MB is used for /var
which includes enough space for log
files and email handling for one or two people. and 53MB for /home
provides
plenty of space for a user or two to work in.
How Much Space Do You Really Need?
Use of Partition Recommend Size Comments
Swap 2 x Physical RAM If less than 16MB of RAM installed,
16MB is a must. If space is tight,
and 16MB RAM installed, 1 x Physical
RAM is the minimum recommended.
Root system, no X 100 - 200MB Depends on tools such as compilers,
etc. needed
Root system, with X & 250-350MB Depends on tools such as compilers,
etc., needed
/home 5 - Infinite MB Depends on being single or multiple
users and needs
/var 5 - Infinite Depends on news feeds, # of users, etc.
/usr/local 25 - 200MB Used for programs not in RPM format
or to be kept separate from the rest of Red Hat
Using FIPS
\dosutils
directory on the CD-ROM. If you have
downloaded Red Hat Linux, you should also download FIPS package
available from:
ftp://ftp.redhat.com/pub/redhat/dos/fips11.zip
or one of the many Red Hat's mirror sites. You should also read
FIPS.DOC included with this package for details on FIPS operation.
FIPS.EXE
to C:\WINDOWS
or C:\DOS
.
This will place FIPS.EXE
in your command path.
RESTORB.EXE
on the disk if you have not already done so. FIPS
gives you the ability to back up your existing partition table,
allowing you to return your system to its previous state using
RESTORB.EXE
.
scandisk
and defrag
(included with DOS 6.X and
higher). This makes sure there are no errors on your hard drive and
places all the free space at the end of the drive.
fips
. An introductory message will appear and you
will be prompted for which hard drive on which to operate (if you have
more than 1). Most people will choose "1" for the first hard disk
to shrink.
fdisk
to delete the second DOS partition. This
will leave unallocated space to be used by Linux's version of f:disk
later to create Linux native and Linux swap partitions.
Installing Red Hat Linux
Using Your Installation Media
Installing From CD-ROM
Installing From The Hard Drive
Installing via NFS
Ctrl-\Alt-Delete
to reboot the
system. Most of the time, when this happens, it is because the probing
"touches" a non Ethernet card. If this should happen, try again and
choose "SPECIFY OPTIONS" and give data about your card in the form
of:
ether=IRQ,IO\_PORT,eth0
This will instruct the probe to look at the location specified by the
values IRQ
and IO\_PORT
for an Ethernet card. For
example, if you Ethernet card is configured for IRQ 11 and IO\_PORT
0x300, you would specify:
ether=11,0x300,eth0
IP Address:          192.113.181.21
Netmask:             255.255.255.0
Default Gateway:     192.113.181.1
Primary Nameserver:  192.113.181.2
Domainname:               infomagic.com
Host name:                vador.infomagic.com
Secondary nameserver IP:  Enter if needed
Tertiary nameserver IP:   Enter if needed
The last screen will prompt you for the NFS server and the exported
directory containing the Red Hat distribution. For example, if you NFS
server is redhat.infomagic.com, enter:
NFS Server name:    redhat.infomagic.com
Red Hat Directory:  /pub/mirrors/linux/RedHat
Again, if you do not know these values, check with you system
administrator. Once you have entered the values, choose "OK" to
continue. If the Installation program reports and error locating the
Red Hat distribution, make sure you have the correct values filled in
above and that your network administrator has given the above target
machine information export permission.
Installing via FTP
to see if Red Hat has updated boot diskettes for your hardware.
Walking Through the rest of the Installation
Command (m for help):
/var
and /home
according to our example.
/var
, enter "n" to
create a partition. Because there is no longer a choice of Primary or
Extended, you are not prompted for this information but instead asked
if this is to be partition five.
/home
partition, you may have a choice. If your drive is larger
than the 850MB suggested in the example, you can enter +53Mb as
indicated above and use the extra space for partition such as
/var/spool/mail
and /usr/local
. Otherwise, just use the last
available cylinder to define /home
. Once you are done creating
partitions, you can use the "p" command to print the partition one
last time to review it. However, you won't modify any thing until you
use the "w" command to write the partition out to the hard disk. If
you decided not to modify the partition table at this time, choose "e"
to exit without modifying the partition table. NOTE: When creating
Logical partitions, you must reboot the system in order for Logical
Partitions to be usable. Simply go through the options as you did up
to being asked to partition you drive. However, say no the second
time around and proceed to the next step.
A:\> fdisk /mbr
. This will allow your system to
boot into an existing DOS or Windows 95 system as it did before LILO
was installed. You can then use the Red Hat Boot Diskette from v4.1
with the following parameters at the boot: prompt to you system on the
hard drive:
boot: rescue root=/dev/???? ro load\_ramdisk=0
Where ????
is the root partition such hda2 in the
example used in this document.
After Installing Red Hat
Understanding the LILO prompt
Shift
key at the appearance of LILO will cause a "boot:"
prompt to appear. Pressing Tab
at this prompt will produce a
list of available operating systems:
LILO boot:
dos linux
boot:
boot: linux single
will boot the system into single user mode so you can take corrective
action. This is also useful if your system won't come all the way up
to the login: prompt some other reason.
Logging In the First Time
[root@locahost] #
will appear once you have successfully
negotiated the login. The system prompt tells you two things: you are
logged in as "root" and in this case your machine is called
"localhost". If you named your machine during the installation
process, then your machine name will appear instead of
"localhost". Now that you are logged in, you can use such commands
as ls
to list files, cd
to change directory, and more
to look at
the contents of ASCII test files. The root account also has its own
home directory, /root
. A home directory is where a valid system
accounts places you in the file system hierarchy once you have
successfully logged in. Some Unix systems use /
instead, so don't
be fooled if you don't see any files if you type "ls"; there aren't
any in the root home directory.
Creating A User Account
adduser
and passwd
commands:
[root@bacchus]# adduser hmp
Looking for first available UID...501
Looking for first available GID...501
Adding login: hmp...done.
Creating home directory: /home/hmp...done
Creating mailbox: /var/spool/mail/hmp...done
Don't forget to set the password.
$[$root@bacchus$]$\# passwd hmp
New password: \textsl{new\_passwd}
New password (again): \textsl{new\_passwd}
Password Changed.
passwd: all authentication tokens updated successfully
Accessing the CD-ROM and Floppy
mount
and the command to close
(tell the system you are no longer using a device) is umount
. When
you open a device under Linux, you make it part of the directory tree
and navigate with the cd
, ls
and cp
(copy) command normally. Red
Hat Linux suggests making removable or temporary devices available
under the directory /mnt
. They create the directory /mnt/floppy
by
default, but not /mnt/cdrom
. So, the first time you want to access the
CD-ROM, you will need to create the directory /mnt/cdrom
by typing:
[root@bacchus]\# mkdir /mnt/cdrom
[root@bacchus]\# mount -t iso9660 -r /dev/\textsl{cdrom\_device} /mnt/cdrom
/dev/{\sl cdrom\_device}, is the
device file you wish to open. If you performed a CD-ROM install, you
want to replace \textsl{cdrom\_device} with the designation of your
CD-ROM such as:
Device File CD-ROM type
hd[a,b,c,d] for IDE/ATAPI CD-ROMs
scd[0,1,2,...] for SCSI cdrom drives
sbpcd for Sound Blaster 2X speed drives
mcd or mcdx for Mitsumi 2X drives
/dev/cdrom
which is a symbolic
link. For example, if you have a Secondary IDE/ATAPI drive set as the
master drive, the command:
ln -sf /dev/hdc /dev/cdrom
will create a symbolic link so that the CD-ROM drive can be referred to as
/dev/cdrom
as well as /dev/hdc
.
mount -t msdos /dev/fd0 /mnt/floppy
umount /dev/fd0 (to un-mount a floppy)
umount /dev/cdrom (to un-mount a cdrom drive)
man mount
).
Shutting Down Linux
[root@bacchus]\# shutdown -h now
which will cause Linux to write out any files it still has in memory and close
down active programs cleanly. When you get the message The system
has halted
, it is safe to turn the power off. If you want to reboot
the computer with out shutting of the power, use:
[root@bacchus]\# shutdown -r now
which performs all the insectary shutdown work but directs
the computer to restart instead.
Copyright © 1997, Henry Pierce
Published in Issue 18 of the Linux Gazette, May 1997
"Linux Gazette...making Linux just a little more fun!"
SQL Server and Linux: No Ancient Heavenly Connections, But...
By Brian Jepson,
bjepson@ids.net
Prologue: Composite Conversations with Fictional
Detractors
ftp://mudshark.sunquest.com/pub/ctlib-linux-elf/ctlib-linux-elf.tgz.
If you are using an a.out system, you can take your chances
with the libraries that Sybase originally released. These
are available at:
ftp://ftp.sybase.com/pub/linux/sybase.tgz
A Neon Joyride with CT-Lib
http://www.sybase.com/products/system11/workplace/ntpromofrm.html
If you do this, it goes without saying that you'll need another
computer (running Windows NT) that's connected to your Linux
box via TCP/IP. Sadly, there is no version of Sybase or Microsoft
SQL Server that runs on Linux. However, if you have
access to a machine that is running SQL Server, then you
will likely find this article interesting.ctlib-linux-elf.tar.gz file includes a top-level
sybase directory. Before you extract it, you
should probably pick a permanent home for it; common places
are /opt or /usr/local. When you
extract it, you should be sure that you are root, and make
sure your working directory is the directory that you've chosen. The process
might look something like this:
   bash-2.00$ su
   Password:
   bash-2.00# cd /usr/local
   bash-2.00# tar xvfz ctlib-linux-elf.tar.gz
While you will be statically linking these libraries in with
application programs, any program that uses the Sybase
libraries will need to find the directory. There are two
ways to deal with this, and I usually do both. The first is
to create a user named sybase. This user's home
directory should be the Client-Library directory into which you
extracted ctlib-linux-elf.tar.gz. The user
won't need to log in, and I'm not aware of any
programs that need to su to that user id. I believe the user needs
to be there so that ~sybase can be resolved to the
directory you chose. Here's the relevant line
from /etc/passwd for the sybase user:
sybase:*:510:100:SYBASE:/usr/local/sybase:/bin/true
Of course, your UID and GID may differ, and you can
certainly use the adduser utility to add the
sybase user. The critical thing is to ensure that you've set
the home directory correctly.
bash-2.00$ export SYBASE=/usr/local/sybase
The interfaces file included in the
top of the Client-Library home directory
(/usr/local/sybase/interfaces in this example) must be set up
correctly in order for anything to work. The interfaces file
allows your clients to associate a symbolic name with a
given server. So, any server you wish to query must be
configured in the interfaces file. If you've already got an
interfaces file in non-TLI format (this is the name of the
network API used by Sybase on Solaris, and the interfaces file differs
as well), you should be able to use it or adapt it. Even if
you don't, you can write your own entries. Here's a sample
entry (that's a tab on the second line, and it
is very important):
   ARTEMIS
           query tcp ether artemis 1433
The parts of this entry that you are concerned about are:
ARTEMIS
This is the name by which client programs will refer to the server.
It doesn't have to be the same as the host name. artemis
This is the host name of the server. 1433
This is the TCP/IP socket that the server listens on.
## DEV_SRVR on Sol2-5 (192.168.254.24)
##       Services:
##              query   tcp     (5000)

DEV_SRVR
        query tcp ether Sol2-5 5000

## NTSRV on artemis (192.168.254.26)
##       Services:
##              query   tcp     (1433)

NTSRV
        query tcp ether artemis 1433

## ARTEMIS on artemis (192.168.254.26)
##       Services:
##              query   tcp     (1433)

ARTEMIS
        query tcp ether artemis 1433
SQSH - an Excellent Alternative to isql
(or is isql a poor alternative to SQSH?)
/usr/src. I usually do installations as
root; some people wait until just before the 'make install'
portion to become root. You can extract the distribution
with the following command:
bash-2.00# tar xvfz sqsh-1.5.2.tar.gz
And then you can enter the source directory with:
bash-2.00# cd sqsh-1.5.2
(of course, if you are building a newer version, you will
need to use a different file name and directory)
ftp://prep.ai.mit.edu/pub/gnu/
Before you do anything, you'll need to make sure you set the
$SYBASE environment variable, which I discussed earlier in
this article. Then, you should run the configure script.
This process might look like:
   bash-2.00# export SYBASE=/usr/local/sybase/
   bash-2.00# ./configure
   creating cache ./config.cache
   checking for gcc... gcc
   [etc., etc.]
If you've installed the GNU Readline library, and you want
to use it with SQSH (who wouldn't?) you should add the
following option to ./configure:
bash-2.00# ./configure -with-readline
After you've run configure, you should examine the Makefile,
and follow the instructions at the top. Generally,
./configure does everything right, but you should
double-check. If everything looks okay, you can type:
bash-2.00# make
And sit back and wait. If everything went fine, you should
have a new sqsh executable that you can install with:
bash-2.00# make install
In order to run it, you must supply a server name (-S),
username (-U),
and password (-P). The server name corresponds to the name that
was set up in your interfaces file. Once you've
started sqsh, you can issue SQL commands. To send whatever
you've typed to the server, you can type go by
itself on a line. To clear the current query, you can type
reset. If you'd like to edit the current query,
you can type vi. Among many other features,
sqsh features the ability to use shell-style redirection after the
'go' keyword. Here's a sample session:
bash-2.00# sqsh -Ubjepson -Psecretpassword -SARTEMIS
sqsh-1.5.2 Copyright (C) 1995, 1996 Scott C. Gray
This is free software with ABSOLUTELY NO WARRANTY
For more information type '\warranty'
1> use pubs  /* the pubs sample database */
2> go
1> SELECT au_lname, city
2> FROM authors
3> go | grep -i oakland
 Green                                    Oakland
 Straight                                 Oakland
 Stringer                                 Oakland
 MacFeather                               Oakland
 Karsen                                   Oakland
1> sp_who
2> go
 spid   status     loginame     hostname   blk   dbname     cmd
 ------ ---------- ------------ ---------- ----- ---------- ----------------
      1 sleeping   sa                      0     master     MIRROR HANDLER
      2 sleeping   sa                      0     master     LAZY WRITER
      3 sleeping   sa                      0     master     RA MANAGER
      9 sleeping   sa                      0     master     CHECKPOINT SLEEP
     10 runnable   bjepson                 0     pubs       SELECT
     11 sleeping   bjepson                 0     pubs       AWAITING COMMAND

(6 rows affected, return status = 0)
1>
CGI, Sybperl and Linux: All the Colours in my Paintbox
   CGI.pm:  http://www.perl.com/CPAN/modules/by-module/CGI/CGI.pm-2.36.tar.gz
   Sybperl: http://www.perl.com/CPAN/modules/by-module/Sybase/sybperl-2.07.tar.gz
Installing the CGI module is quite simple. You need to
extract it, enter the directory that's created, and follow
the instructions in the README file. For most Perl modules,
this will follow the form:
   bash-2.00# tar xvfz MODULE_NAME.tar.gz
   bash-2.00# cd MODULE_NAME
   bash-2.00# less README
   [ ... you read the file ...]
   bash-2.00# perl Makefile.PL
   [ ... some stuff happens here...]
   bash-2.00# make
   [ ... lots of stuff happens here...]
   bash-2.00# make test
   [ ... lots of stuff happens here...]
   bash-2.00# make install
You should double check to make sure that CGI.pm is not
already installed; if you install it, you should do it as
root, since it needs to install the module into your
site-specific module directories. Here's the commands I
typed to make this happen for the CGI
extension (note that there are no tests defined for CGI.pm,
so I didn't need to do 'make test'):
    bash-2.00# tar xvfz CGI.pm-2.36.tar.gz
    bash-2.00# cd CGI.pm-2.36
    bash-2.00# perl Makefile.PL
    bash-2.00# make
    bash-2.00# make install
Once you've installed it, you can use it in your Perl
programs; do a 'perldoc CGI' for complete instructions.
ftp://mudshark.sunquest.com/pub/ctlib-linux-elf/sybperl.tar.gz
If you do want to go ahead and build it yourself,
first extract it and enter the source directory:
   bash-2.00# tar xvfz sybperl-2.07.tar.gz
   bash-2.00# cd sybperl-2.07/
Again, it's really important that you read the README file.
Before you run 'perl Makefile.PL,' you will need to set up a
couple of configuration files. The first is CONFIG. This
file lets you set the following parameters:
DBLIBVS
The version of DBlib that you have installed. Under
Linux, only CTlib is available, so this should be set to
0. CTLIBVS
This should be set to 100, as indicated in the
file. SYBASE
This is the directory where you installed the
Client-Library distribution. It should be the same as
$SYBASE or ~sybase.
EXTRA_LIBS
These are the names of additional libraries that you
need to link against. The Sybase Client-Library distribution
typically includes a library called libtcl.a, but this
conflicts with the Tcl library installed under many versions
of Linux. So, this has been renamed libsybtcl.a in the Linux
version of CTlib. This option should also include libinsck.a. The
value for this configuration option should be set to
'-lsybtcl -linsck'. EXTRA_DEFS
It does not appear that this needs to be changed, unless
you are using Perl 5.001m, in which case you need to add
-DUNDEF_BUG. LINKTYPE
Under Linux, I am not aware of anyone who has managed to
get a dynamically loadable version of Sybperl to build.
I have not been able to get it to compile as a dynamic
module, so I always set this to 'static', which results in a
new perl executable being built.
#
# Configuration file for Sybperl
#
# DBlibrary version. Set to 1000 (or higher) if you have System 10
# Set to 0 if you do not want to build DBlib or if DBlib is not available
# (Linux, for example)
DBLIBVS=0


# CTlib version. Set to 0 if Client Library is not available on your
# system, or if you don't want to build the CTlib module. The Client
# Library started shipping with System 10.
# Note that the CTlib module is still under construction, though the
# core API should be stable now.
# Set to 100 if you have System 10.
CTLIBVS=100

# Where is the Sybase directory on your system (include files &
# libraries are expected to be found at SYBASE/include & SYBASE/lib
SYBASE=/usr/local/sybase

# Additional libraries.
# Some systems require -lnsl or -lBSD.
# Solaris 2.x needs -ltli
# DEC OSF/1 needs -ldnet_stub
# See the Sybase OpenClient Supplement for your OS/Hardware
# combination.
EXTRA_LIBS=-lsybtcl -linsck

# Additional #defines.
# With Perl 5.001m, you will need -DUNDEF_BUG.
# With Perl 5.002, none are normally needed, but you may wish to
# use -DDO_TIE to get the benefit of stricter checking on the
# Sybase::DBlib and Sybase::CTlib attributes.
#EXTRA_DEFS=-DUNDEF_BUG
EXTRA_DEFS=-DDO_TIE


# LINKTYPE
# If you wish to link Sybase::DBlib and/or Sybase::CTlib statically
# into perl uncomment the line below and run the make normally. Then,
# when you run 'make test' a new perl binary will be built.
LINKTYPE=static
# This file contains optional login id, passwd and server info for the test
# programs:
# You probably don't want to have it lying around after you've made
# sure that everything works OK.

UID=sa
PWD=secretpassword
SRV=ARTEMIS
/usr/local/bin/sybperl. The README file includes alternate
instructions for installing the new binary. The manual is
included in the pod/ directory under the Sybperl source
code. You can also read the documentation with 'perldoc
Sybperl'.
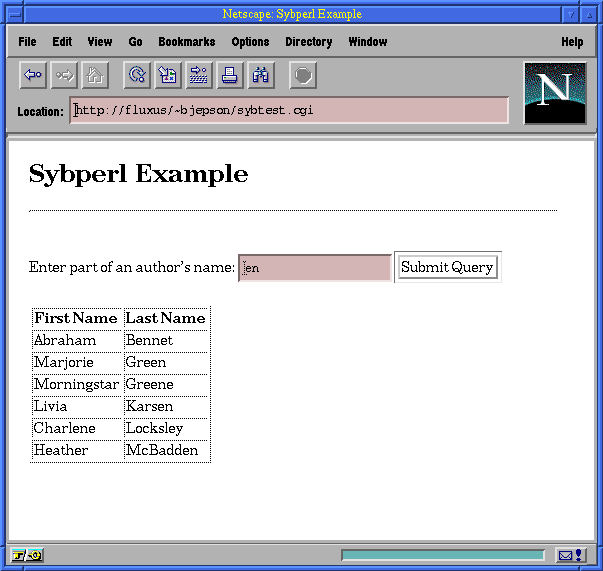
Everything Has Got to be Just Like You Want it To
(or, things are more like they are now than they ever were before)
Copyright © 1997, Brian Jepson
Published in Issue 18 of the Linux Gazette, June 1997
"Linux Gazette...making Linux just a little more fun!"

Welcome to The Linux Weekend Mechanic!
Published in the June 1997 Edition of the Linux Gazette
Copyright (c) 1997 John M. Fisk <fiskjm@ctrvax.vanderbilt.edu>
The Linux Gazette is Copyright(c) 1997
Specialized Systems Consultants Inc.
Time To Become... The Linux Weekend Mechanic!

You've made it to the weekend and things have finally slowed down. You
crawl outa bed, bag the shave 'n shower 'cause it's Saturday, grab that
much needed cup of caffeine (your favorite alkaloid), and shuffle down
the hall to the den. It's time to fire up the Linux box, break out the
trusty 'ol Snap-On's, pop the hood, jack 'er up, and do a bit of
overhauling!
Table of Contents
 Welcome to the June 1997 Weekend Mechanic!
Nashville, TN
Thursday, 8 May 1997
 Wallpapering with XV: A Followup
From: Brent Olson <brent@primus.com>
To: fiskjm@ctrvax.Vanderbilt.Edu
Subject: re: reducing the colors in a background
xv -root -quit -maxpect -ncols 16 filename.gif
mailto: brent@primus.com
From: hap@adv.magwien.gv.at
To: fiskjm@ctrvax.Vanderbilt.Edu
Subject: xv - interesting options
-random filepattern   selects a random picture of given given filepattern
-ncols #colors        to limit number of used colors
xv -quit -root -ncols 16 -random /var/X11R6/lib/xinit/pics/*.gif
--
 (~._.~)    From the keyboard of Peter Haas (hap@adv.magwien.gv.at)
 _( Y )_    Located at MA14-ADV, Rathausstr.1, A-1082 Wien, Austria
()_~*~_()   Phone +43-1-4000/91126   FAX +43-1-4000/7141
 (_)-(_)    "Big iron" division
Date: Thu, 24 Apr 1997 17:52:27 -0500
From: Bill Lash <lash@tellabs.com>
To: fiskjm@ctrvax.Vanderbilt.Edu
Subject: Limiting colors with XV
xv -root -quit -max -rmode 5 -ncols 100 image.gif
lash@tellabs.com
VIM Programming PerksGVIM -- Going Graphical!
Yup, that's right! VIM has gone GUI :-)
This last point is wonderful. Anyone who's ever tried to backspace onto the
end of a previous line and gotten that miserable BEEP! will appreciate this.
What's particularly nice about the graphical version of vim is that it
provides several basic features of a GUI style editor while retaining the
speed and flexibility of vi.
The Big News: Syntax Highlighting!
This is truly a godsend and was one of the features that was definitely on the
'ol wish list! VIM now provides color syntax (lexical) highlighting for a
variety of languages including C, C++, HTML (which I'm using right now...),
Java, Ada95, FORTRAN, Perl, and TeX. But that's not all...!
" Enable automatic color syntax highlighting on startup
source /usr/local/share/vim/syntax/syntax.vim
Help is on the way!
One of the coolest and most useful things about VIM is the mind numbing amount
of documentation that comes with it. There's a small library of support
documents covering everything from a blow-by-blow description of each
feature and command to information about showing thanks by providing help for
a needy Uganda.
:help
and the window (under gvim) splits and loads up the top level help file. This
is your gateway to knowledge.
Ask "The Man!"
Another really useful thing to try is accessing manual pages from within vim.
Say you were writing a shell script and needed to quickly look up something in
the bash manual page or you were setting up a test condition and couldn't
remember the syntax for the "greater than" test, all you have to do
is:
:!man test
and presto!, information. It's instant gratification at its
best... :-)
WARNING! Terminal is not fully functional
got me on this one...
TAG, You're It!
This is another one of those things that makes life SO much easier. If you've
not used tags before then brother, it's time to start!
    HashTable HTbl;
    HTbl.Load("hash.dat");
    found = HTbl.Lookup(buf);
    .
    .
    .
and were interested in finding out how the Load method was implemented. To
jump to the point in the file where this is defined simply move the cursor so
that it sits on "Load":
    HTbl.Load("hash.dat");
         ^
and hit "Ctrl-]" (hold down the control key and hit the right square
bracket key -- "]"). Beauty of this is, that even if the definition
is not in the file you're currently working on, vim will load up the needed
file and position the cursor at the first line of the function definition.
ctags *.cc *.h
if you happen to be doing C++ programming, or:
ctags *.c *.h
if you're programming in C. That's all there is to it! Keep in mind that you
can use tags without having to position the cursor on top of some function or
variable. If you'd defined a macro isAlpha and wanted to jump to your
definition, then simply type in:
:ta isAlpha
and vim will take you to that point. How 'bout that for easy? There's a good
deal more info on using tags in the VIM online documentation. Browse and
enjoy!
Using the Real Windows...
Another very handy item that gvim (and vim) provides is multiple windows.
This makes cutting and pasting from one file to another (or from one section
of a file to another) quite easy. It also is nice if you're reading one file
and editing another (for example, reading an INSTALL file while making changes
to the Makefile).
:split ctags.README
This would create a second window and load up the ctags.README file. If you
want a second window with the current file displayed there, then simply use:
:split
and a second window will be created and the current file loaded into that
window. Under gvim, moving the cursor from one window to the other is as
simple as mouse clicking in the desired window. You can also use the
keystrokes
Ctrl-w j (hold down control and hit "w", then hit j)
Ctrl-w k (hold down control and hit "w", then hit k)
to move to the window below or the window above the current
window respectively. But, use the mouse... it's a lot easier :-)
SHHHHHhhhh.....! Let Me Tell You A Secret!
Here's a little something that ought to part of one of those blood oath,
"cross-my-heart-and-hope-to-die", secret society initiations into
the "Secret Lodge of Some Large North American Mammal Society"
    :w!
    :!ci -l %
    :e %
    :w!
    :!lpr %
what could be easier? :-)
lpr [filename]
transparently formats the file to Postscript and sends it to the printer.
I've been quite pleased with this. You should be able to find this and
similar programs at any of the sunsite FTP sites under the
/pub/Linux/system/print (printer?, printing?) subdirectory (sorry, I'm not
connected to the 'net at the moment and can't recall the exact
subdirectory name off the top of my head :-).
    :w!
    :!wc %
which will print out the file's line, word, and byte count.
command [-options] filename
can be used from within VIM doing something like:
:! command [-options] filename
:r a2ps.README
:r! ls /usr/local/lib/sound/*.au
:w!
:! ispell %
:e %
which basically commits the current buffer to file, starts a shell and runs
ispell on the file, and then reloads that file once the spell checking is
done. Thing is, this works at least reasonably well running vim in text mode;
under gvim, ispell gives an error message to the effect:
Screen too small:  need at least 10 lines
Can't deal with non-interactive use yet.

1 returned
Running Make!
The specifics of setting up a makefile are, in academic parlance,
"beyond the scope of this article...". (You can, however,
find a good deal of information about makefiles using info; or, more
appropriately, O'Reilly & Assoc. put out a very nice little book
on managing projects using make -- hit up you friendly neighborhood librarian
or find it at your favorite Linux bookstore!)
:make
As the build process proceeds, you'll see all sorts of nifty messages go
whizzing by. If make terminates on an error, gvim will very kindly load up
the errant file and position the cursor at the line that was implicated as
being the culprit. This is VERY handy. Also, if multiple errors are
encountered, you can move from one error to the next using:
:cn
which advances to the next error. For some reason, the console version of vim
hasn't worked quite a well as gvim. It doesn't always automatically go to the
first error encountered, although using the ":cn" command seems to
work fine.
And So Forth...
" Enable editing of gzipped files
"    read: set binary mode before reading the file
"          uncompress text in buffer after reading
"   write: compress file after writing
"  append: uncompress file, append, compress file
autocmd BufReadPre,FileReadPre      *.gz set bin
autocmd BufReadPost,FileReadPost    *.gz '[,']!gunzip
autocmd BufReadPost,FileReadPost    *.gz set nobin

autocmd BufWritePost,FileWritePost  *.gz !mv <afile> <afile>r
autocmd BufWritePost,FileWritePost  *.gz !gzip <afile>r

autocmd FileAppendPre           *.gz !gunzip <afile>
autocmd FileAppendPre           *.gz !mv <afile>r <afile>
autocmd FileAppendPost          *.gz !mv <afile> <afile>r
autocmd FileAppendPost          *.gz !gzip <afile>r
set ai                " turn auto indenting on
set bs=2              " allow backspacing over everything in insert mode
set noet              " don't expand tabs into spaces
set nowrap            " disable line wrapping
set ruler             " display row,col ruler
set showmatch         " show matching delimiter for parentheses, braces, etc
set ts=4              " set tab stop width to 4
set tw=78             " always limit the width of text to 78
set sw=4              " set the shift width to 4 spaces
set viminfo='20,\"50  " read/write a .viminfo file, don't store more
                      " than 50 lines of registers
:set noai
and off it goes. To turn it back on use ":set ai".
Ahhh! Time For The Pictures!
Congrats! If you've made it this far you might be interested in finally
having a look at all the good stuff that I've been mentioning here.
gvim Screen Shots
The "Other Guys..."
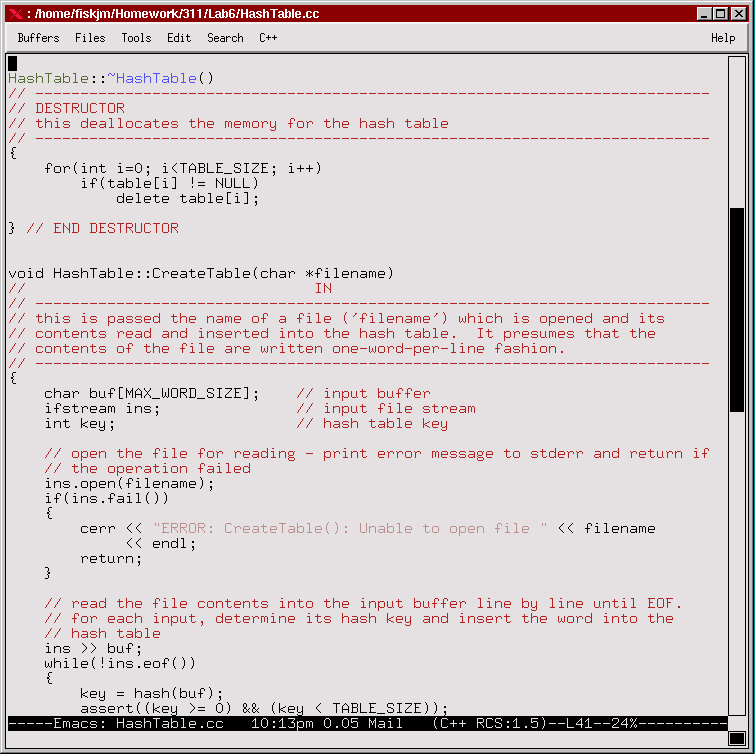
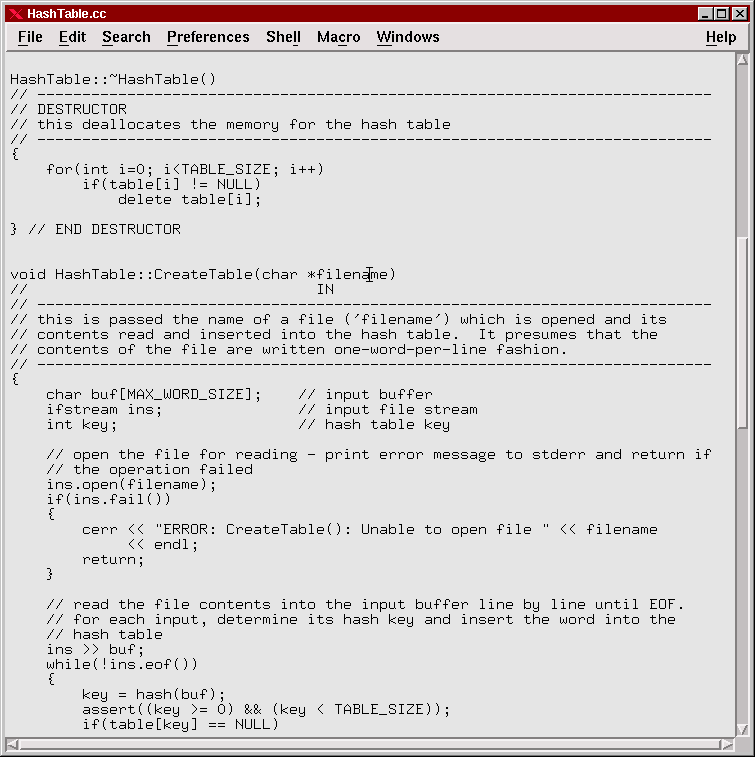
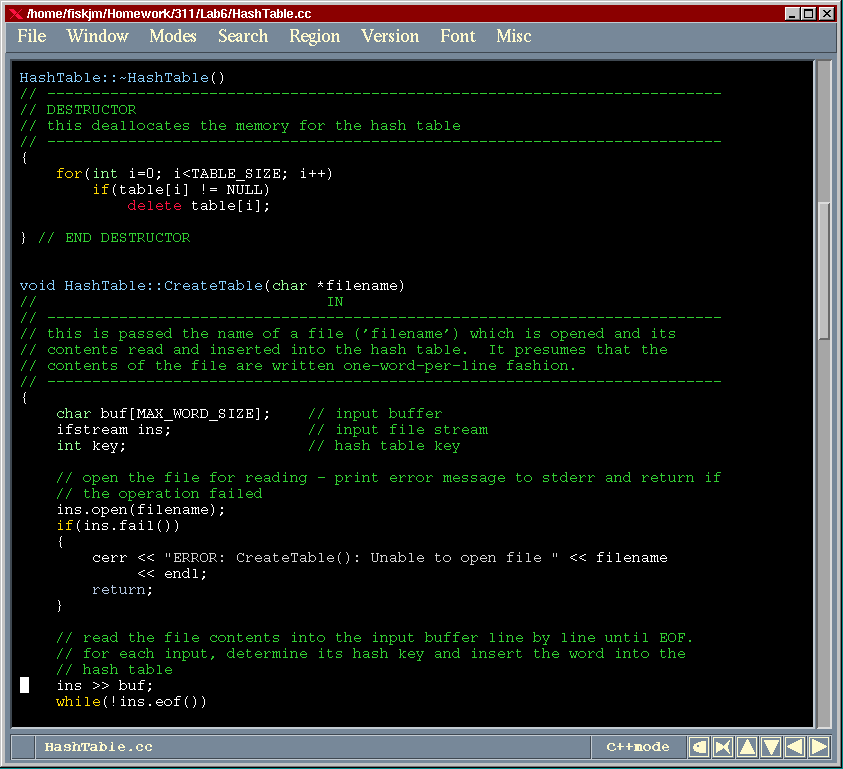
The xxgdb Debugger
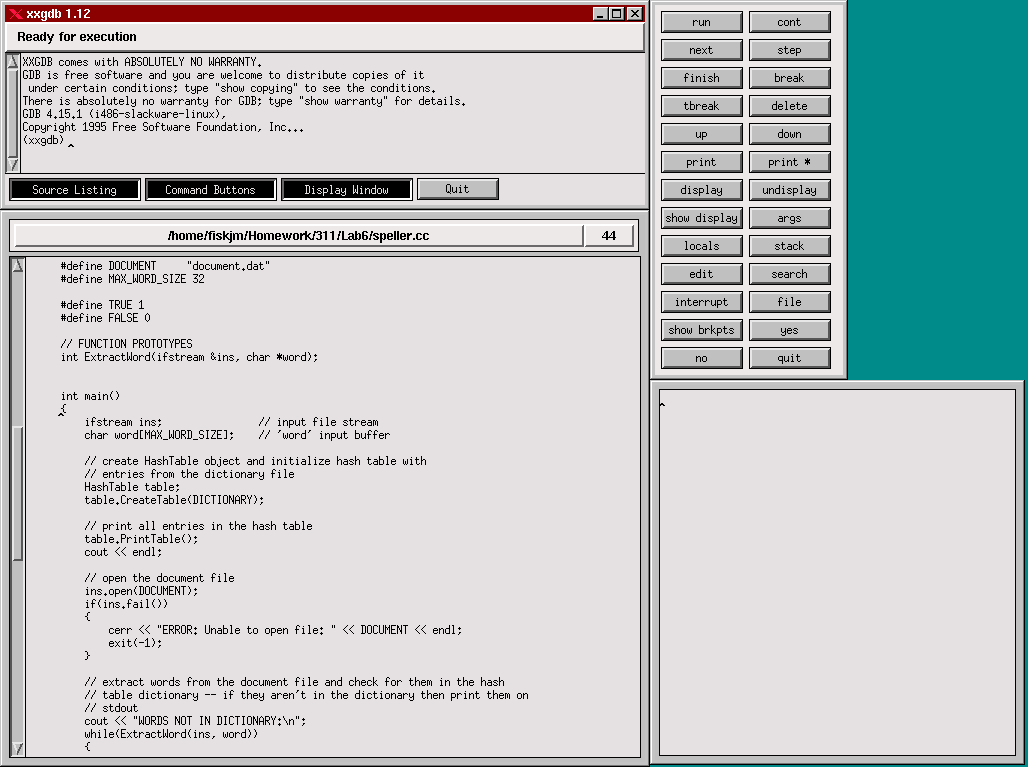
The DDD Debugger
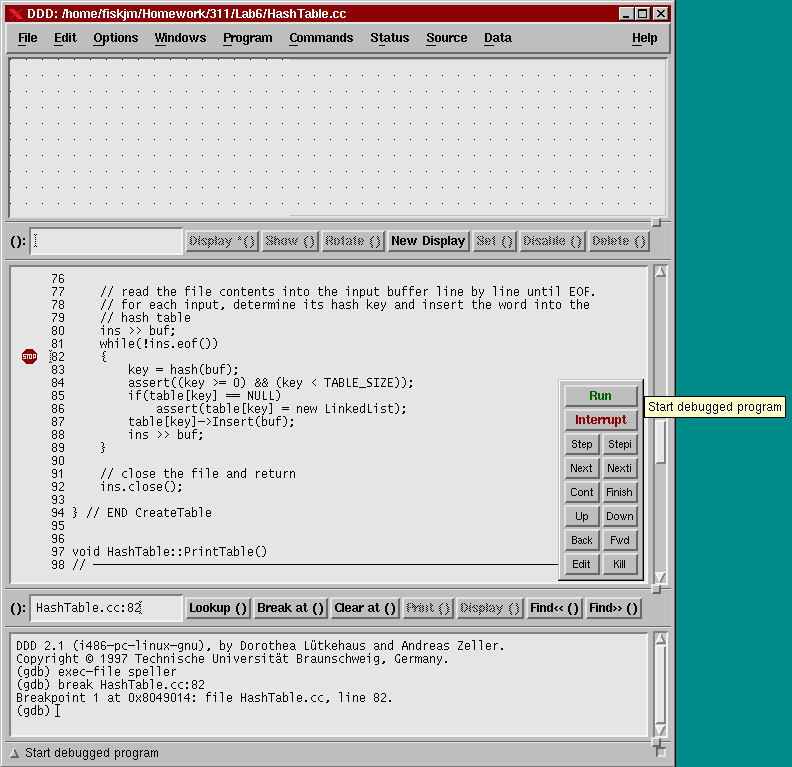
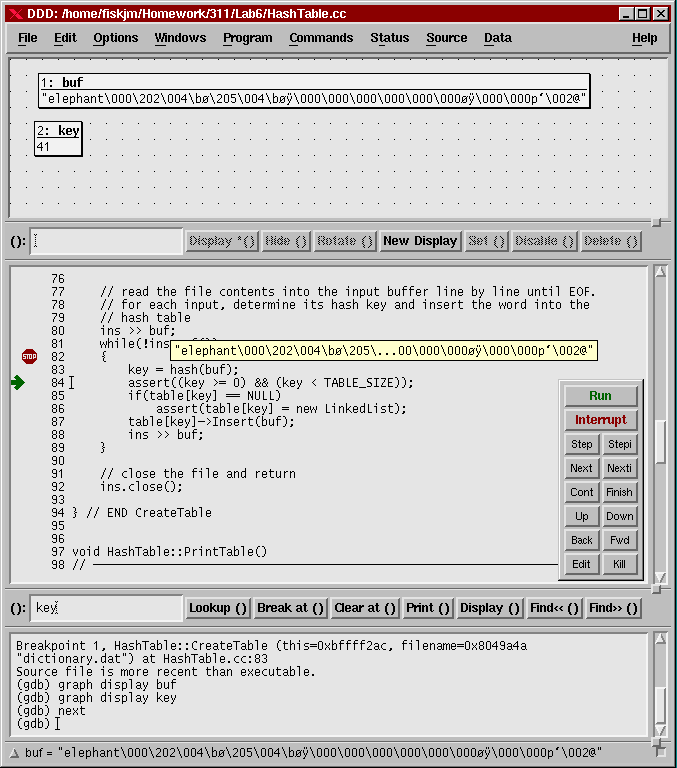
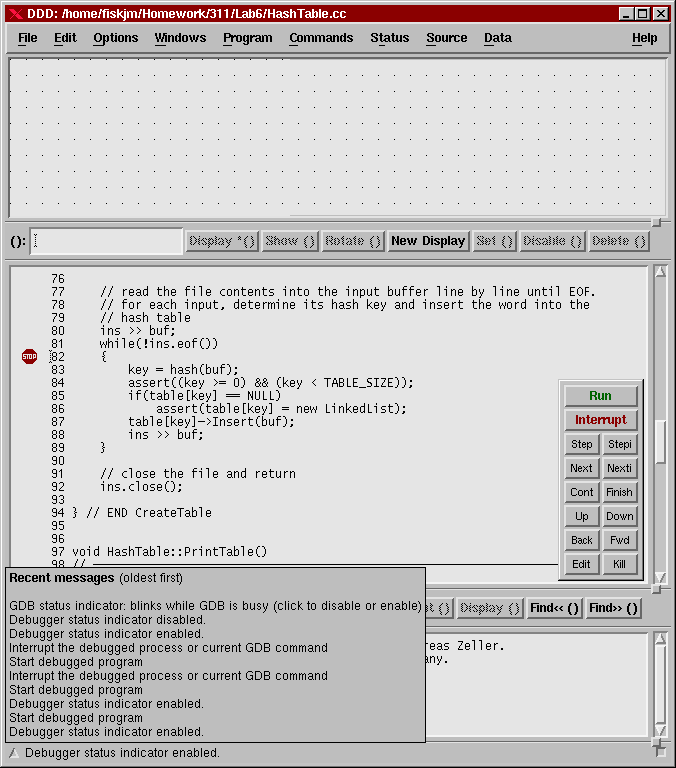
Xxgdb resource file
Sunsite Linux
Incoming Directory
VIM Home Page
XEmacs Home Page
ftp.x.org FTP site (XCoral)
sunsite.unc.edu
FTP site (NEdit)
Closing Up The Shop
#!/bin/sh
#
# fdformt.sh   formats 1.44 HD floppies in the fd0 drive
#
# Author:      John M. Fisk <ctrvax.vanderbilt.edu>
# Date:        6 May 1997

FORMAT_CMD="superformat -v 3 "
FLOPPY_DEV="dev/fd0"

while : ; do
    echo -n "Format floppy [y,n]? "
    read yesno
    if [ "yesno" = "y" -o "yesno" = "Y" ]; then
        echo -n "Insert floppy and hit any key to continue..."
        read junk
        ${FORMAT_CMD} ${FLOPPY_DEV}
    else
        break
    fi
done
Now, I'm sure that this could easily be improved upon, but the point was that
it took me all of about 3 minutes to write this, it's easily maintained, and
the logic is simple enough that it needs no documentation.
Nashville, TN
Friday, 9 May 1997
![]() If you'd like,
drop me a note at:
If you'd like,
drop me a note at:
Copyright © 1997, John M. Fisk
Published in Issue 18 of the Linux Gazette, June 1997

Copyright © 1997 Specialized Systems Consultants, Inc.
For information regarding copying and distribution of this material see the
Copying License.
Contents:
About This Month's Authors
Larry Ayers lives on a small farm
in northern Missouri, where he is currently engaged in building a
timber-frame house for his family. He operates a portable band-saw mill,
does general woodworking, plays the fiddle and searches for rare
prairie plants, as well as growing shiitake mushrooms. He is also
struggling with configuring a Usenet news server for his local ISP.
 Larry Ayers
Jim Dennis
is the proprietor of
Starshine Technical Services.
His professional experience includes work in the technical
support, quality assurance, and information services (MIS)
departments of software companies like
Quarterdeck,
Symantec/
Peter Norton Group, and
McAfee Associates -- as well as
positions (field service rep) with smaller VAR's.
He's been using Linux since version 0.99p10 and is an active
participant on an ever-changing list of mailing lists and
newsgroups. He's just started collaborating on the 2nd Edition
for a book on Unix systems administration.
Jim is an avid science fiction fan -- and was
married at the World Science Fiction Convention in Anaheim.
Jim Dennis
John Fisk is most noteworthy as the former editor of the Linux Gazette.
After three years as a General Surgery resident and
Research Fellow at the Vanderbilt University Medical Center,
John decided to ":hang up the stethoscope":, and pursue a
career in Medical Information Management. He's currently a full
time student at the Middle Tennessee State University and hopes
to complete a graduate degree in Computer Science before
entering a Medical Informatics Fellowship. In his dwindling
free time he and his wife Faith enjoy hiking and camping in
Tennessee's beautiful Great Smoky Mountains. He has been an avid Linux fan,
since his first Slackware 2.0.0 installation a year and a half
ago.
John M. Fisk
One of Guy Geens's many interests is using Linux. One of his dreams is to
be paid for being a Linux geek. Besides his normal work, he is the (rather
inactive) maintainer of his research group's web pages
http://www.elis.rug.ac.be/~ggeens.
Guy Geens
Ivan Griffin is a research postgraduate student in the ECE department at the
University of Limerick, Ireland. His interests include C++/Java, WWW, ATM, the
UL Computer Society (http://www.csn.ul.ie) and of course Linux
(http://www.trc.ul.ie/~griffini/linux.html).
Ivan Griffin
Michael J. Hammel,
is a transient software engineer with a background in
everything from data communications to GUI development to Interactive Cable
systems--all based in Unix. His interests outside of computers
include 5K/10K races, skiing, Thai food and gardening. He suggests if you
have any serious interest in finding out more about him, you visit his home
pages at http://www.csn.net/~mjhammel. You'll find out more
there than you really wanted to know.
Michael J. Hammel
Mike List is a father of four teenagers, musician, printer (not
laserjet), and recently reformed technophobe, who has been into computers
since April,1996, and Linux since July.
Mike List
Dave Phillips is a blues guitarist & singer, a computer musician
working especially with Linux sound & MIDI applications, an avid
t'ai-chi player, and a pretty decent amateur Latinist. He lives and
performs in Findlay OH USA.
Dave Phillips
Henry graduated from St. Olaf College, MN where he first used BSD UNIX
on a PDP-11 and VAX. He first started to use Linux in the
Fall of 1994. He has been working for InfoMagic since June of 1995
as the lead Linux technical person. He is now an avid Red Hat user.
Henry Pierce
Michael lives the Linux life. After downloading and patching together his
first system in '93, he fast became a Linux junkie. Long a proponent of the
GNU philosophy (publishing books and music albums under the GPL), he sees in
Linux a Vision. Enough so that he spends his time developing a custom
distribution (based on Debian) and related documentation for writers and
other "creative" types and have formed a consulting firm based on
GNU/Linux.
His company, Design Science Labs,
does Linux consulting for small-scale business and art ventures.
He has written for Rolling Stone, 2600: The Hacker
Quarterly and Alternative Press. He's a staff writer for US Rocker,
where he writes about underground rock bands.
Michael Stutz
Josh Turiel is the IS Manager of a small advertising agency South of
Boston. He also runs the Grater Boston Network Users Group
(http://www.bnug.org/). He also writes and does consulting work, as well.
Since he has no life whatsoever as a result, his rare home time is spent
sucking up to his wife and maintaining his cats.
Josh Turial
Not Linux
 My assistant, Amy Kukuk, did
ALL the work this month other than this page. If this keeps up,
I may have to make her the Editor. Thanks
very much for all the good work, Amy.
My assistant, Amy Kukuk, did
ALL the work this month other than this page. If this keeps up,
I may have to make her the Editor. Thanks
very much for all the good work, Amy.
Stop the Presses
Editor, Linux Gazette gazette@ssc.com
This page written and maintained by the Editor of Linux Gazette,
gazette@ssc.com
 A.L.S.


 The Mailbag!
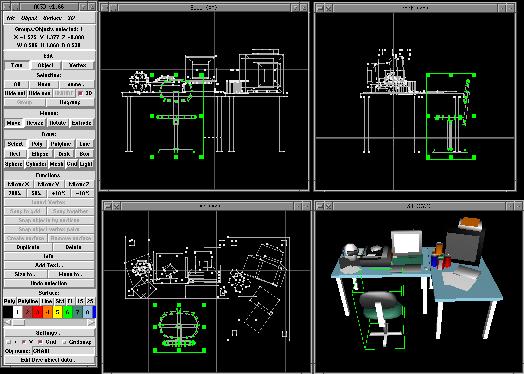
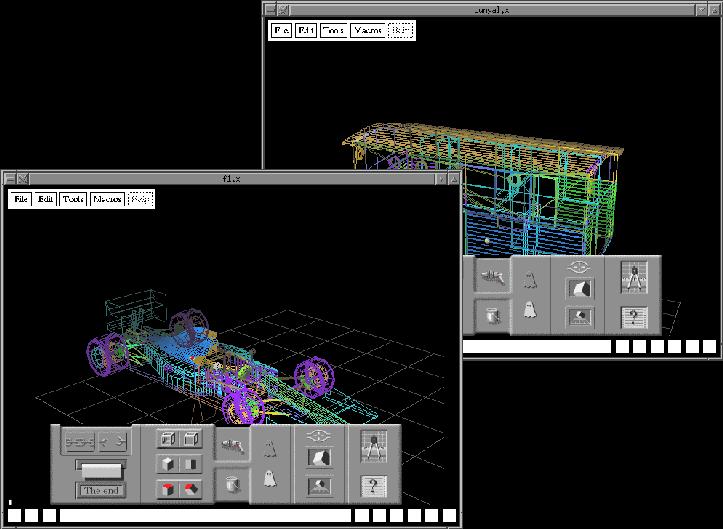
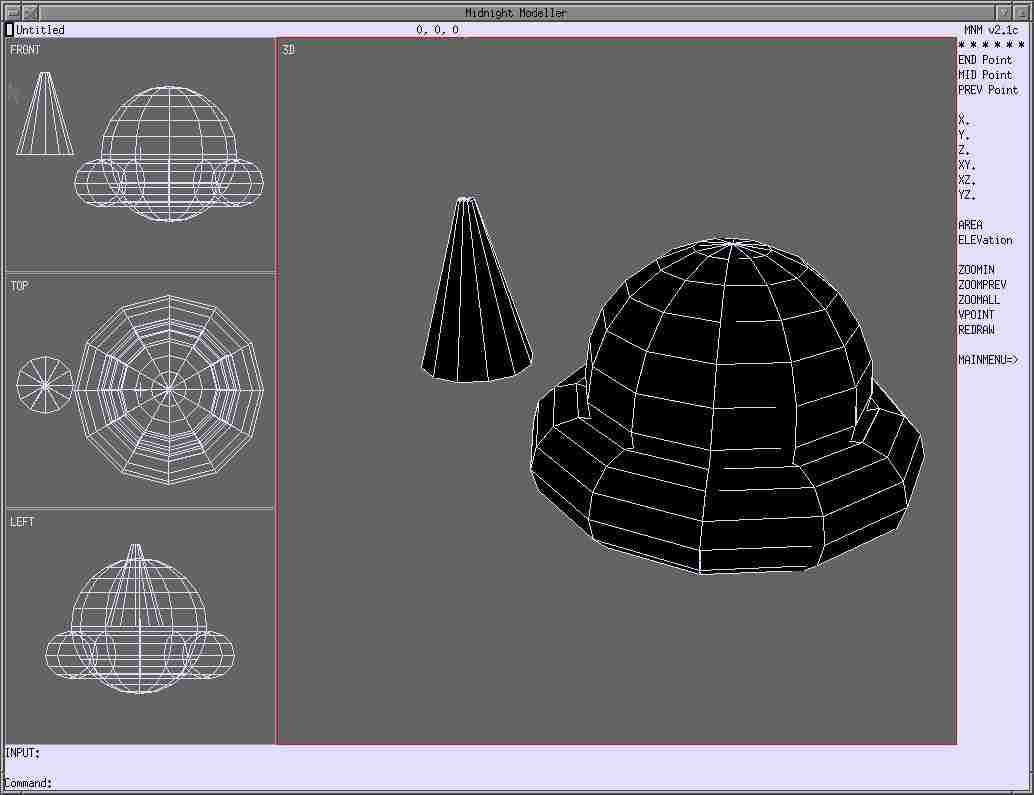
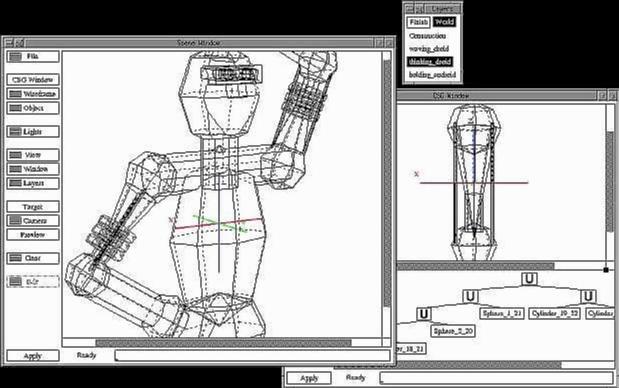